How To Sound Deaden A Camper Van
If you’re thinking about living the van life, then you’ll need to know how to sound deaden a camper van. Anyone that has spent time travelling in a van, especially a modified camper or in DIY camper conversions will know that it can get pretty noisy when on the road. Living in a van should not have to come at the cost of your hearing, good music, or even better, conversation when putting in those long miles on an off grid adventure.
Sound deadening your van is one of the van life essentials that nobody talks about. By sound deadening your tiny home, your time spent driving will be much more enjoyable and shouting directions at each other can finally be a thing of the past. If you have never travelled in a self-built campervan for an extended period then you might be wondering what all of the fuss is about, but we can assure you that it is one of the easiest things to do in order to increase your road trip enjoyment.
Itching to try out Full Time Van Life? Want to reveal to the world that you’re a weekend warrior? Head over to our brand new Facebook Group! It’s a place to pick up vanlife tips, share ideas, and meet other van life enthusiasts from around the globe!
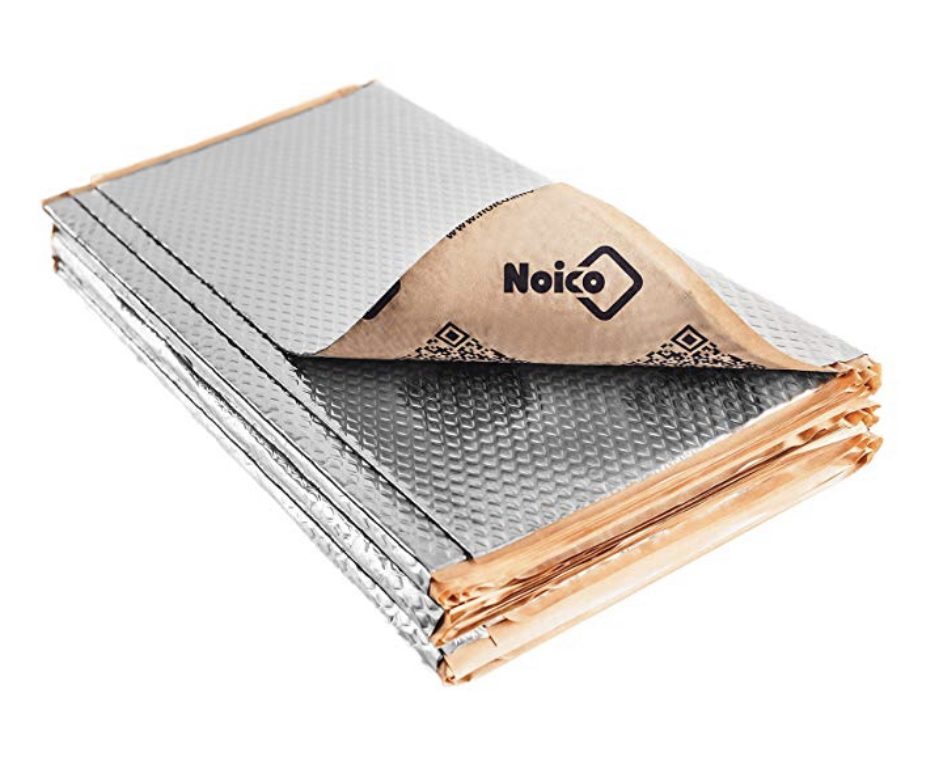
Sound deadening a camper van may feel like a daunting and expensive task if you haven’t done it before, but it doesn’t have to be! If you’re wondering how to build campervan with sound-deadening materials and how to complete your conversion on a budget to create an affordable camper, then this article is for you. We’re going to walk you through how to install sound-deadening materials yourself, keeping van life costs low when building your camper. Today we’re going to look at two sound deadening products by Noico that will make your off grid home much quieter and more comfortable to drive.
How Does It Work?
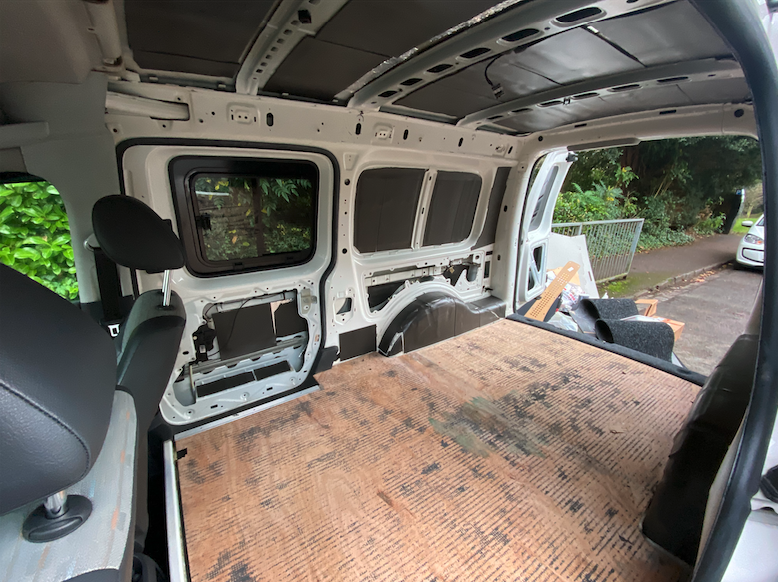
Noico produces a sound deadening mat that is made of butyl, a thick material that absorbs sound waves, ensuring they won’t bounce around and vibrate in your vehicle. Butyl has high viscoelasticity, meaning that once stretched it takes a long time to return to its original shape. This fundamental property means that a sound wave is unable to travel through the material, so it absorbs sound. (There will be a test at the end, readers).
Noico’s sound deadening polyethene foam liner works similarly, absorbing sound waves to create a quieter journey. This liner is also good at insulating against the cold and heat, ensuring the interior of your van stays at the perfect temperature and meaning you won’t need to rely on the air conditioning or heating so much. Paired together, the butyl mat and foam liner are the perfect team to sound deaden a camper van.
Where Should I Install Sound Deadener?
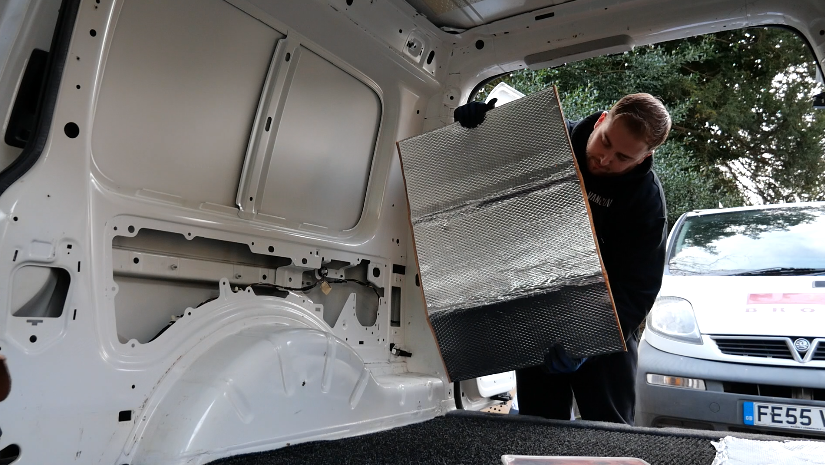
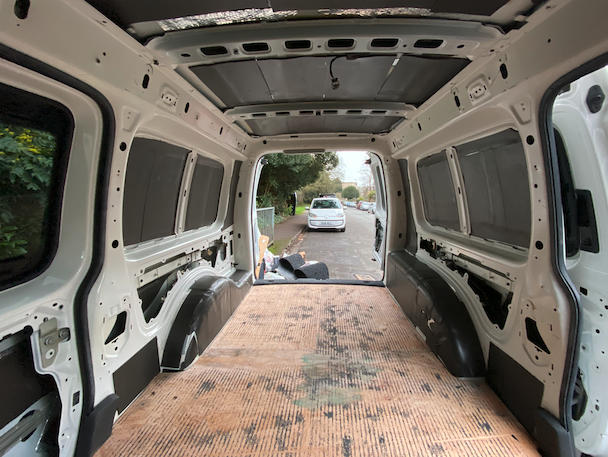
The first step to sound deadening a camper van is to decide where you want to place the sound deadener. If the living area of your campervan is partitioned from the cab by a bulkhead wall, then you could get away with just installing sound deadener in the cab area of the van.
Insulating your cab area will minimise sound when driving your adventure bus and save your ears from feeling like they’ve been hit by a bulldozer. However, if you live in a more compact camper van that doesn’t have a bulkhead wall, or if you are sensitive to noise and want to insulate your entire van, then you can always sound deaden the whole camper.
By sound deadening the living area in your camper van as well as the cab, you will make your camper even quieter when out on the road. This is especially true if you do not have a bulkhead wall as noise can reverberate from the cab around the entire van. Sound deadening is the first step in a camper conversion, so it would have to be completed before any other insulation is inserted. It does create some thermal insulation, but extra will be needed to keep your van super warm (check out our article on how to insulate a camper for more info!).
If you are a light sleeper, then sound deadening the living area is a good idea as it will help to keep outside noise at bay, allowing for a better rest. This is especially a good idea if you have little vanlifers on board too!
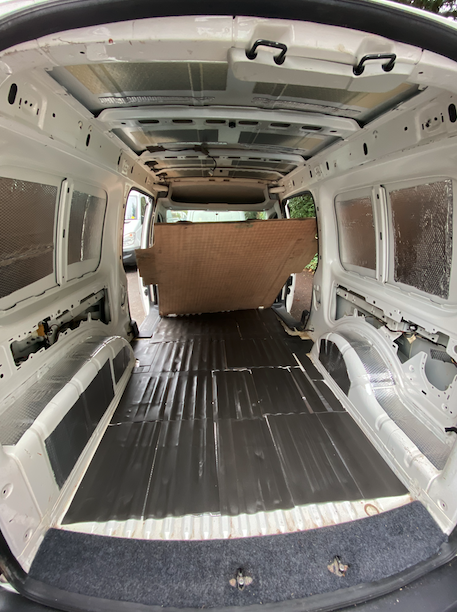
Sound deadener can be applied to the interior floor, ceiling, wheel wells, and internal walls of your van, as well as under the hood of the bonnet. If you need more info on where to install your sound deadener and how to correctly measure the amount needed, then head to the Noico website.
What Will I Need?
Installing the sound deadener is a relatively straight forward process and doesn’t require too much equipment. All you will need is:
- Noico sound deadener
- Stanley Knife or scissors
- A pen for marking
- Measuring tape
- Gloves
- A roller for rolling down the sound deadener
- Degreaser (white spirit) and dry cloth
Note: Noico sound deadener needs to be applied in temperatures of 12°c or higher. If you are working in cold temperatures, then you will need a heat gun or hair dryer to ensure the adhesive is sticky.
Installing Sound Deadener
Once you have decided where you are going to apply your sound deadener and have gathered all of your tools together, then you need to measure the area. To do this properly, you may need to remove all of your seats, flooring, and trims. Ensure you refer you your vehicle’s manual to do this correctly and be careful not to break any of the clips so that everything can fit back together easily (and please don’t try to sue us if you do it wrong).
After all parts have been removed, you will need to thoroughly clean and dry the surface using a degreaser such as white spirit, and a dry rag. If you are working with an old van, then any rust will need to be treated before fitting the sound deadener. You can only begin to sound deaden a camper van once the surface is clean and dry, so don’t try and jump the gun and rush everything. That pint at the pub can wait.
To minimise waste of the product, you can create a paper template (try using old newspapers) of each area that you wish to sound deaden. Then you can draw around your template, transferring the exact shape needed to your sound deadening material.
After you have transferred your template to the sound deadener then you can cut it out; do this using either a Stanley knife or scissors. Make sure you are wearing gloves as the foil can have sharp edges.
Before you remove the backing of the adhesive, test the piece you have cut in the area you will be placing it to make sure it is the correct size.
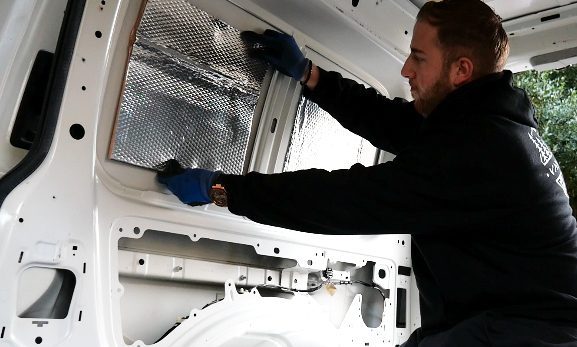
When happy with the piece, slowly remove the adhesive backing and secure to the area of the van you are treating. Do not remove the adhesive backing paper quickly as this can result in poor adhesion; it must be done gradually.
Smooth the sound deadener by hand to remove any air bubbles that might be trapped and to make sure it is firmly stuck to the surface of the van. Once you are happy that the sound deadener is secure, then use a roller to flatten the material completely. When this is complete, the pattern on the foil will disappear completely, leaving a smooth surface.
Once you have covered the surface with the sound deadening mat, you can repeat the process with the polyethene foam liner to create maximum sound insulation. You may wish to focus on particularly noisy areas such as the gearbox and wheel wells.
When you have finished applying sound deadener to your camper van, you will need to fix all of the seats and trimmings back into your vehicle, ensuring they fit correctly and safely. All that’s left for you to do then is to sit back and enjoy the silence.
Cost-Effective
Noico sound deadener is a cost-effective way to sound deaden a camper van and, although it isn’t an essential part of a camper van conversion, it is one that will make you journey so much more comfortable and enjoyable. Noico currently costs just £49.99 (from Amazon) for 36sqft of sound deadening matting, with most vans needing 2-3 packets depending on the size of your cab. The comfort and luxury feel of a sound deadened drive is well worth £150 (or less!) and, if done correctly, this process will only need to be completed once. Noico is one of the leading products on the market, beating its competitors on price and quality. The matting is 2mm thick, so is a lightweight solution to sound insulation without compromising on quality.
If you plan on travelling on a long term basis and will be driving almost every day, then it is essential to enjoy the drive just as much as you enjoy all other parts of the vanlife adventure. Noico products allow you to listen to music and chat with ease over the sound of your vehicle’s engine and movements, creating a relaxed driving environment.
Final Thoughts…
By installing Noico in your campervan, you are ensuring a better drive and are saving your eardrums from the noises of the road. If done slowly, carefully and with the proper preparations, then installing sound insulation can be a breeze even for the beginner DIY-er. For such a small amount of money it is well worth taking the time to sound deaden a campervan; you’ll thank us in the long run.
Have you applied sound deadener to your campervan? Let us know what you thought of the process by joining the Van Clan on Facebook, Instagram and Twitter.
More Content From The Van Clan Team!
- Check out the best campervan toilets for your new conversion
- Which are the best camper van batteries? We’ve done the research
- These van life gifts are the perfect presents for vandwellers



COMMENTS
Please note that all comments will be checked by our team before being approved.