How To Build A Camper – The Ultimate DIY Conversion Guide
If you’re asking yourself how to build a camper, then you most likely either have a van, or you’re thinking of buying one. And we here at Van Clan could not be more excited for you, this is a big part of your life! It’s up there with having a child… okay maybe not but it certainly feels like it once you’re done with it! We can’t wait to help you build your dream home on wheels. So we’ve put together this ultimate how to build a camper conversion guide for you, so you can save yourself stress and time!
In this guide, we’re going to take you through all of the steps on how to build a camper. From searching the web, test driving certain vans all the way up to a full conversion guide and things to do once you’ve “finished”. Everything you need is here. Share this on with your van life pals or if you’ve got any questions we’re very active on Twitter and are more than happy to help you with any questions you may have.
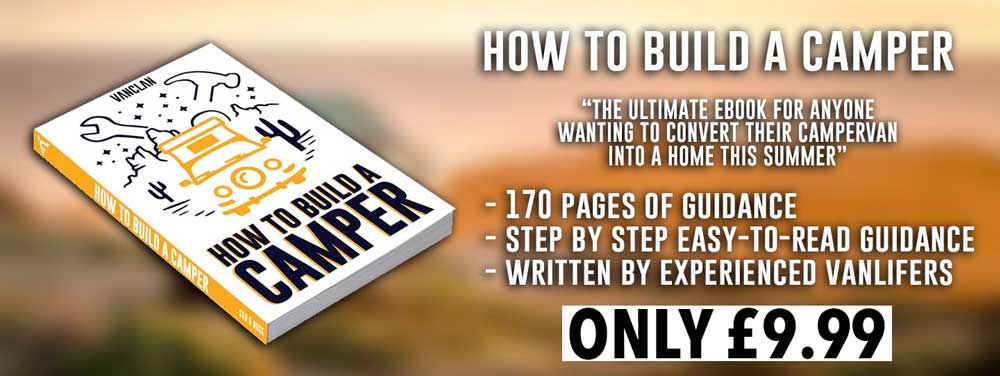
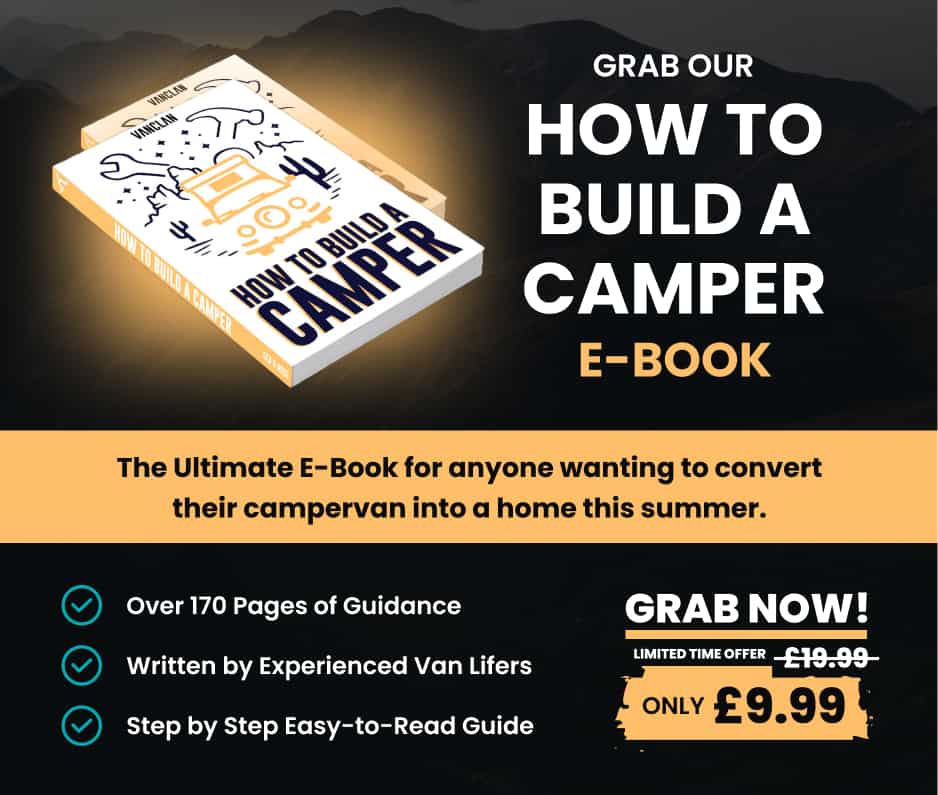
If you want a full in-depth e-book with tonnes of images and extremely detailed ‘how to’s’ then we have one available here, this is a 170 page e-book about how to build a camper, created by us, the Van Clan team, this is something you can have up on your laptop or phone, and flick back to whenever you need a hand with the nitty-gritty bits, plus it only costs £9.99! This goes into a lot more detail than this article FYI!
Below is a list of the sections we’ll be covering, feel free to use this to bookmark, and organise what you want to read:
1. Is Van life for you?
There are many things you need to consider when taking to the road. Firstly, you most likely fit into one of two categories, either you’re taking on van life full time, or you’re going to be what we like to call a ‘weekend warrior’, someone who likes to travel in a van on their days off and not across the world.
For both categories there are some overlapping topics we need to cover, the main one being are you ready? As much as we like to think it’s a ‘get-up and go’ scenario when travelling, it’s really not, you need to be prepared for expenses, planning destinations and preparing for some bad experiences that you never see on Instagram, because they’ll happen, trust us!
Living in a van even for a few days can be limiting, and at times stressful, but this will all be worth it when you’re parked up near a beach, stargazing under the mountains, or going for a weekend picnic with the love of your life. Van life is without a doubt an ever growing way of travel because it’s affordable, rewarding and it’s a sense of accomplishment when you finally build your tiny home on wheels.
Next, you’ll have to think about where you are going? Is your campervan conversion going to be built primarily for weekend use, or will you need a fully fledged shower and a toilet when you plan to go through Europe?
For weekend warriors we’ll be honest you don’t need much, your basics will do, and sometimes having less makes the weekend away much more escaping. But for full-time van lifers, this is your home, you’re going to need more bits n’ bobs to keep you sane. Electricity, a toilet, a possible desk to work at and a lot more storage.
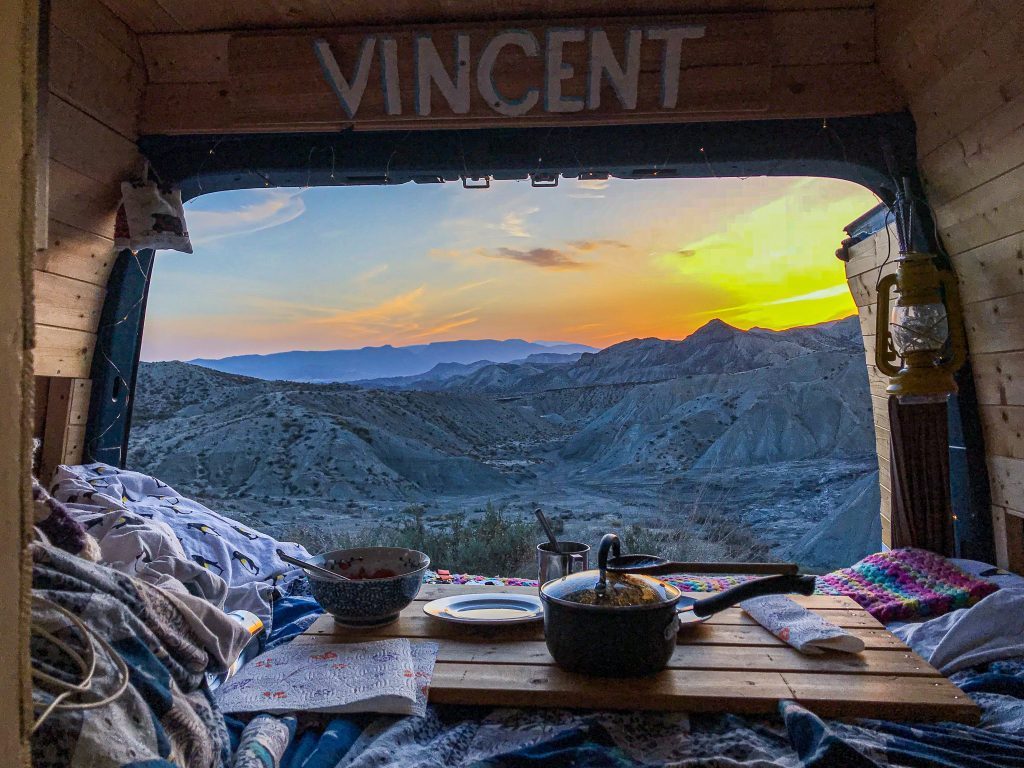
And finally, in this category, how are you going to earn money on the road? This will affect how to build a camper, will you need a desk, will you need storage for your equipment, or do you need to look at some small travel trailers? For full-time vandwellers taking to the road is always appealing, because you don’t have to pay a tonne of bills, you dodge council tax and you can go full digital nomad and take your work anywhere you please, meaning you save some big bucks, just look our pals at vincentvanlife have done recently.
Take all of this into consideration before you build your camper as you might need to pick up some van life essentials before you do! Oh, and if you plan on taking on the van life with a dog, then you’ll need a bit more space and storage, we advise reading the linked article above for more dog tips.
2. How Do I Get Insurance When Living On The Road?
Now, I know what you’re thinking… this is too early in the build to be worrying about insurance! Yes, and no. Insurance is your lifeline, and something you should be thinking about before you even step foot in your camper.
Van life insurance is a thing, and we’ve found some pretty great deals, but our favourite has to be Safety Wing. They are an insurance company built specifically for digital nomads and van lifers who are continuously on the move. This DOES NOT insure your van, this is primarily insuring you for any health or accidental coverage, but it means you can be in any country (apart from Cuba, Afghan and North Korea) and know that you’ll be sorted out.
I don’t want to go into too much detail here because we all know how boring insurance is, but for $37 a month they’ll cover you in any country, meaning you can travel around the world in your van knowing when you run into problems Safety Wing will sort out any financial problems up to quarter of a million dollars.
You can also cancel this anytime you want, they will never charge you for the whole year, allowing you to travel for 3 months if you want to know and not pay out a full year. Click here to learn more.
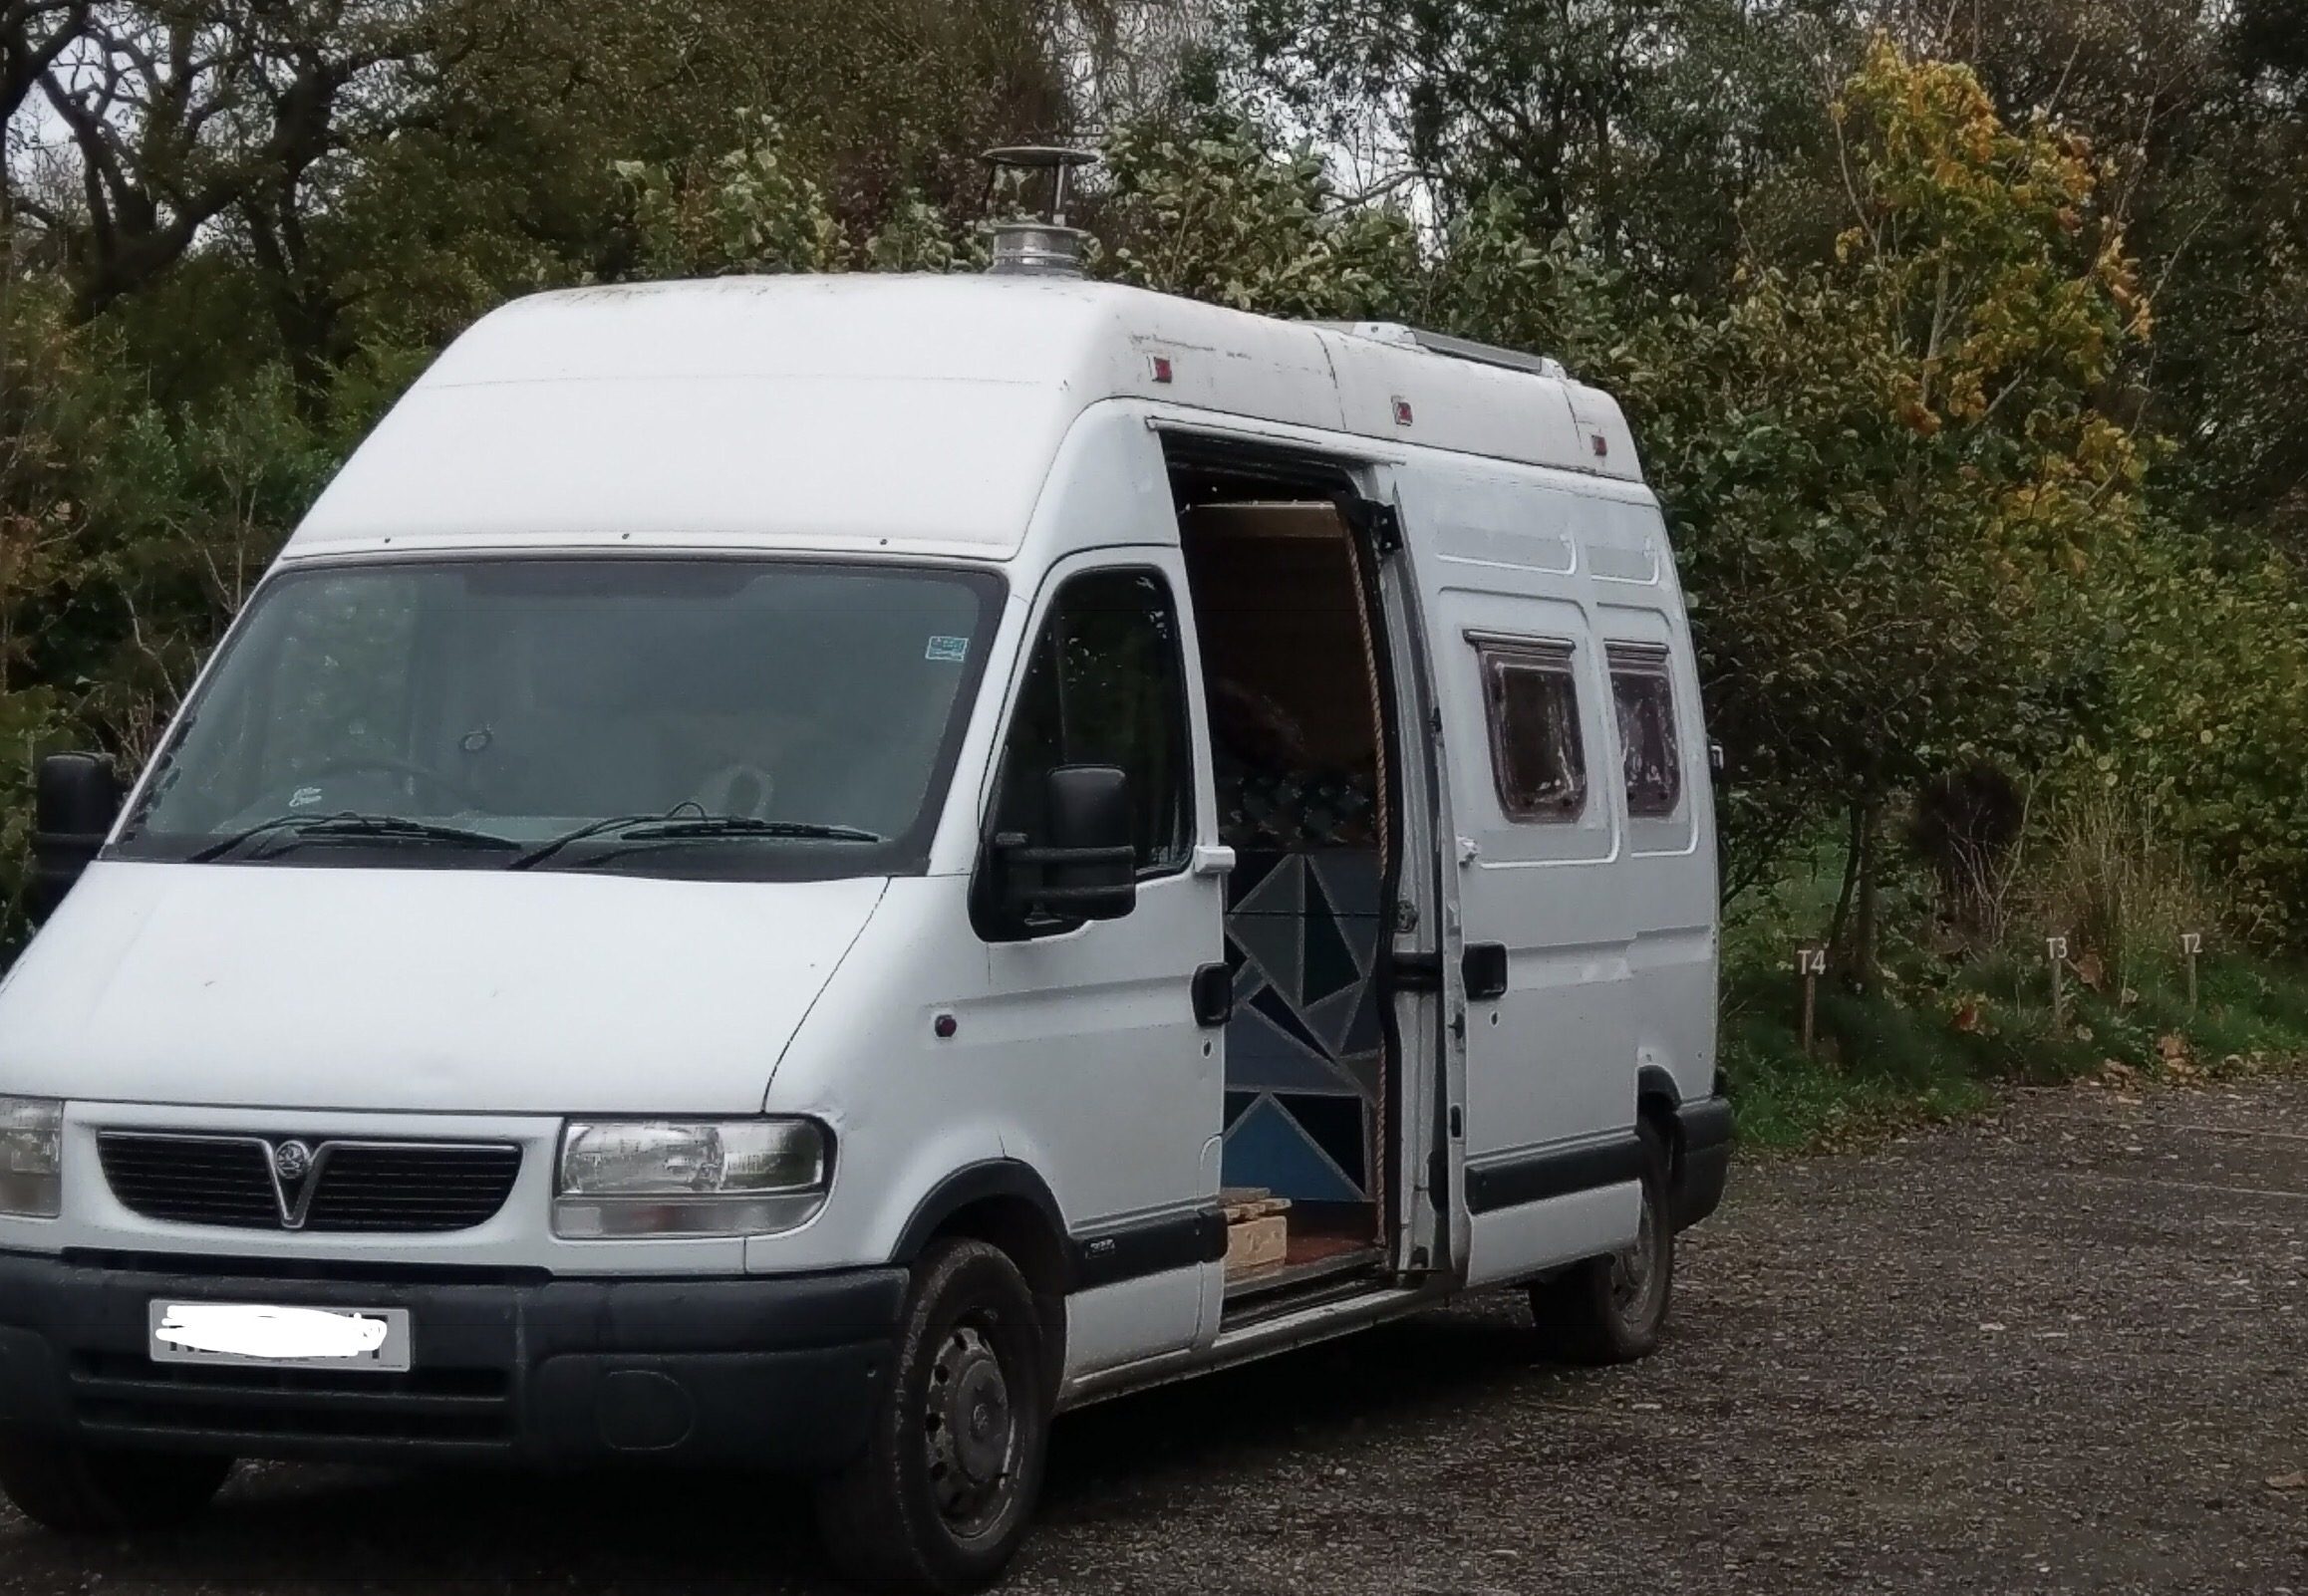
3. Picking The Right Van

This is by far the most important part of the whole how to build a camper process. Picking the correct camper is a hard, and time-consuming process, but when you know you’ve found the right one, you just know.
There are hundreds of different camper vans out there, do you want a Volkswagen Westfalia camper? A panel van? A pop up truck camper? A monstrous mercedes camper? The choice is yours, but pick wisely!
One of the best ways to get a feel for a camper is by actually getting inside of it. I know, this may be tricky for some of you because you don’t know anyone with that exact campervan that you’ve been keeping an eye on, but there’s a wide number of services, events and rentals that allow you to test out your dream camper before actually buying and converting it.
A great way to test a camper is not by test driving it, but by actually renting it out for a weekend. That’s right, just rent a rv! This will help you get a feel for the size, to see if you can manoeuvre it properly and you can get a taste of what it’s actually like when it’s converted and fully functioning.
We advise visiting Outdoorsy, this is a rental service for campervans, but campervans owned by other adventurers! Think Air BnB but for already converted, ready to go campervans. This is a service for camper owners to rent out their campervans for weekends or weekdays if they want to earn a bit of extra cash when their vehicle isn’t in use. This makes it great for adventurers like us wanting to test out a camper or for those of us that can’t afford to buy one out fully yet.
We advise checking out to see if your dream camper is available, you can search for Volkswagens, Mercedes Sprinters, Ford Transits and a lot more. If you’re lucky you’ll find one close to you, and all you have to do is book it out for a couple of days and go on a much-needed adventure! This is, without doubt, the best way to test a vehicle before you learn how to build a camper. And if you like it, and are set on buying that type you can use your rental to start taking measurements for your how to build a camper project!
Once you’ve made your decision then comes the big task of finding one to actually buy. Search on eBay, Facebook, Craig’s List and local buy and sell pages. If you’re looking for panel vans then email delivery companies in your area, they might be trying to get rid of a few for newer models so you could strike a good deal if you were to take it off their hands soon! When you go to view the vehicle make sure to look it over, take it out for a spin and ask any questions you have.
Remember there are people out there that will try and hide bits from you, we recently had a bad seller and our engine blew just 20 minutes after buying a new van. We stupidly paid direct into this bank account and not through eBay so unfortunately for us we couldn’t claim anything back. If you do buy through a website such as eBay, please use the sites payment process, it’s safer
4. What Equipment Will I Need?

When thinking about how to build a camper one of the first things to consider is the equipment you will need in order to complete your campervan conversion.
The equipment that can be used to build a camper-van varies from person to person and will depend on your budget and how much space you have to work in.
Theoretically, it is possible to build a camper using minimal tools such as a hand saw, drill and screwdriver if you’re working on a shoestring budget. However, this is going to make your build process much slower and more work. Space is the second consideration when thinking about the tools you want to use for your conversion.
If you’re converting a van on your driveway then you’re going to want handheld, portable tools. Alternatively if you have a large workshop or garage area you have more space to work with and can therefore invest in larger equipment to make your build easier. So what will you actually need…
Jigsaw

How fancy your saw is going to be depends mainly on your budget. At the lowest end of the scale is a handsaw. This is a good option for a basic, minimal conversion but your progress is going to be considerably slower with a hand saw than an electronic saw and working with just a hand saw could get frustrating on such a large project.
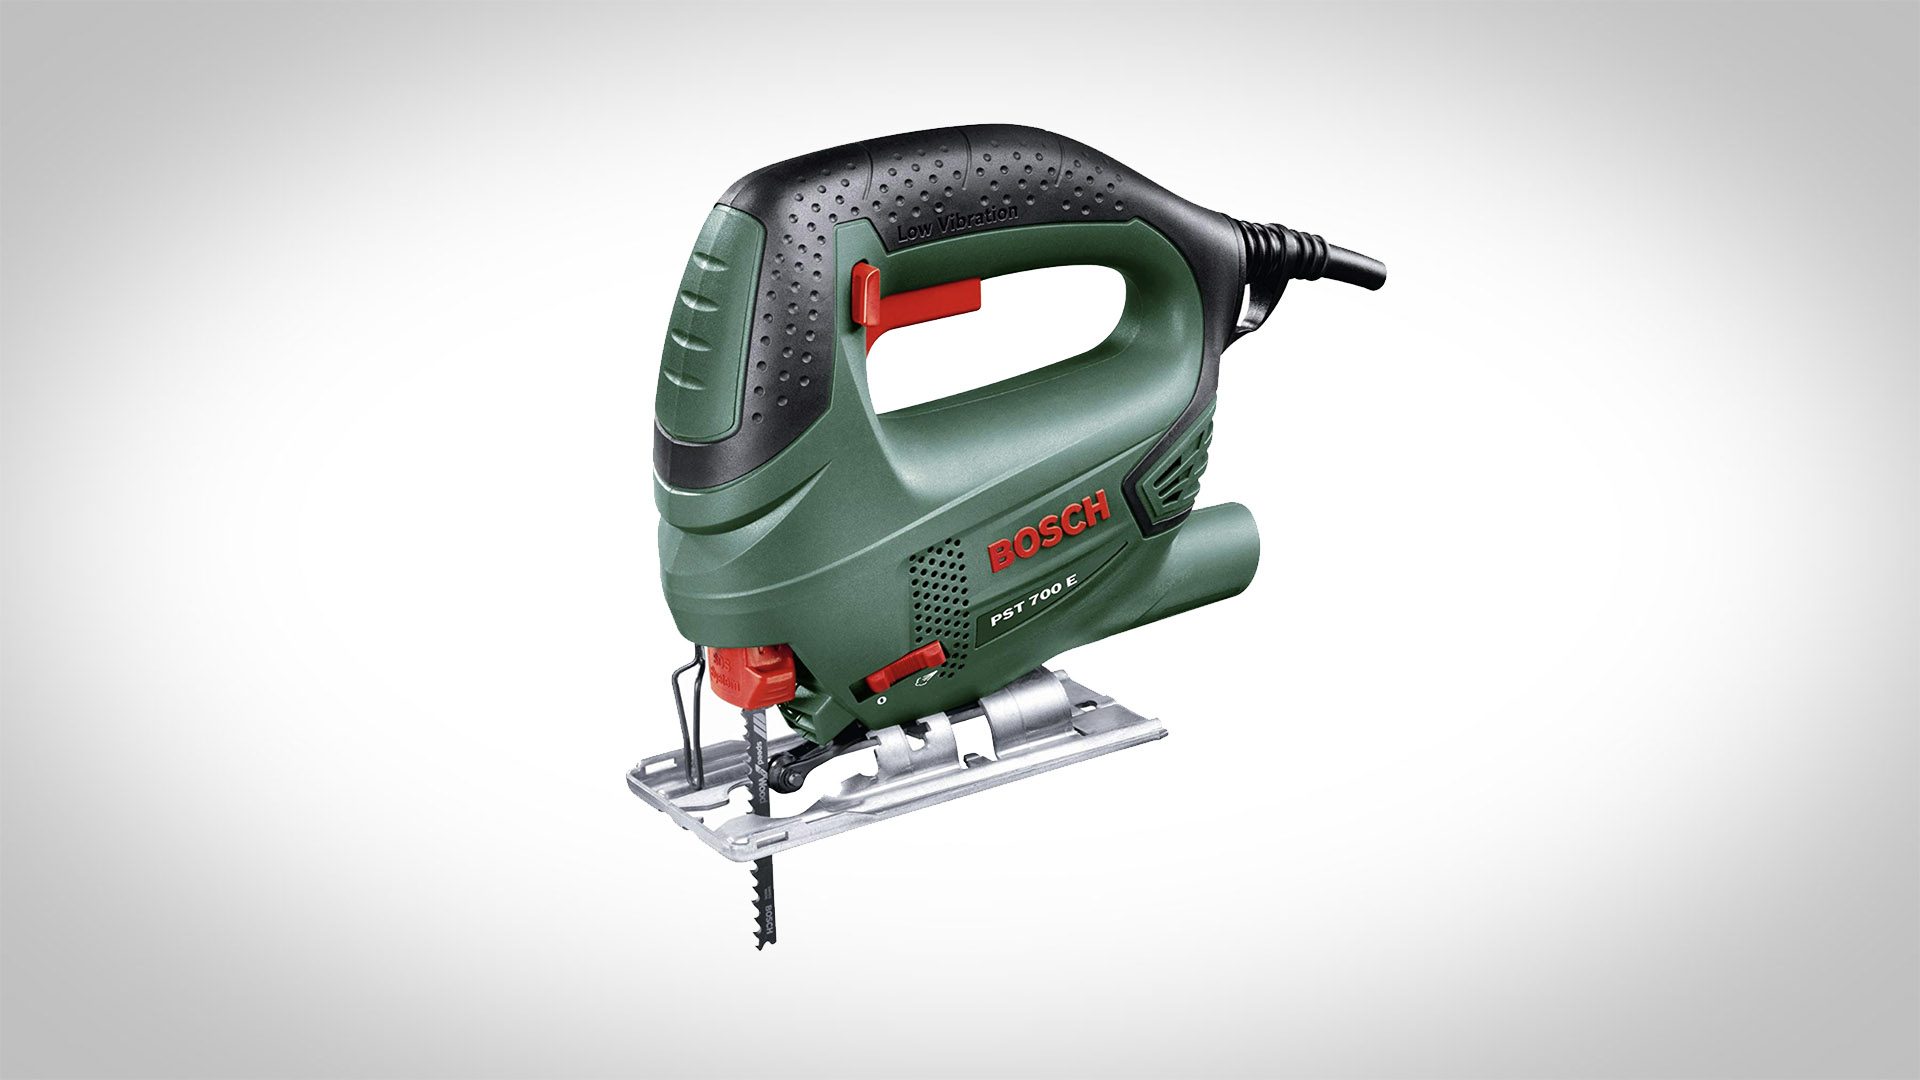
The next step up on the budget ladder would be a handheld jigsaw. This is such a great option; they don’t cost very much, are reliable, the blade can be changed depending on your material (thick/thin wood, metal plastic etc.) and they made the job 10x faster than with a handsaw. Jigsaws are also great for any detailed work and curves that you will undoubtedly come across during your camper conversion.
A more pricey option is a mitre saw. This is a table top piece of equipment so space for a sturdy workbench is also required. A mitre saw allows you to get a precise cut at any angle and makes cutting multiple pieces much quicker. If you were thinking of getting a mitre saw it’s also a good idea to have a jigsaw as mitre saws only allow you to cut in a straight line. We advise the Bosch Compact Jigsaw.
Drill
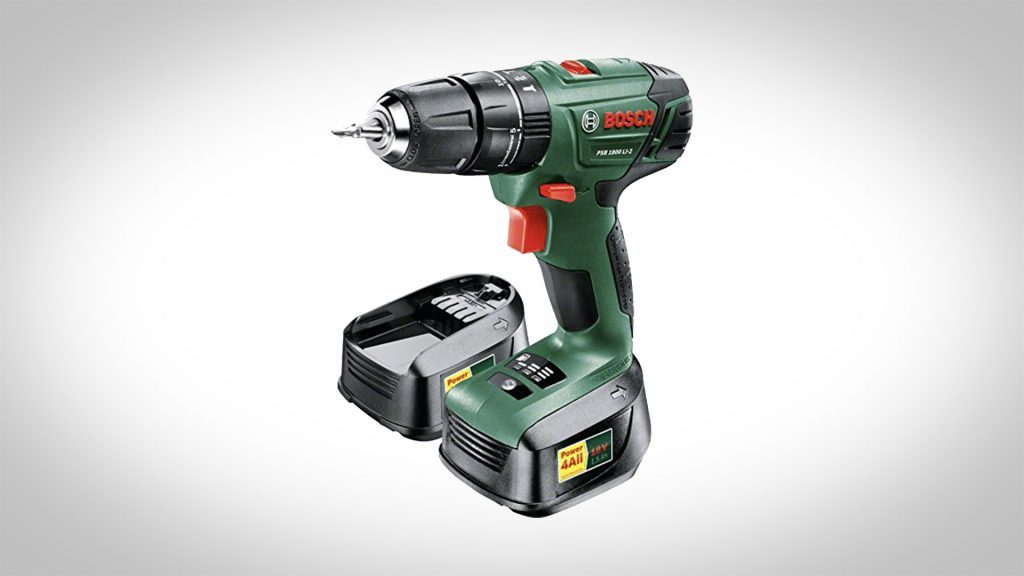
When thinking how to build a camper and what equipment you will need a drill is one of the most important items.
A good drill, drill head set and a couple of batteries is essential to any van conversion. Your drill can also be used as a screwdriver which is makes building much quicker and easier. We advise Bosch 1800 Drill.
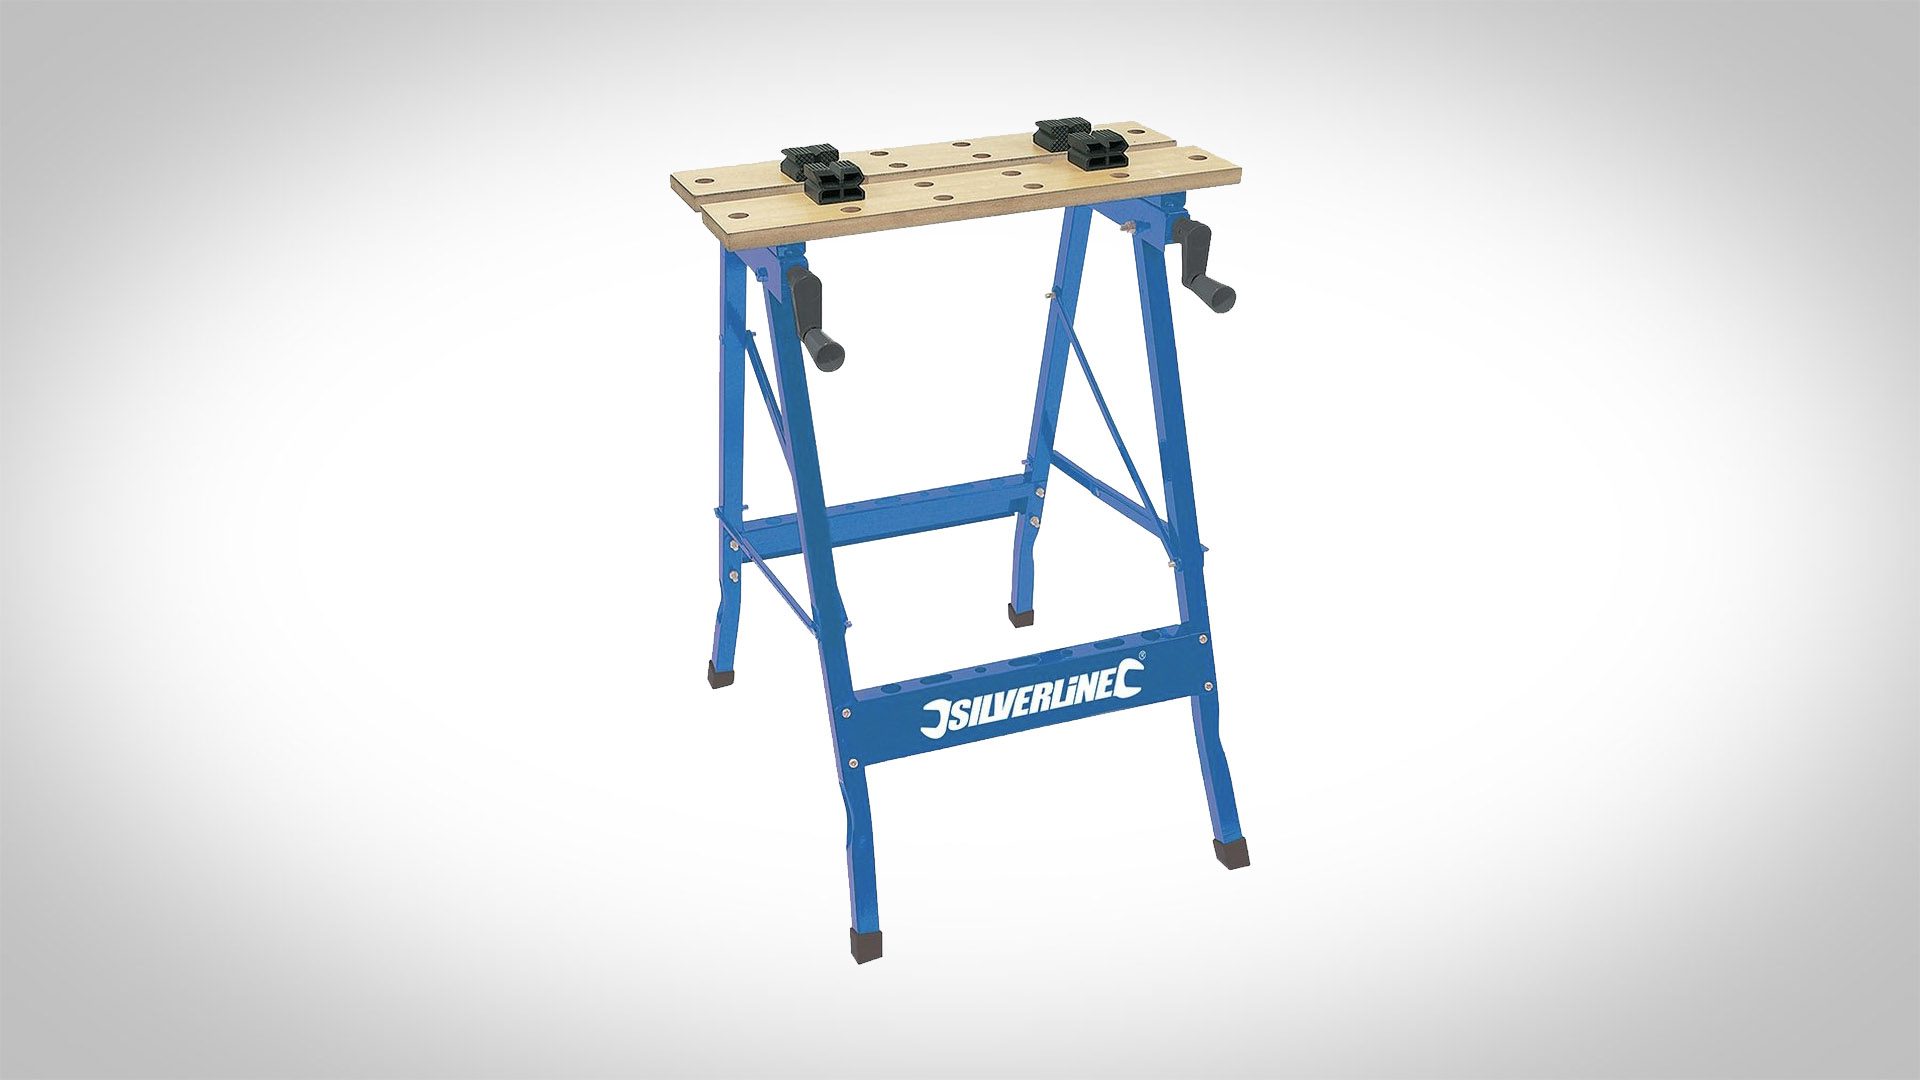
Workbench
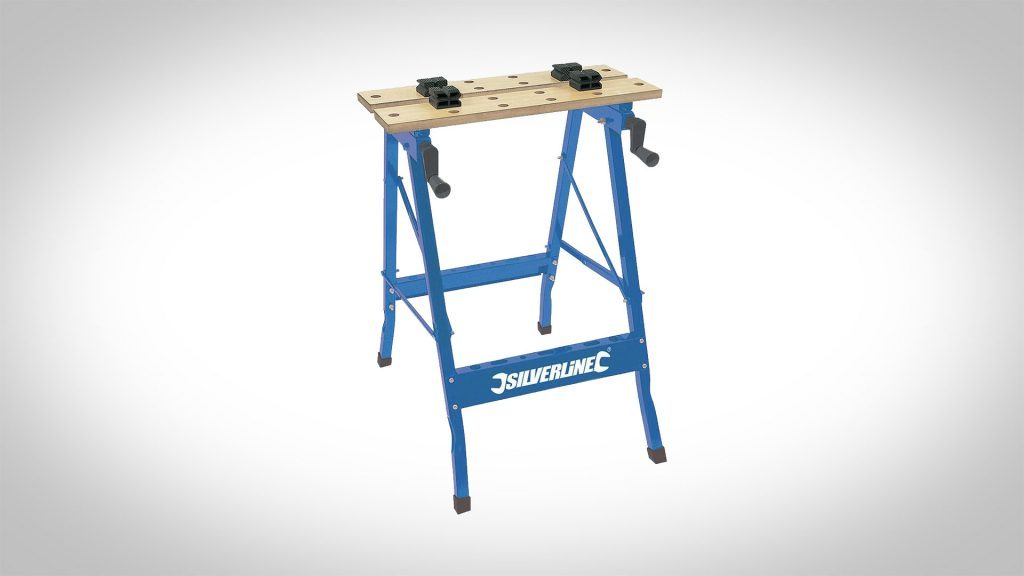
A workbench is key to getting a clean cut and will improve the quality of your build. The bench itself doesn’t have to be anything fancy, a small portable one would do the job. Along with the work bench you’re going to want several clamps to hold your materials in place. We advise this cheap Silverline Workbench.
Measuring Tape
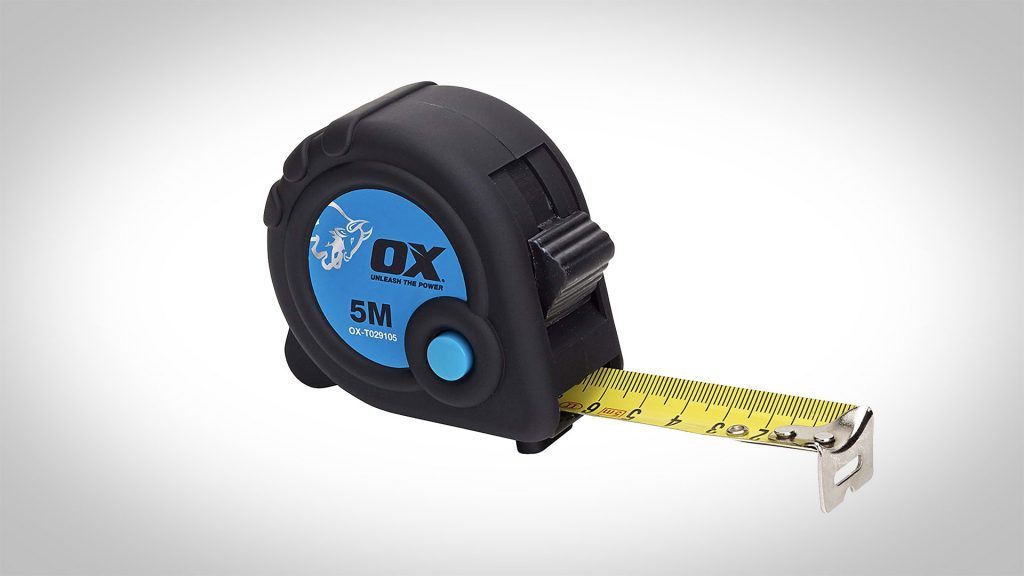
Accurate measurements are key to a good conversion and should be one of your first stops when thinking about how to build a camper. A measuring tape is essential to your build! We advise the cheapest measuring tape you can find.
Screws

A bit of an obvious one but you’re going to want to make sure you have plenty of screws at different lengths. Always buy more than you think you will need, buy in bulk if you can as there is nothing more annoying than running out of screws half way through a build day. We advise picking up a bunch like these here.
Sandpaper

Every cut you make should be sanded to ensure a clean finish, so when thinking about how to build a camper sandpaper should definitely be on your list. If you plan on having a lot of exposed wood in your tiny home, for example if you want to clad your walls, then and electric sander could be a good option. We advise any cheap sandpaper, but at least 10 pieces.
Electrical Equipment
Down in the electrical section of this how to build a camper van guide we have a list of all large pieces of kit that you will need. On top of these things you will need (click the product link for a direct Amazon page):
On top of these key pieces of equipment it is also going to be useful to have a full basic tool kit- the sort of thing that most people will own anyway. This should include a hammer, cross and flat head screwdrivers, pliers, scissors, pencils, masking tape, paint brushes, spirit level, safety goggles and dust masks. You are also likely to need things like sealant, expanding foam and spray adhesive but you can buy these as you go along if you find you need them.
5. Creating a Blank Canvas

When you’re imagining how to build a camper you’re probably picturing the beautiful compact homes that you’ve seen on van life instagram accounts or vanlife blogs but when you first get your van it is going to be far from beautiful.
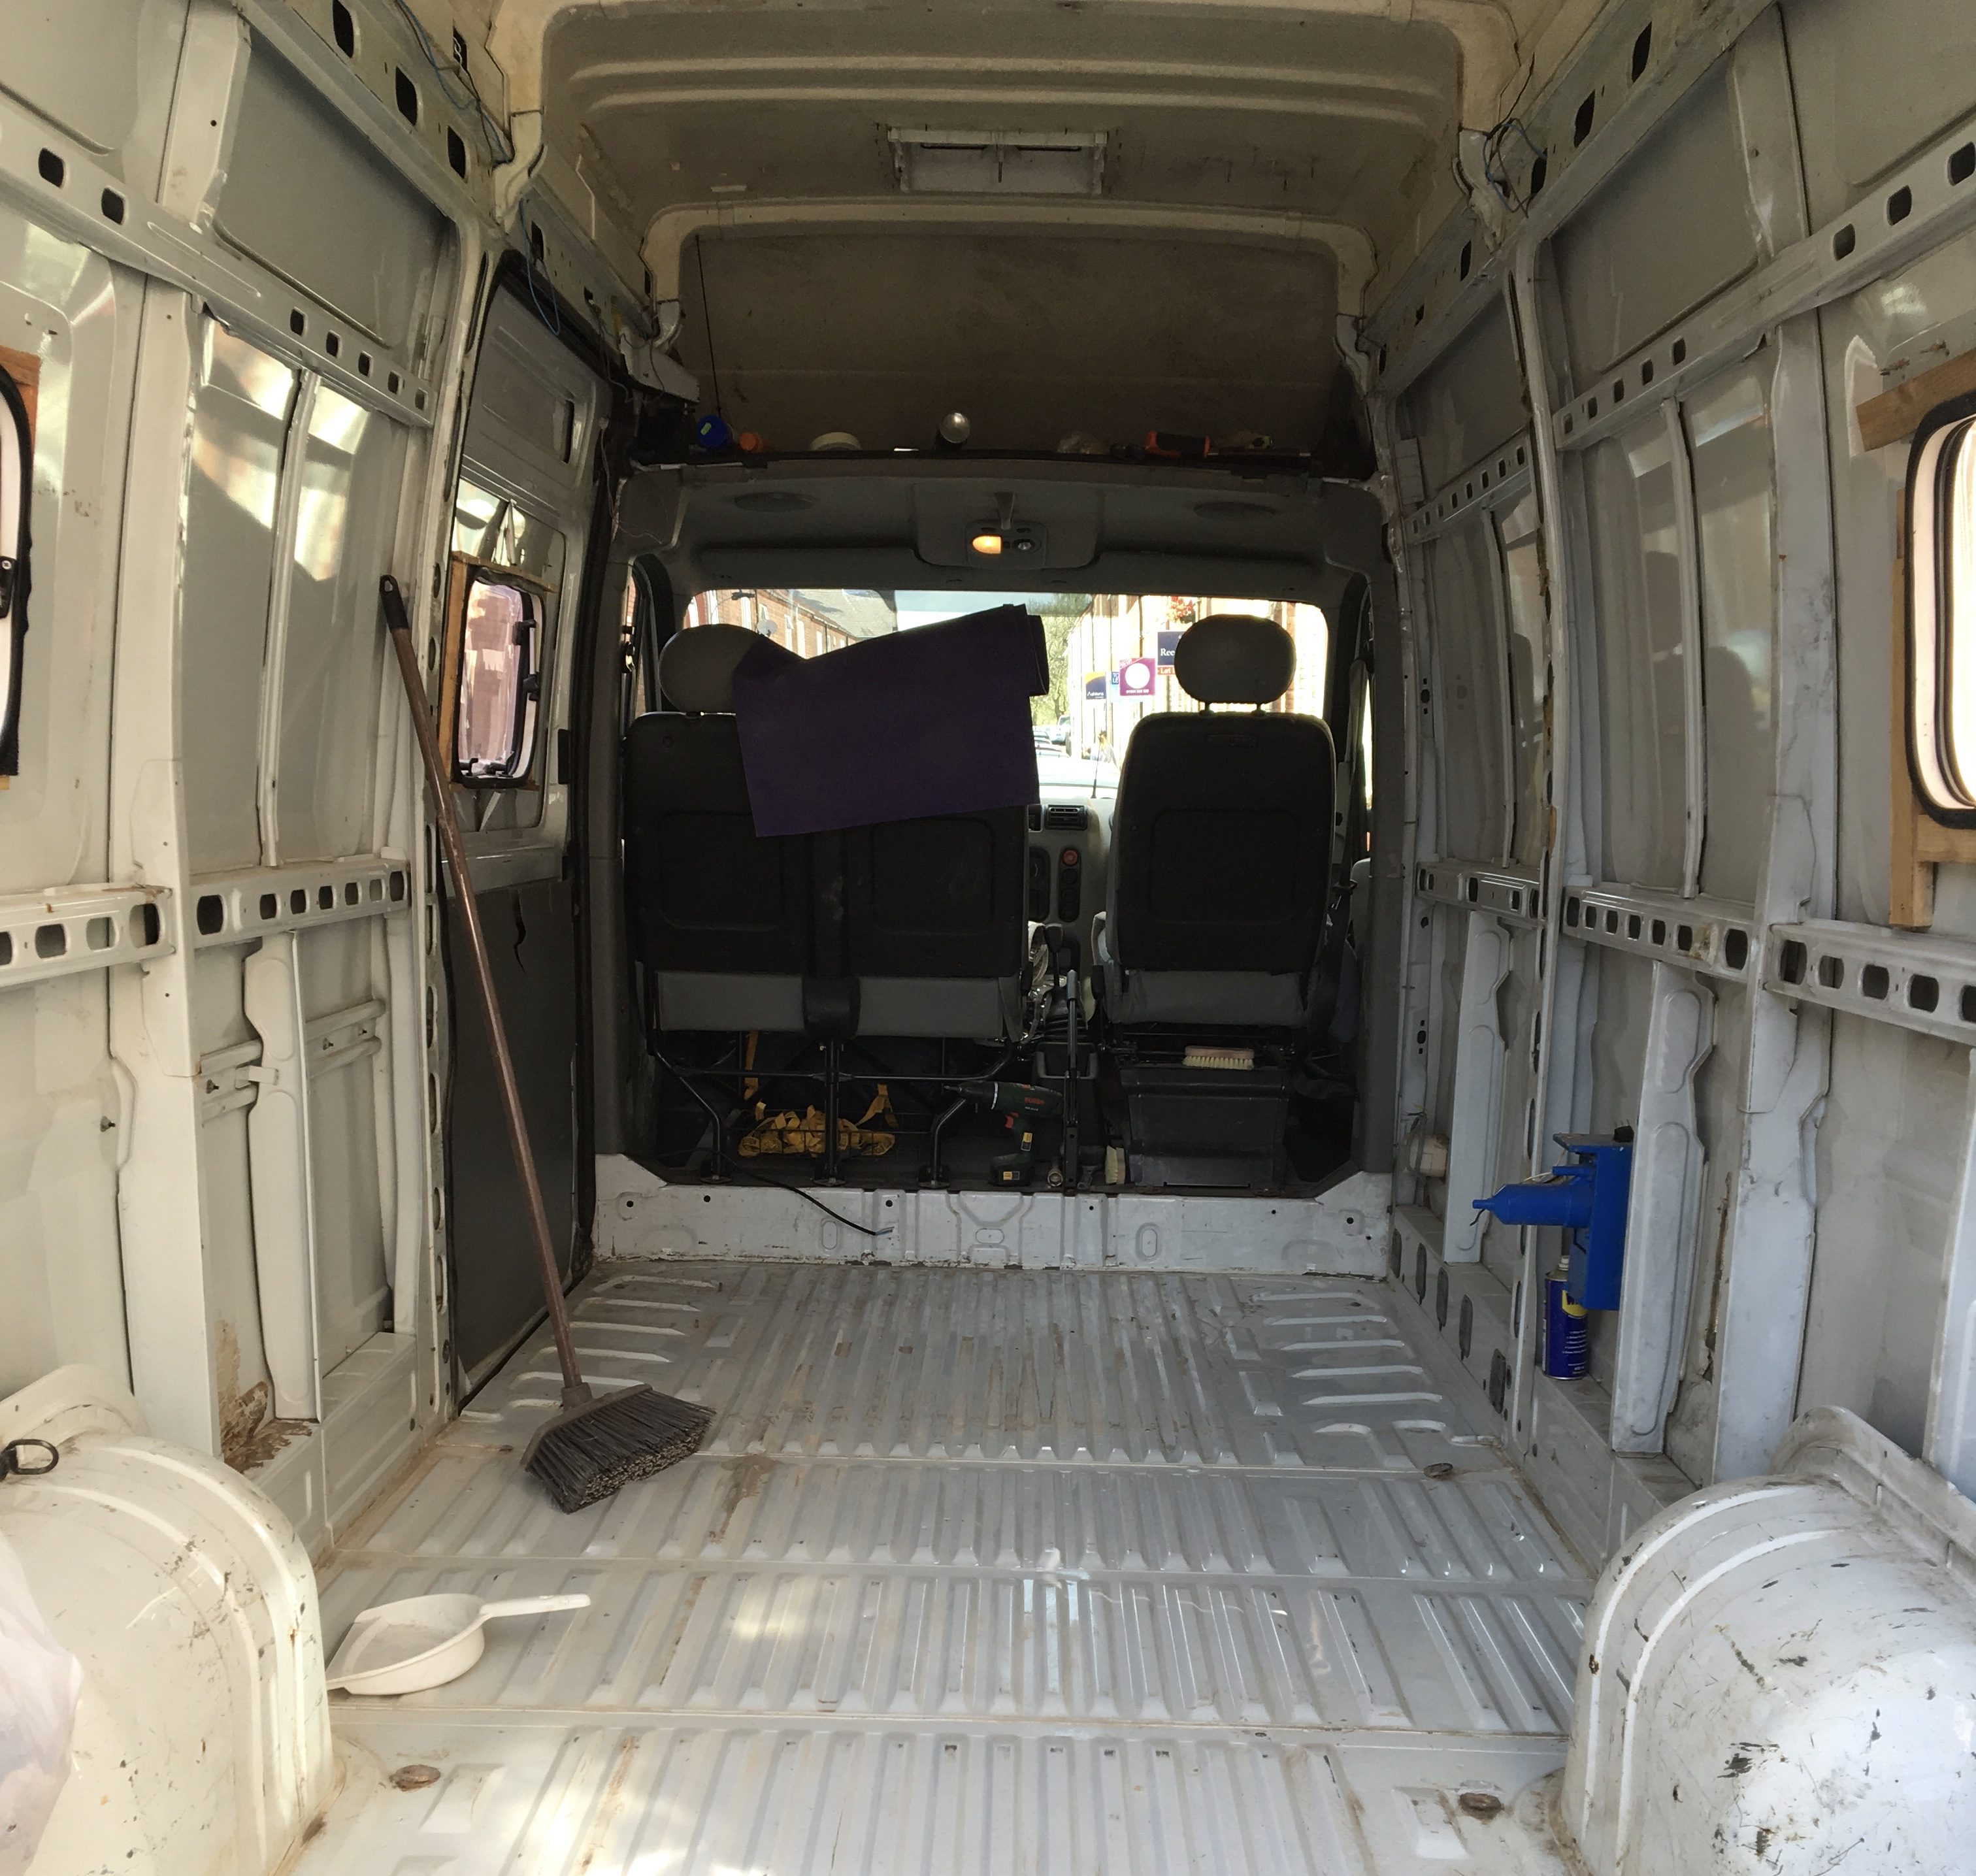
Unless you’ve bought a brand new vehicle to convert the interior of your van is going to need to be completely stripped back so that you start with a blank canvas. If you’re converting an old work van then this means taking out everything and giving the interior a really good clean, checking and treating any rust at the same time.
If you’re starting with an old conversion it is still worth stripping the van back to a shell. In doing this you can ensure that there are no issues below the van’s decor and you can make the interior entirely your own. If you are ripping out a previous conversion then there may be parts you can save or up-cycle. Once you have emptied, clean and rust treated your van then you are ready to get on with the fun part!
6. Measurements
When thinking about how to build a camper, measurements are so vital in creating a great build that it is worth spending a good couple of hours ensuring you have accurately measured all areas of the van. You’ll want to measure the width, heigh and length of the interior space of your van as well as any key elements such as the windows, wheel arches, skylights and doors.
Once you have all of your measurements you can start accurately designing the best van to live in. Design is so important when working out how to build a camper as you can choose the best layout for your lifestyle.
Once you have all of your measurements and an idea of the key elements that you want to build into your design you can start designing. To make this process easier and more accurate it is also a good idea to source the measurements of any items that you have already decided on incorporating into you build. This could be the toilet, sink, fridge, cooker, extra passenger seat or bed. In knowing these measurements it is easier to see how much space you have left to work with.
There are several ways you can design the layout of your build, the first one is a simple pencil and paper. This is a great way to quickly jot down ideas and get a sense of your layout. However, it can be difficult working out how to scale down all of your measurements so that everything is accurate to each other. If you’re finding this a bit difficult computer aided design (CAD) might be a good option for you.
There are several free programs that will allow you to build a perfectly to scale 3D model of your space, and the items within it so you can really get a feel for your layout.
If you’re not very techy or don’t feel the need for such an in depth design then grab some masking tape, and a measuring tape and head out to your empty van. Use the masking tape to mark out your layout on the floor. If you want to do a 3D version of this then you can create rough cardboard models of the furniture that you want in you camper. This is such a quick and easy option and means you can play around with your layout while inside your van!
Another important reason to gather accurate measurements of you vans interior is so that you can buy the correct amount of materials such as the insulation, any wiring you may need, cladding or wood for panelling your van walls, flooring etc. I would recommend buying materials in stages so that if you change your mind about your layout then you alter it without needing to return anything.
7. Insulation
Next in our how to insulate a camper. Insulation is the first proper step of your build and it is so important that it is done properly. There are so many different insulating options available and most vandwellers will go for a multi pronged attack.
The first step is to use some double sided silver foil- basically silver coloured bubble wrap (high-tech right?!). This can be attached directly to the walls of your van using spray adhesive and/or silver foil tape. It’s a good idea to cover every metal surface within the van in insulation, including above the cab, the floor, wheel arches, and even the inside of the cab’s doors.
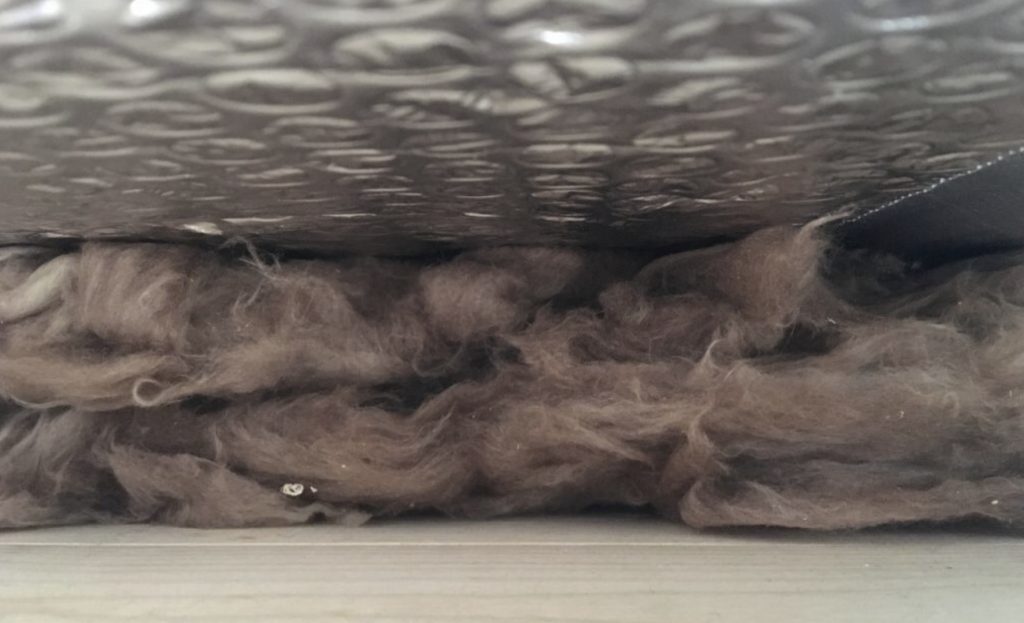
There are many different options to choose from for the the main insulation in your van and when you’re looking into how to build a camper it can be difficult to know which one to choose. Some choices are kingspan and other foam insulation blocks, loft insulation or something more eco friendly like sheep’s wool. All of these materials do the same job and are installed in similar ways but it is worth doing some research so you can find out what is best for you.
If your van is very curved foam blacks may not be ideal as the are very rigid, they are however, cheap to buy and quick and easy to use. To install foam blocks simply cut the blocks to size and use spay adhesive and tape to attach to the walls and wedge between the frame for your walls, fill in any small and fiddly gaps with expanding foam.
Foam blocks are a great option for insulating below your flooring, if you have enough head room to loose a few inches, as they are so ridged, if you are worried about head room however you will want to go for something thinner below your flooring.
If you want to use a soft insulation such as loft insulation, rock wool or sheep’s wool these can all be installed in the same way. The easiest way to add this insulation to you build is to install it as you are building your interior walls. This is because the insulation wants to sit between the foil covered metal and the panelling or cladding that you are using as your camper’s walls. Once you’ve attached one panel or several lengths of cladding to the rib cage of the van walls then you can insert the insulation behind it, pushing it down to allow generous amounts to fit.
We’ve mentioned the framing or rib cage for the walls a couple of times in this section- this is explained in detail later on in our how to build a camper guide.
8. Flooring
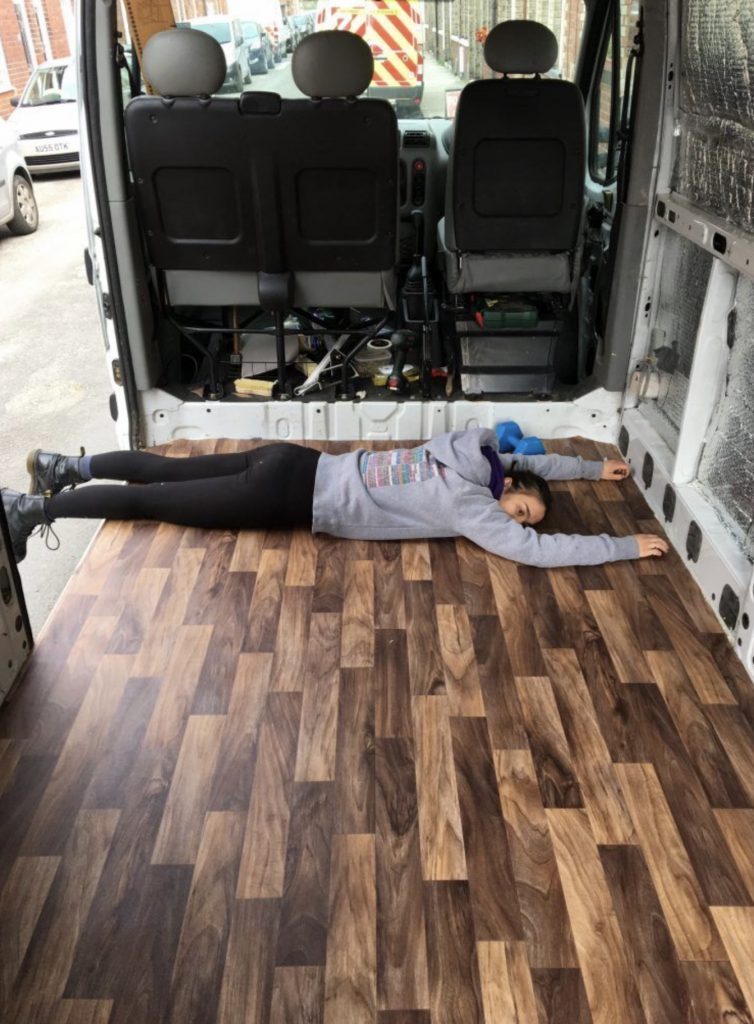
Next on our how to build a camper guide is the flooring. Some people choose to lay their flooring last so that it doesn’t get damaged throughout the build process, this is fine but the base of the floor will still need to be laid at this point.
When converting a van that used to be a cargo van, there is a high chance that it would have had a sheet wood (such as MDF, or ODB) floor installed. If you kept this flooring when removing everything from your van then you can use it as a template to transfer the pattern onto new sheet wood. If it is in really good condition you could reinstall the original flooring.
For those who didn’t keep the original flooring then you need to measure the dimensions of your floor and mark them out on some sheet wood before cutting out with your saw.
Make sure that all areas are covered and that each pieces fits together nicely and goes right up to the sides of the van. You want to use glue to secure your flooring, on top of any insulation you have used. Something really strong like gorilla glue works well, just remember to weigh the floor down so that it bonds properly. The reason for using glue over screws is so that the metal floor of your van has minimal holes in it, reducing the risk of moisture getting in and causing rust.
Once this is secured you can begin laying your final flooring. You have serval options here, the easiest and cheapest being Lino. If you are using Lino, lay it out on your floor and mark where you need to trim it. Do not draw around the same template you used for the base of your flooring as this is likely to be slightly out now that you have laid a layer of MDF/OSB flooring. Again, you want to secure this with glue- something like spray adhesive is fine here. If you are using some form of floor boards then measure them one by one as you lay and secure them to ensure the best finish.
9. The Electrics
The next step in our how to build a camper guide is one of the most important factors to your van build and also the most complicated: the electrics. Even if you’re going for a simple van build you are probably going to want to install some sort of electrical system so that you can have lights when it’s dark and charge your phone.
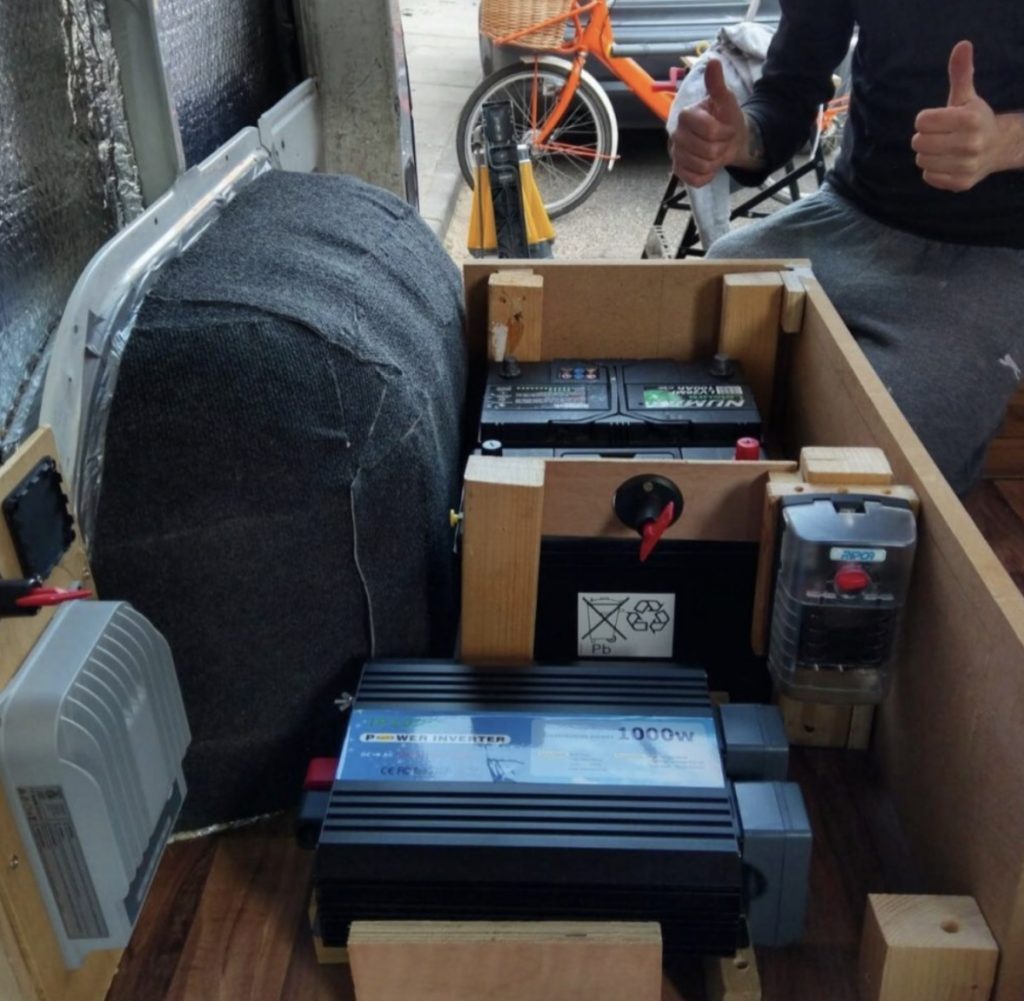
There are two main ways to have power in a van. The first is to plug into the main grid electrical system that we use every day in our homes and the second is to create your own power through the use of a solar system.
Having a solar electric system has so many benefits, and is worth considering if it isn’t something you’ve previously thought of. Having solar means that you can go off the grid for long periods of time without having to worry about where you will next be able plug in and charge your batteries. It also means that, as you can generate your own electricity, you will not have to pay for pricey and crowded campsites just to have access to power. In our how to build a camper van guide we’re going to be covering the essentials on how to fit a solar electrical system.
This is a brief explanation of a complex electrical system. For a much more in depth guide and step by step instructions check out our E-book, for only £4.99. Make sure you are confident in what you are doing before undertaking any electrical work.
First, we’re going to run through the different components that you will need for your set up.
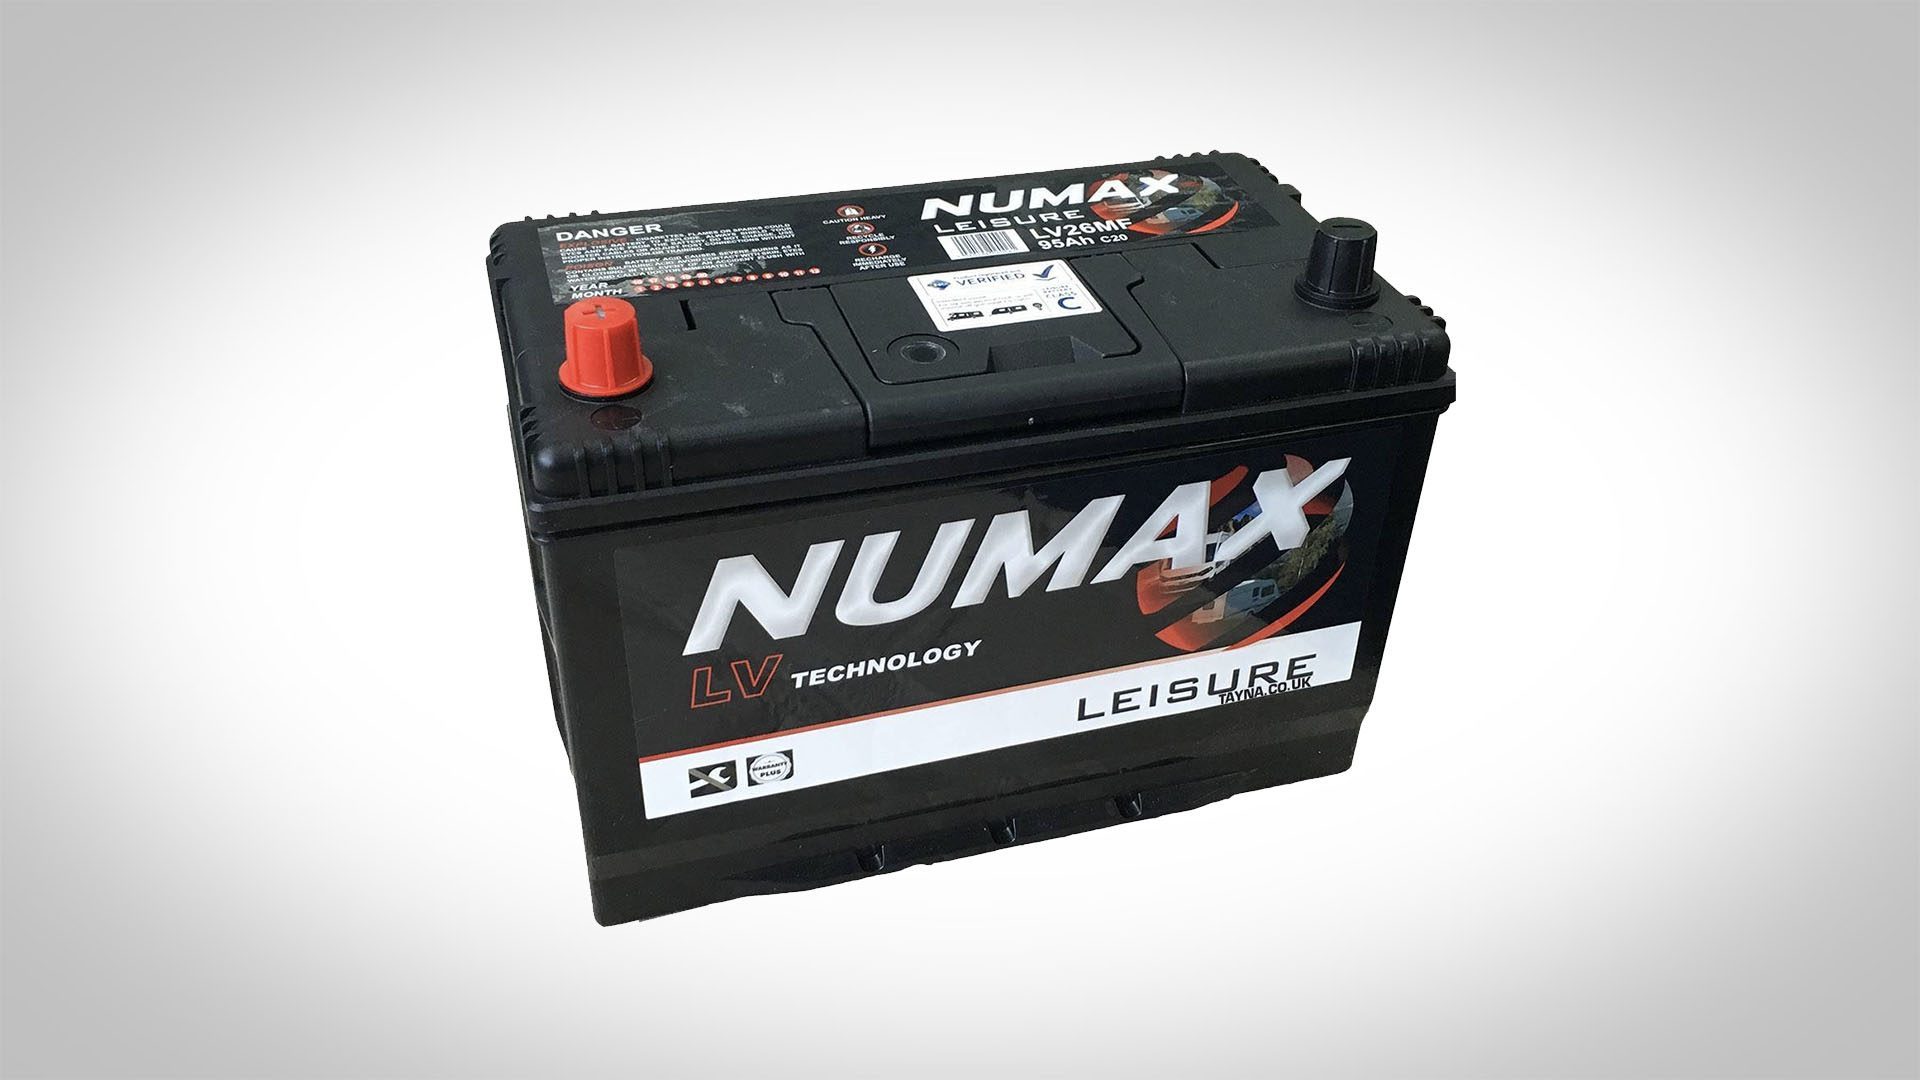
Batteries
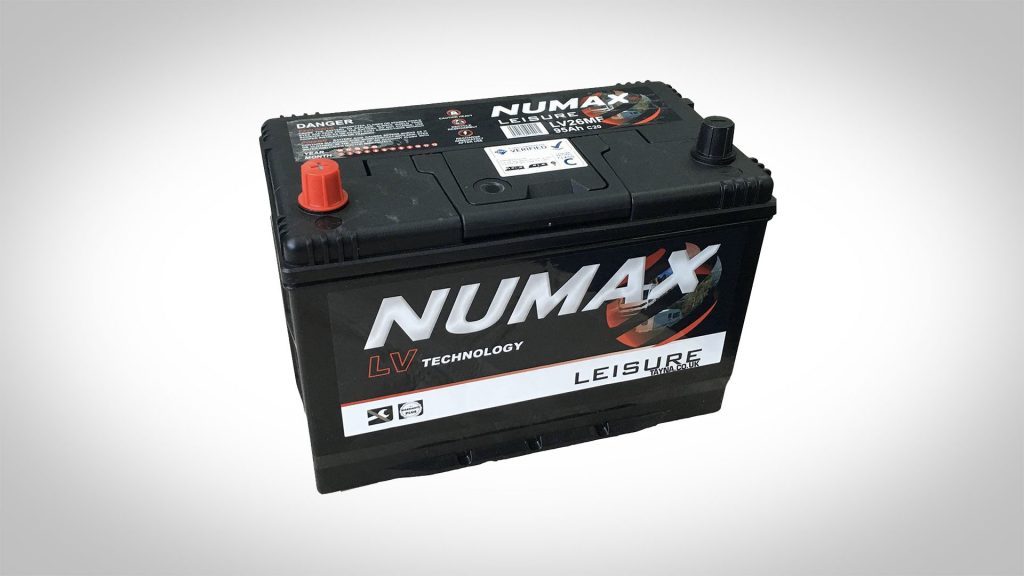
We have lived on the road full time for over two years and have two 100amp hour batteries, we haven’t run out power yet. Check out our article on the best camper van batteries if you need help choosing what is right for you.
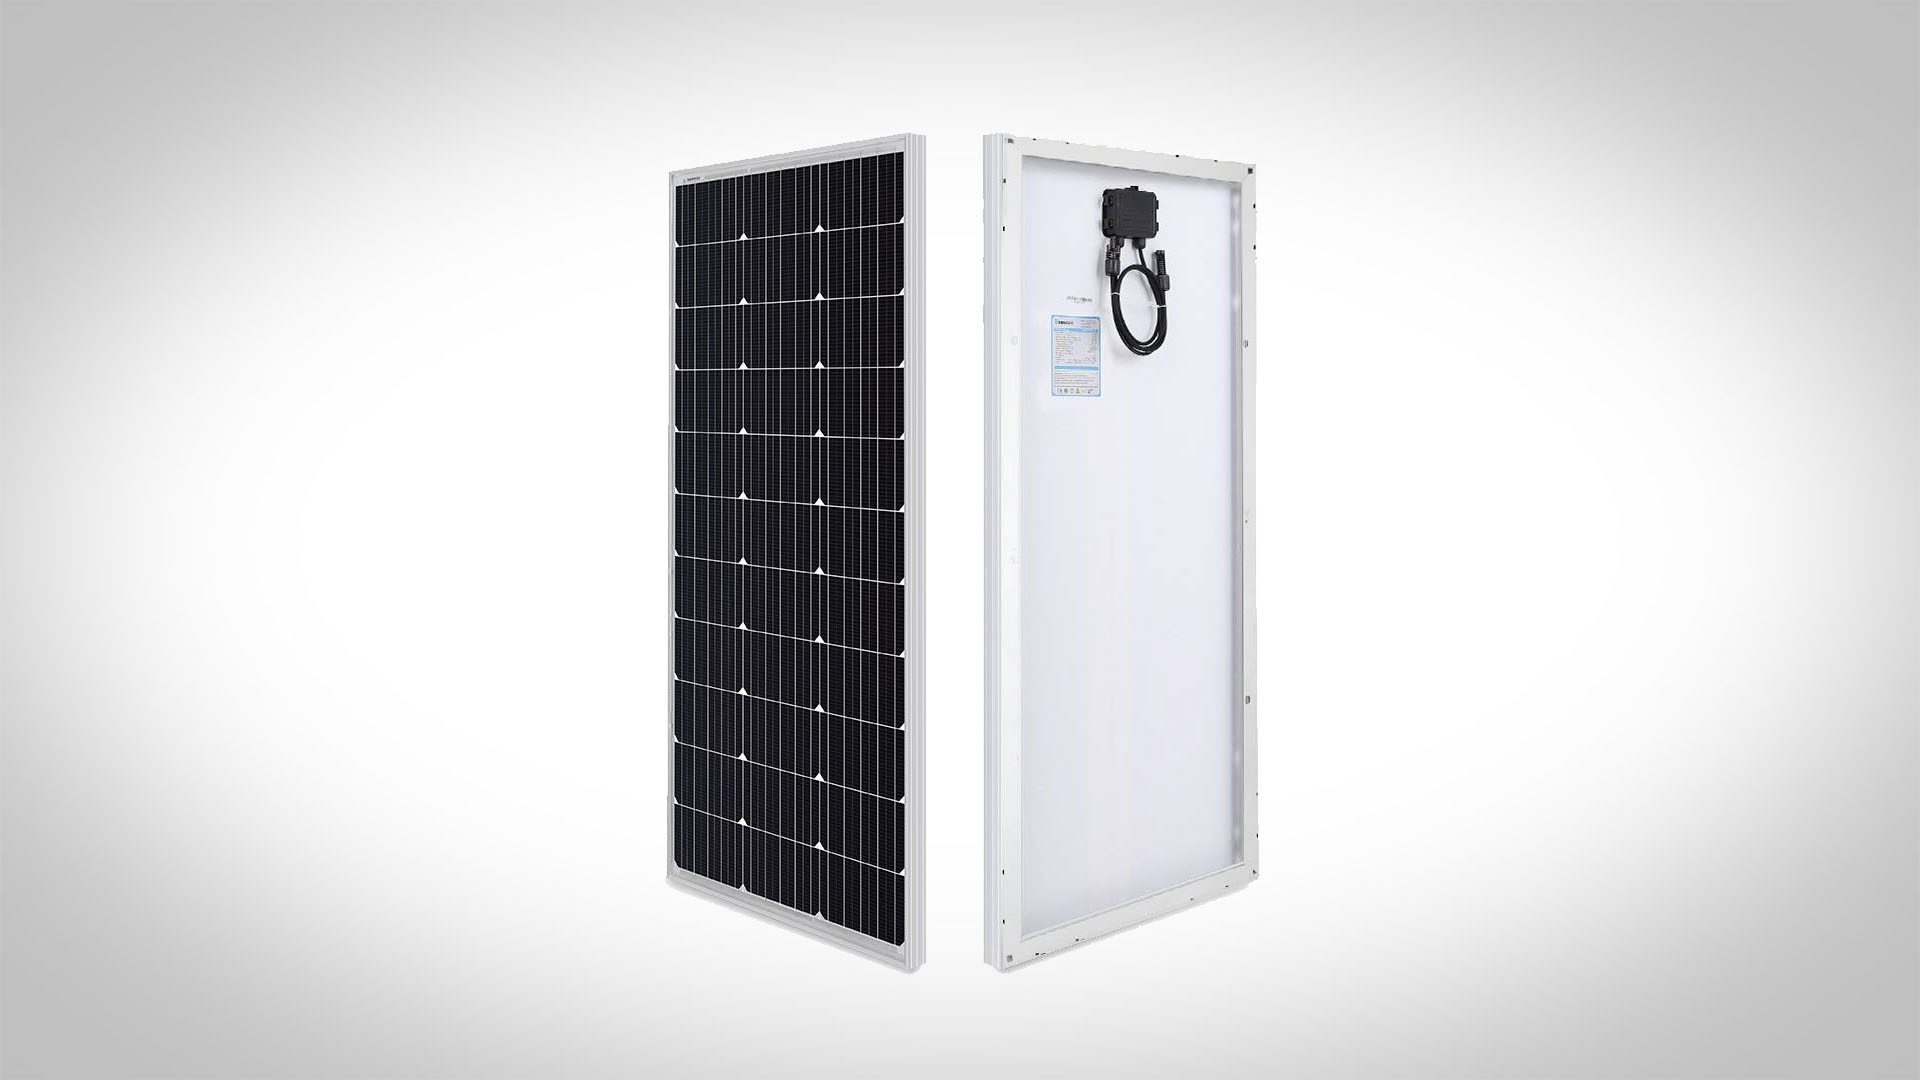
Solar Panels

Again, we have two solar panels, each a 100W that have kept us with power over the last two years. There are different types of solar panels so it is worth doing your own research before taking the plunge.
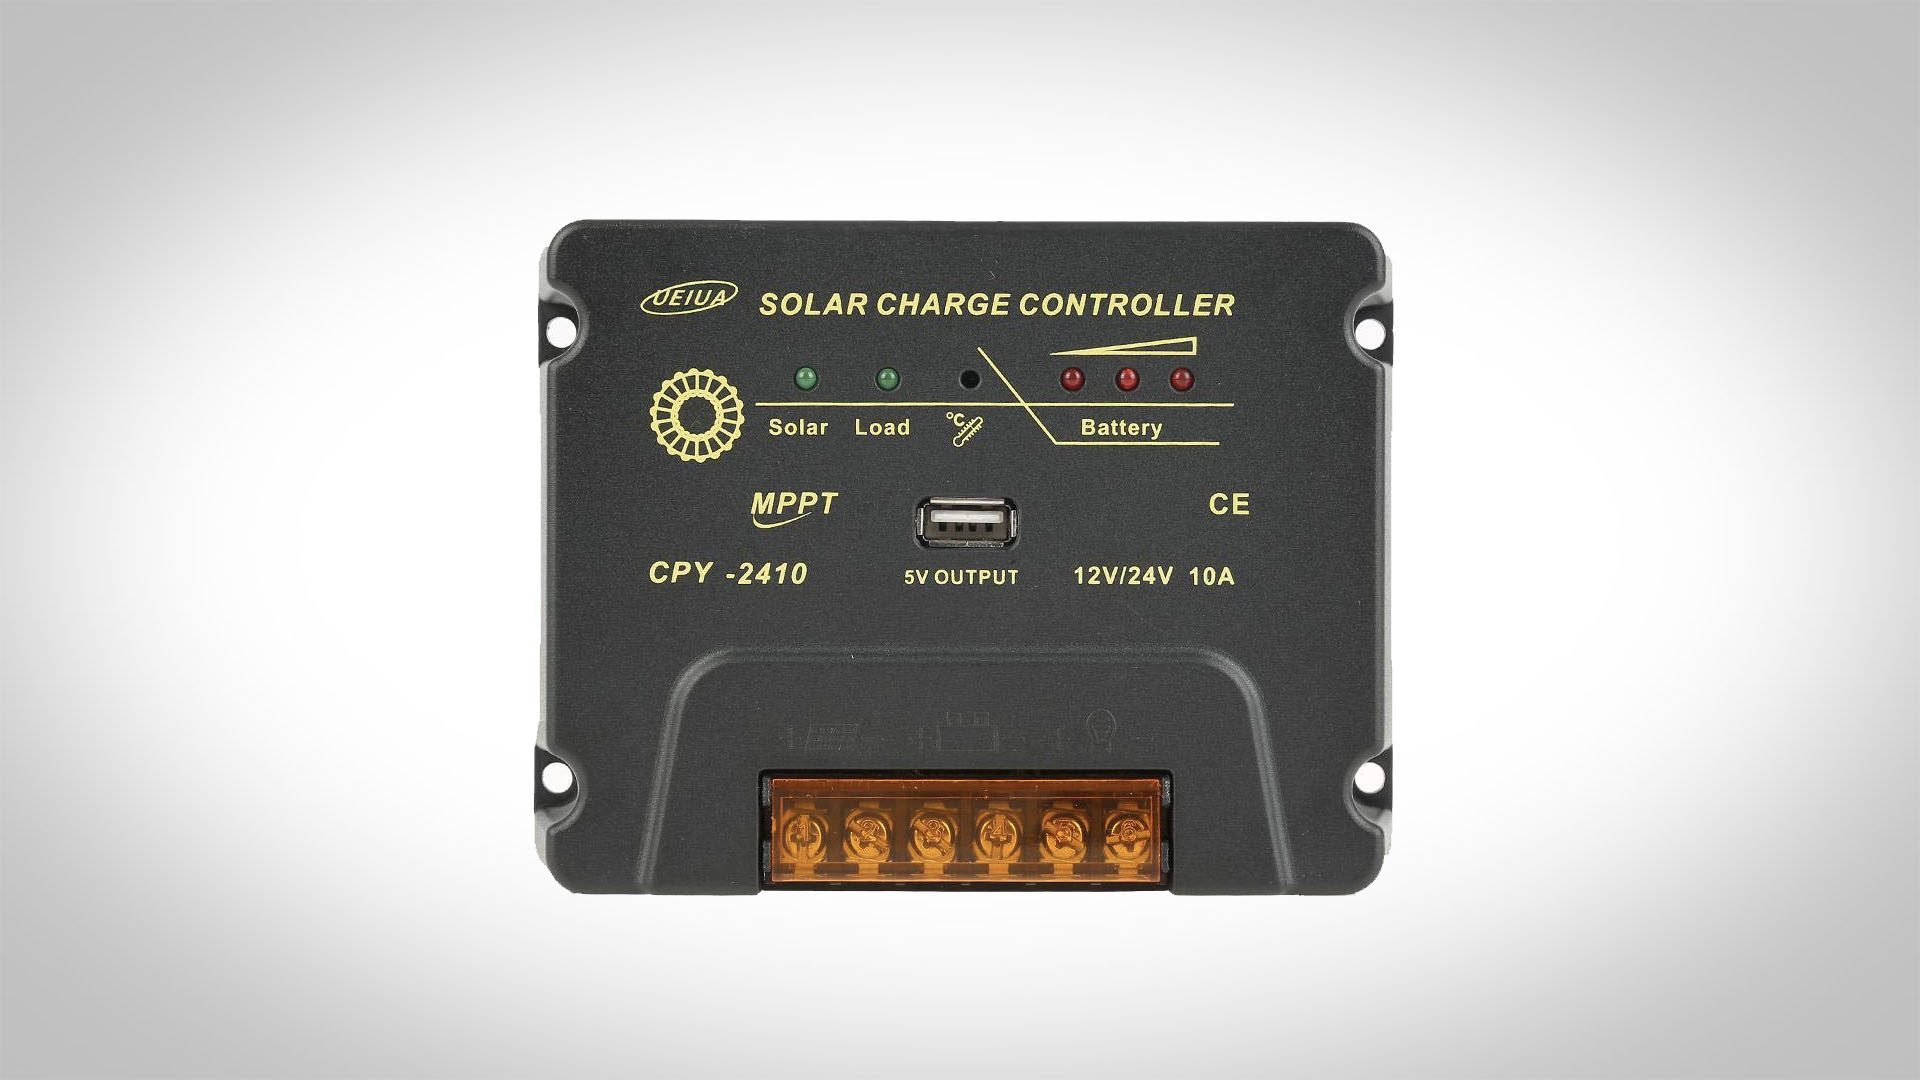
Solar Charge Regulator and Display
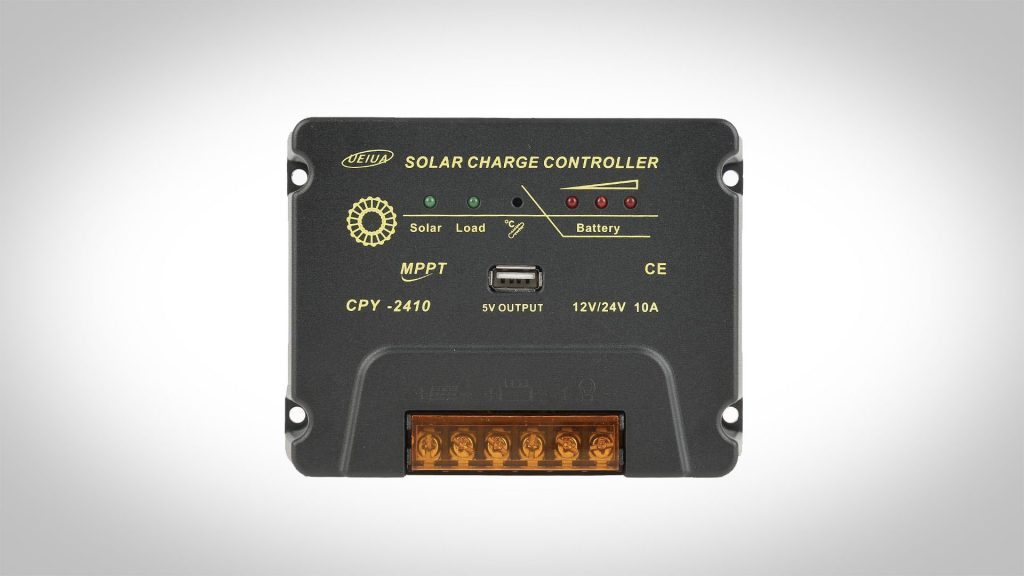
This unit allows you to see how much charge you batteries have and how much power you are getting from your solar panels. It’s a really useful bit of kit.
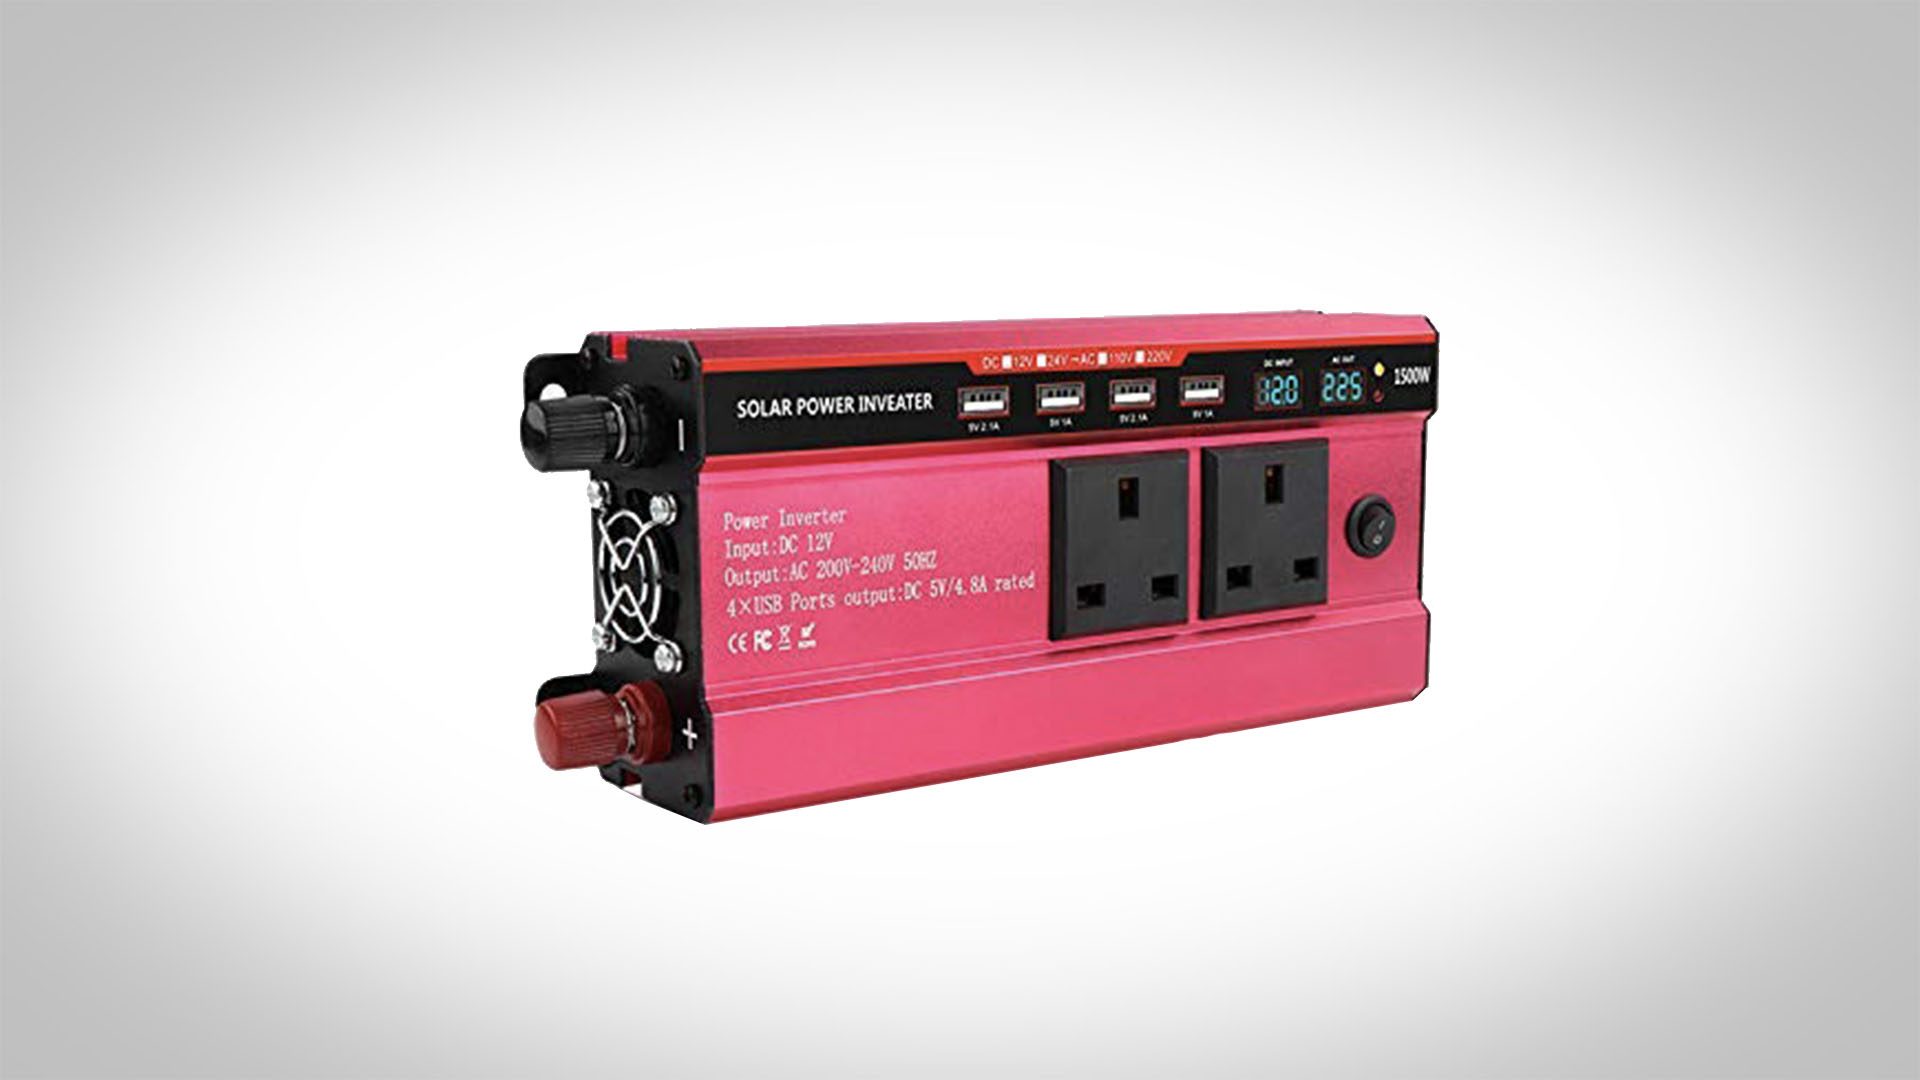
Inverter

An inverter allows you to transform 12v energy into 24v energy. You’ll need this if you want to charge or run anything bigger than your phone.
Fuse Box
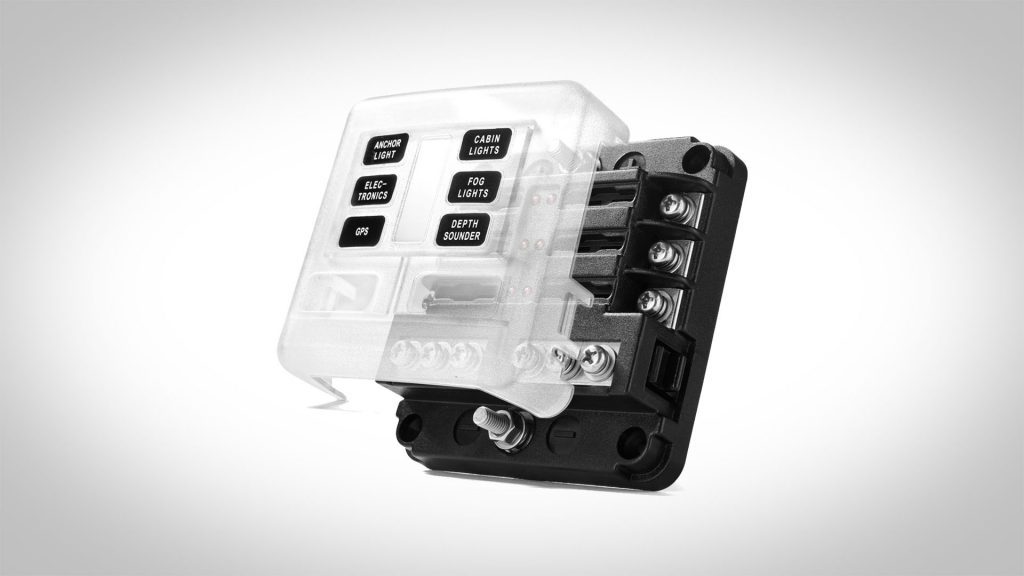
A fuse box is needed to keep the electrical system safe. This means if something goes wrong you will simply blow a fuse, stopping the flow of energy from reaching your appliance and causing it (or you) any damage.
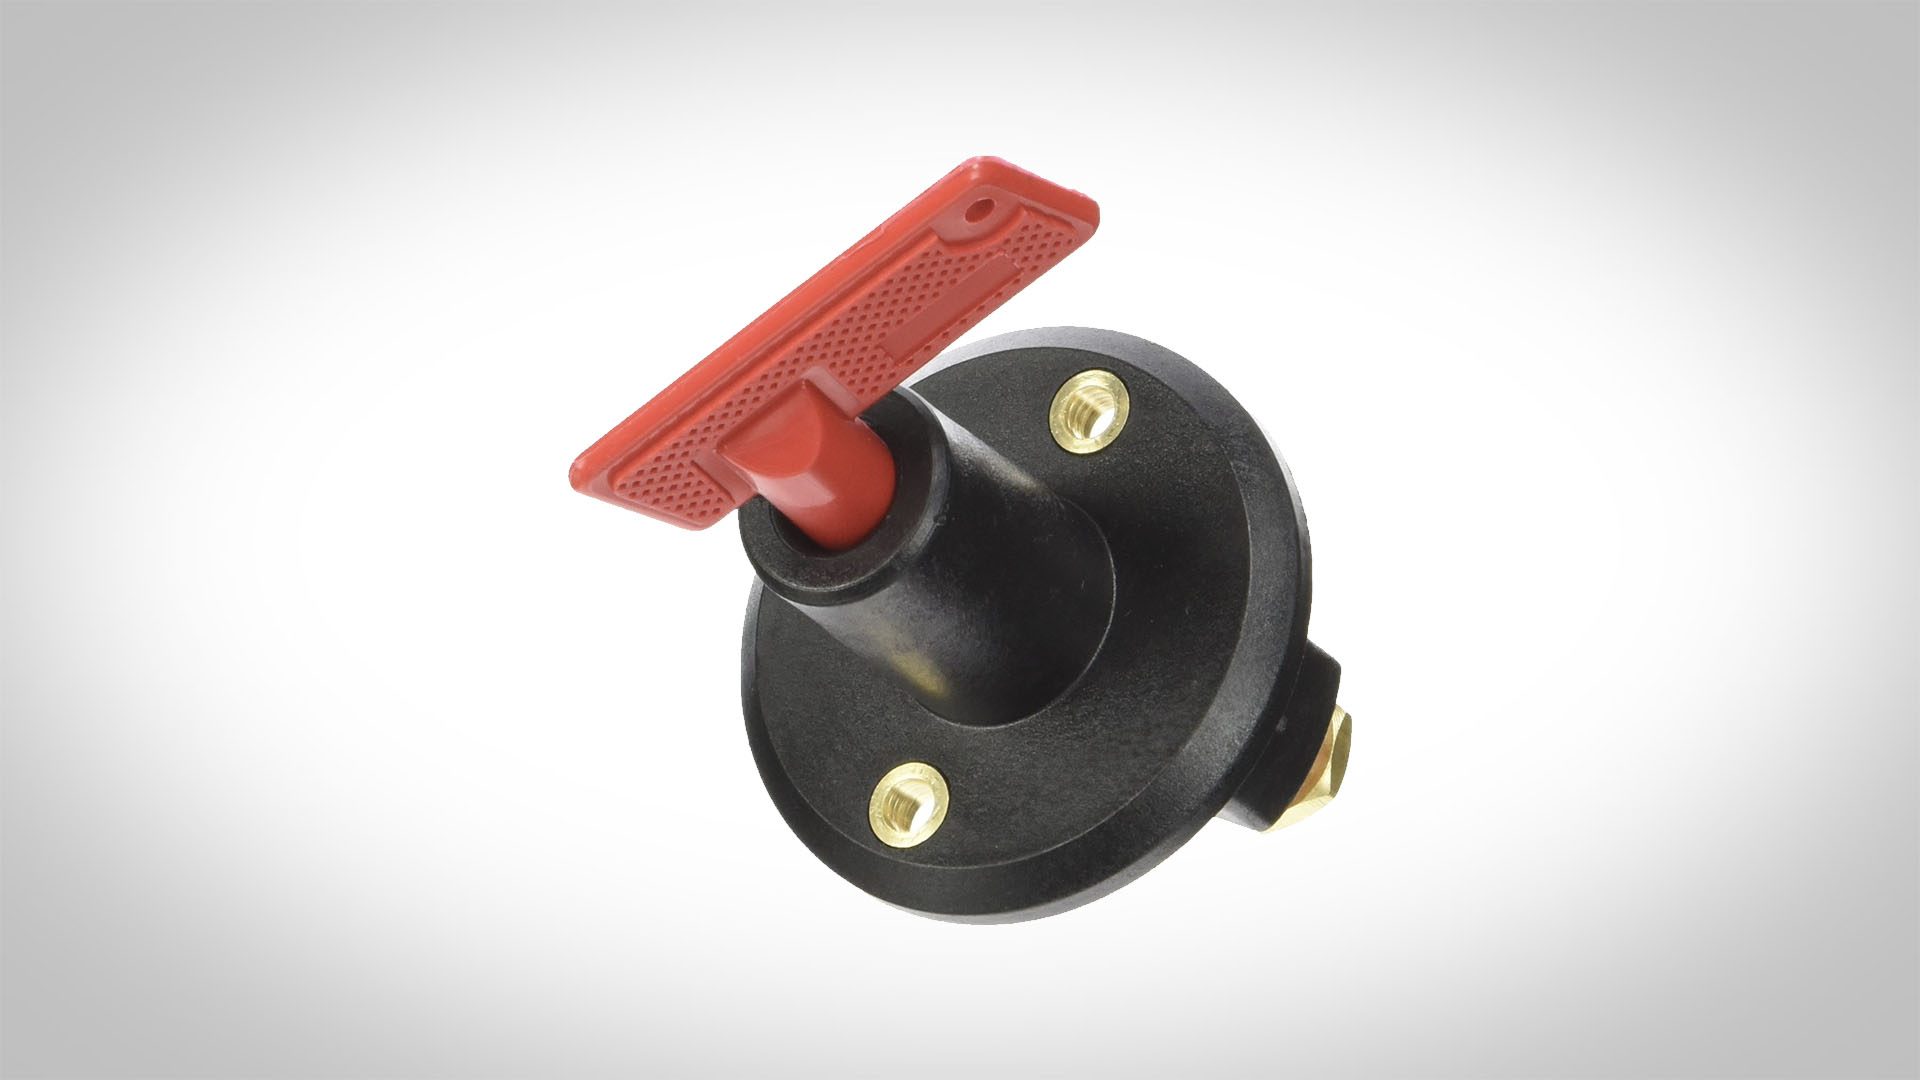
Isolator Switches

An isolator switch is a quick and easy way to shut your electrical system down if something is going wrong. It’s also useful to be able to turn off your electrics if you are not using the van for a long period of time.
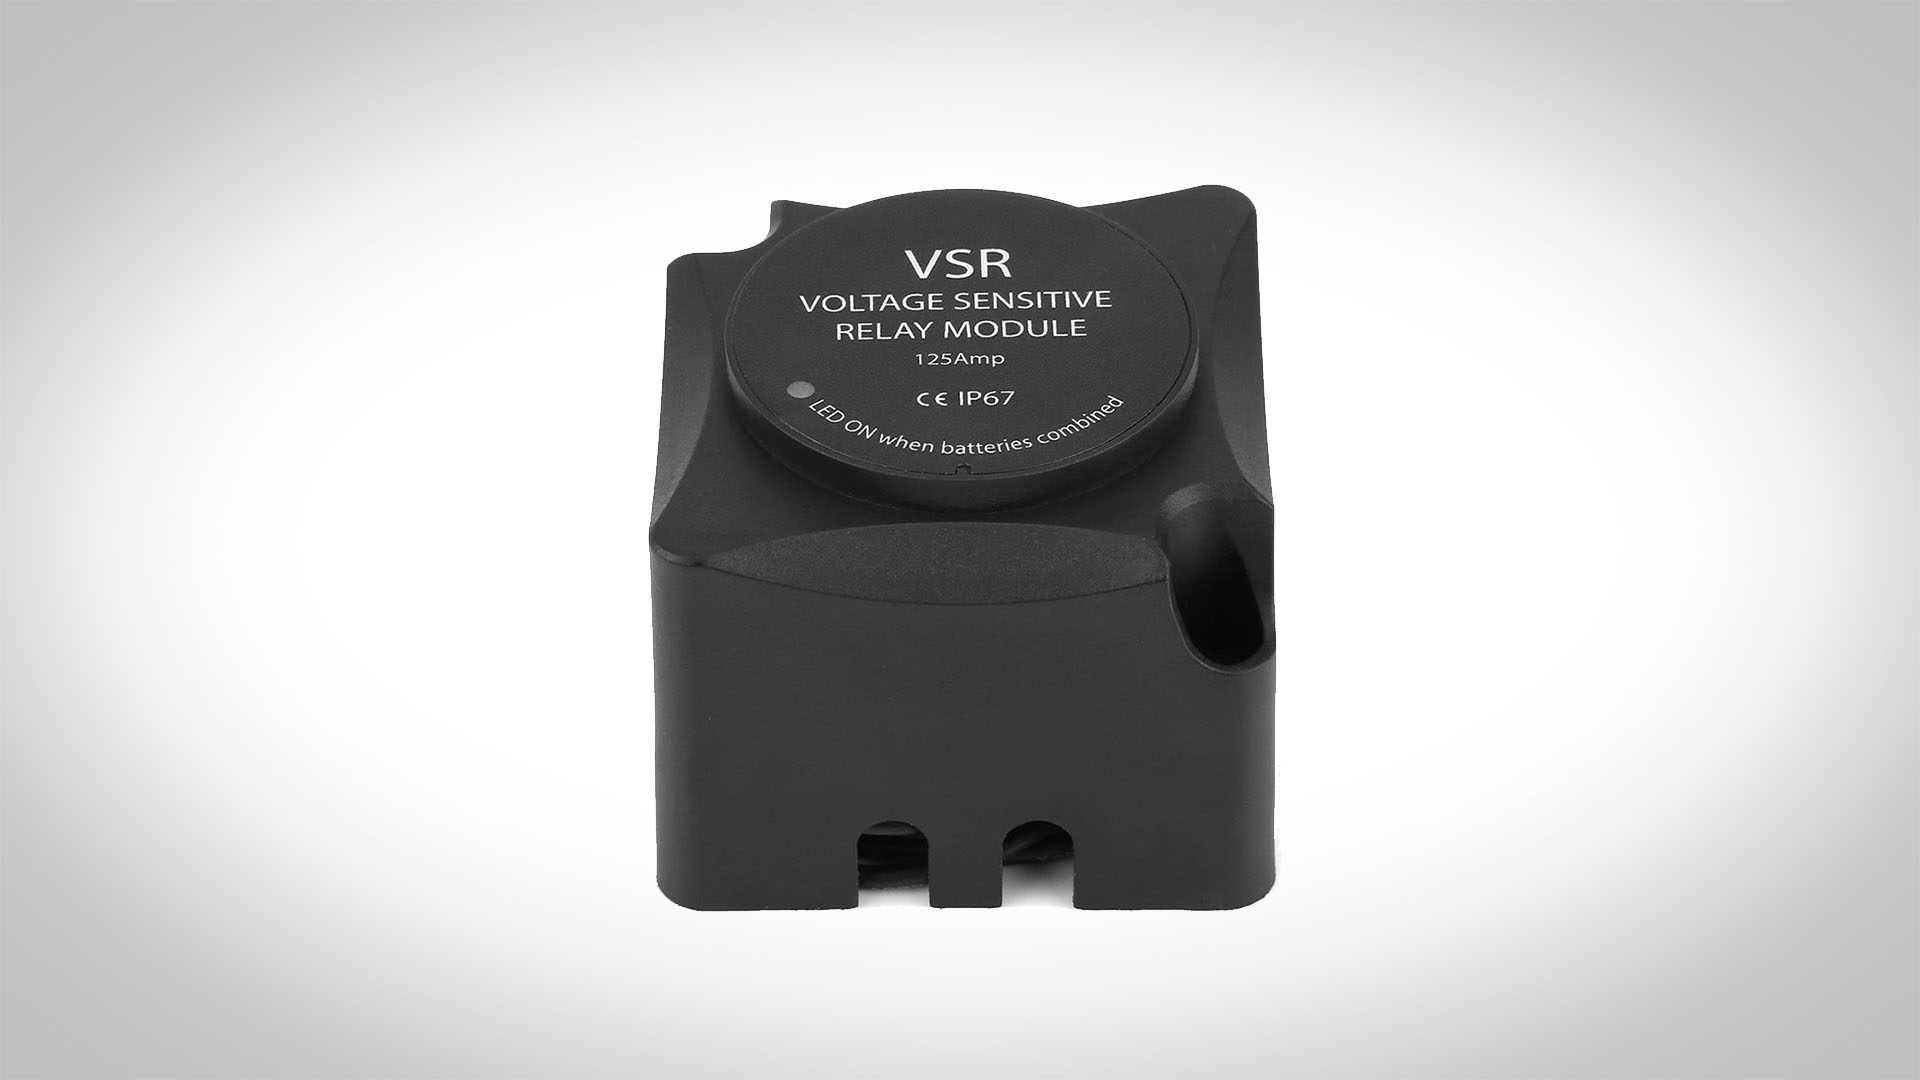
Switch Charge Relay

This is a back up for those grey cloudy days when the solar panels won’t be getting much action. A switch charge relay allows your leisure batteries to charge while your engine is one, meaning you can charge when you drive
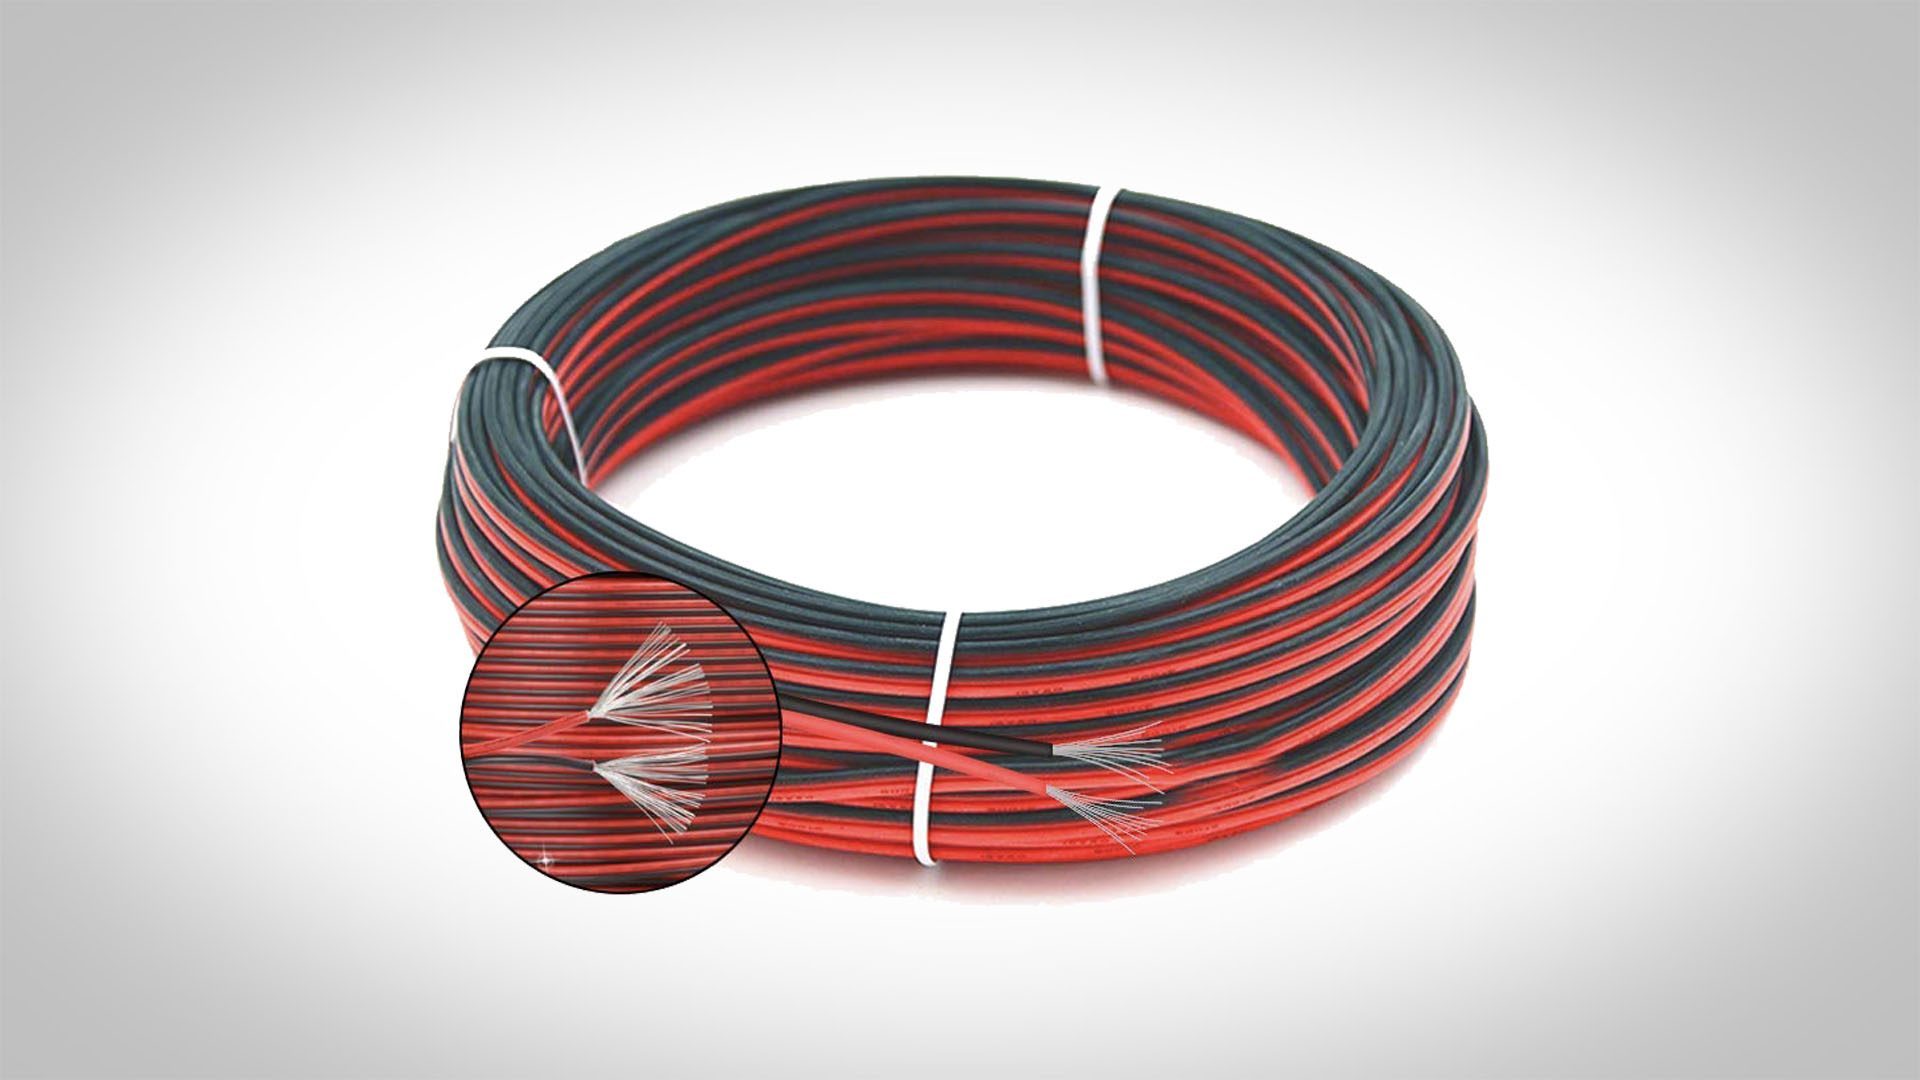
Wire
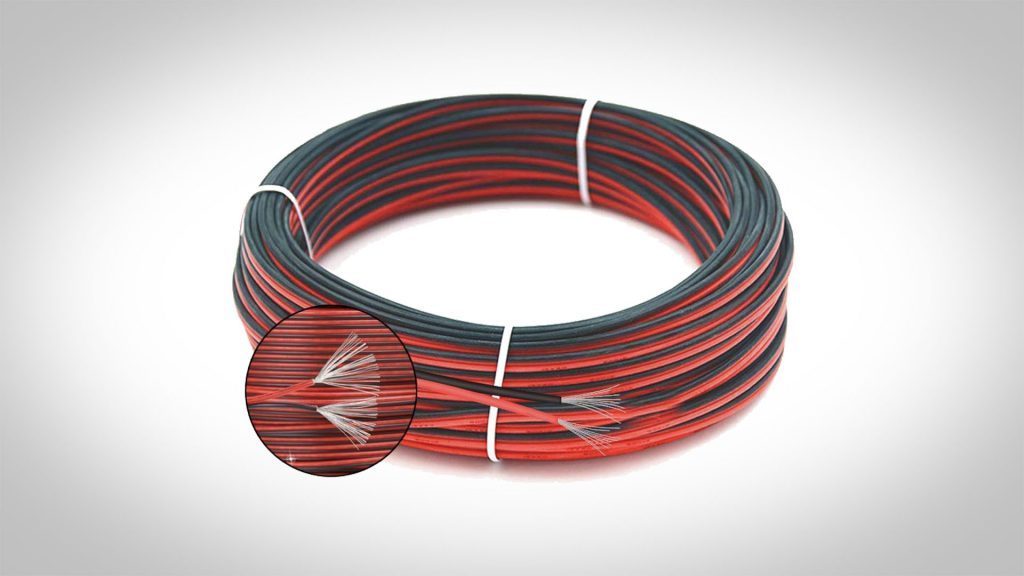
Finally, you are going to need plenty of red and black wire to join it all together. Make sure your wire is thick enough to take the charge that will be running down it.
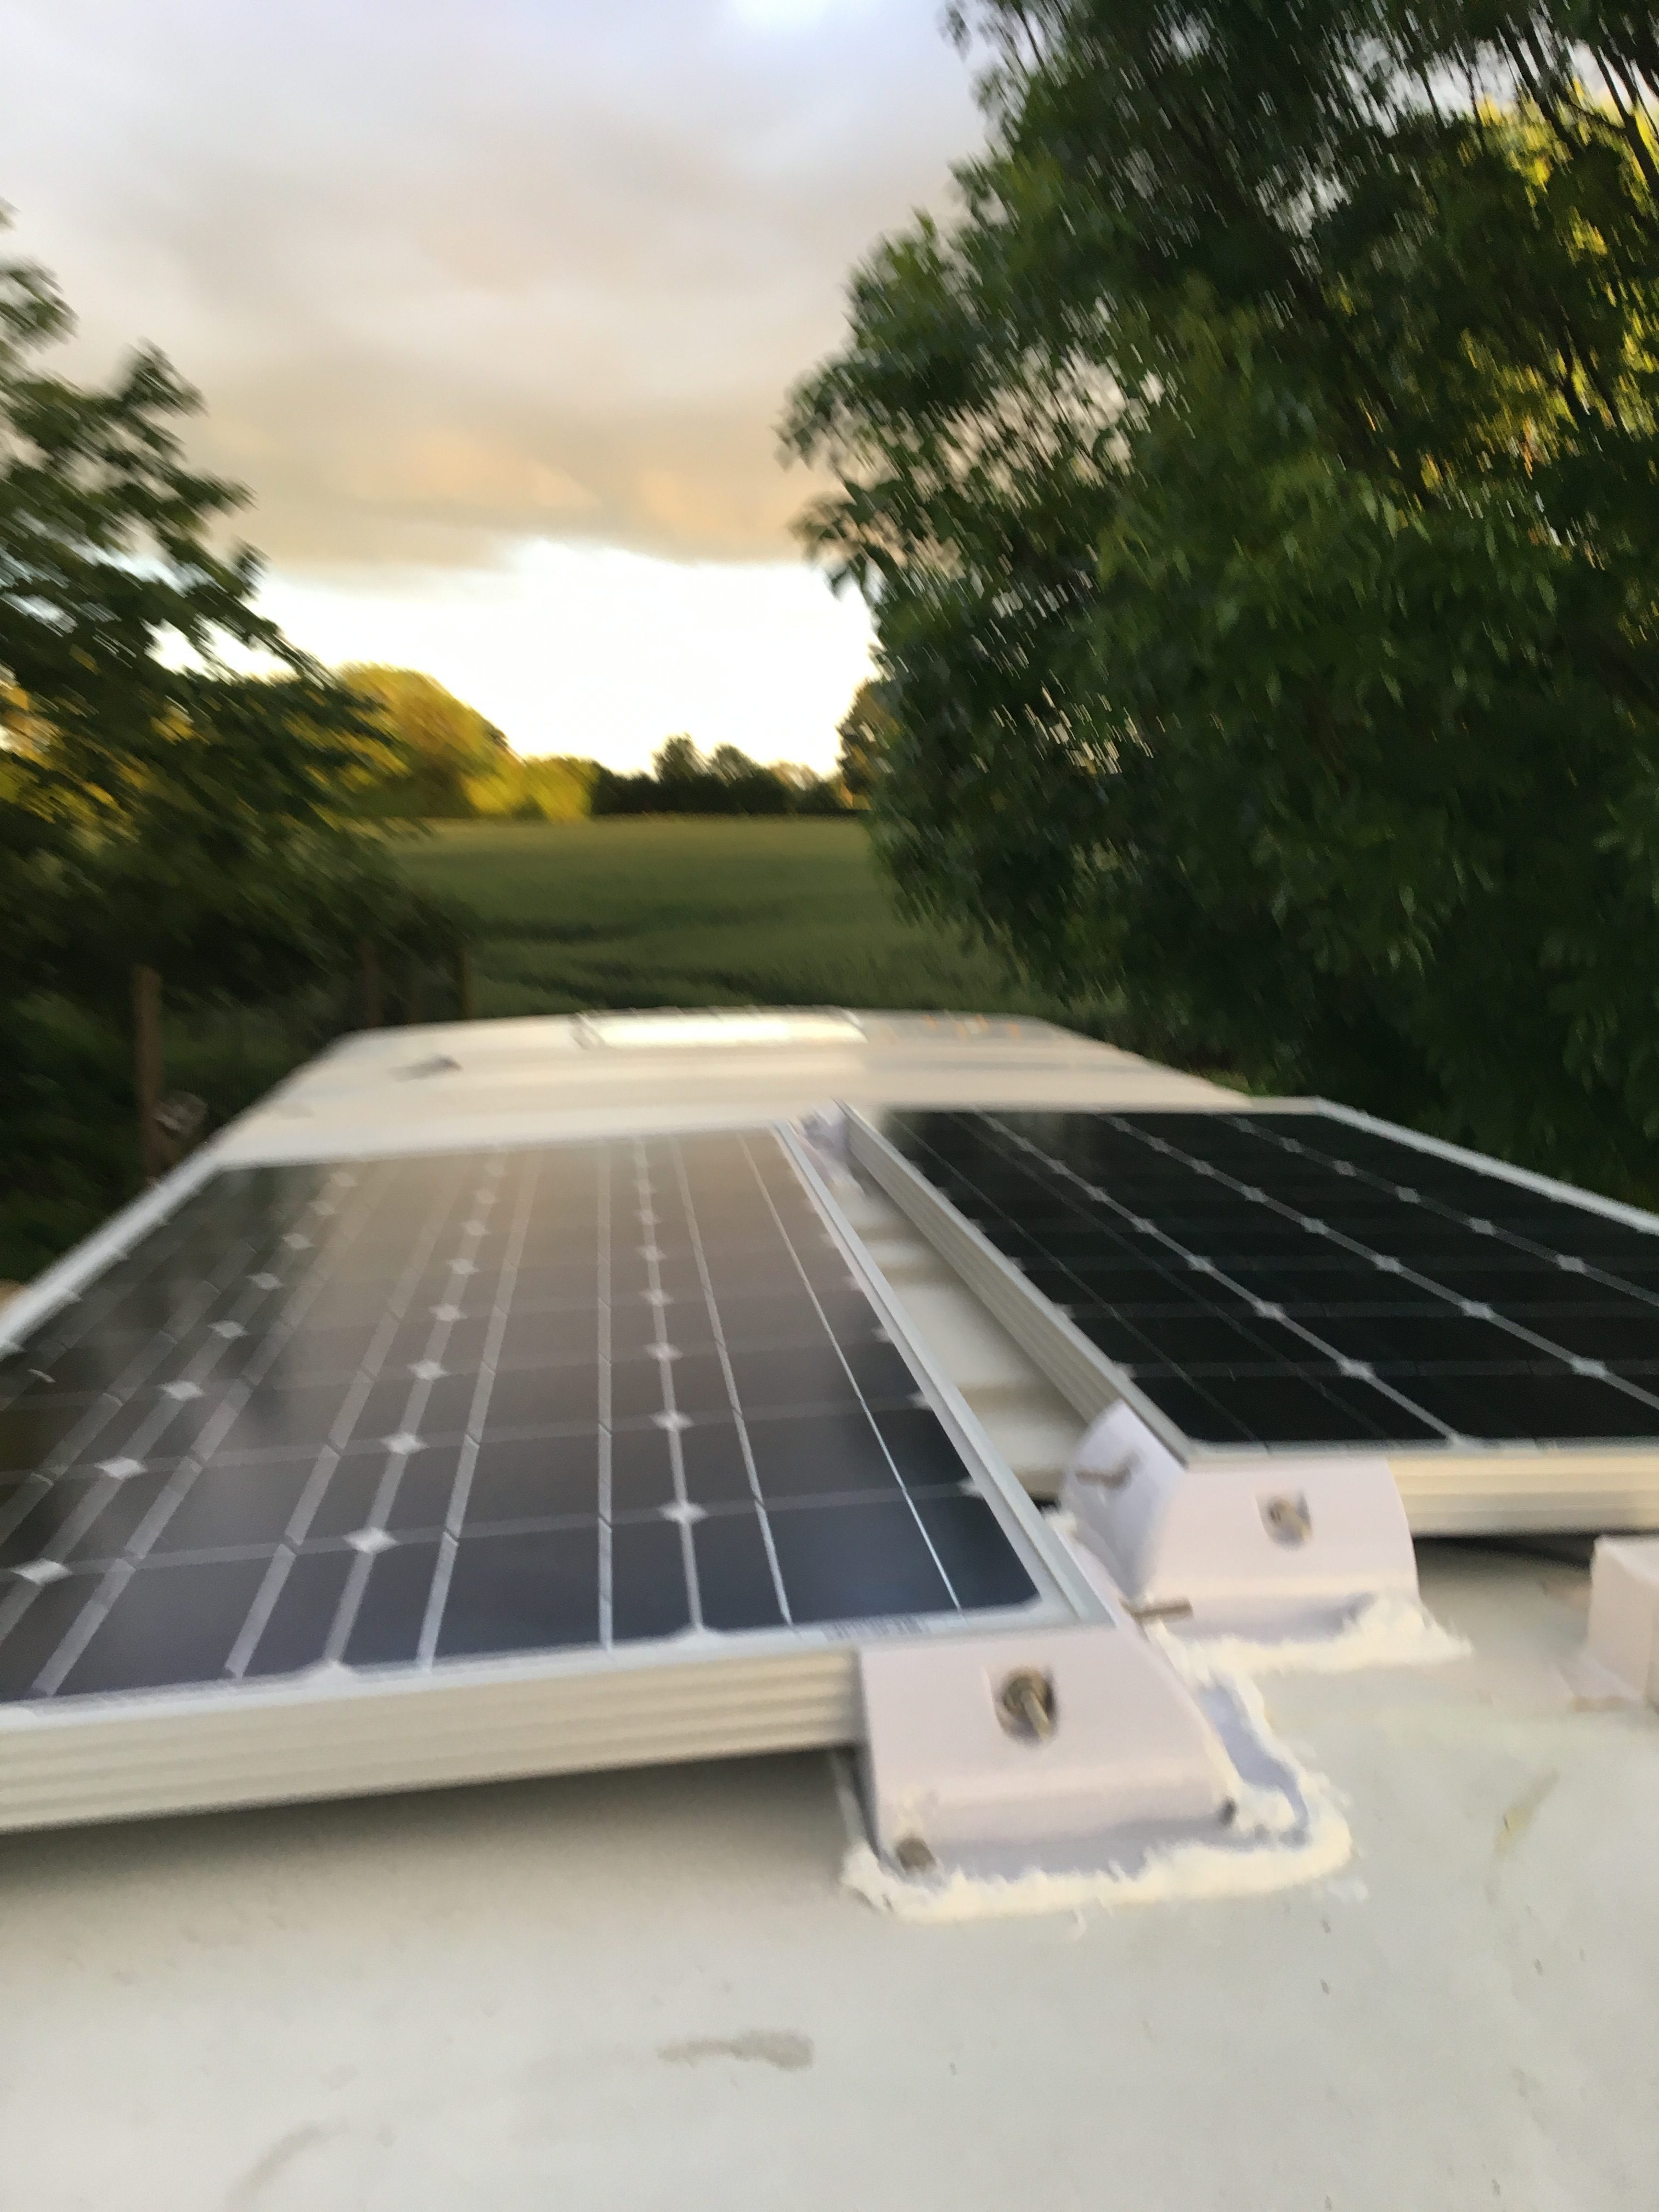
Installing the Solar Panels

First, you’re going to want to mount the solar panels on the roof. You can buy roof mounting kits online and these are a quick and easy way to secure your panels to your roof. Bolt the mounts to the van and then bolt the panels to the mounds, be sure to seal around the holes in the roof with sealant to stop any leaks. Attach the wires to the solar panels and thread through the mount and roof, attach the wire mount to the roof and seal.
Next, you want to attach your split charge relay in the engine of your van. Run a positive (red) wire to the starter battery within the engine of your van and attach to the battery. Place an inline fuse in the wire before reaching the battery. The other end of this wire needs to attach to the relay unit itself, inside your camper. Run the second wire coming out of the relay unit to your batteries and attach. Earth the earth wire to the bare metal of the van.
Once your solar panels and your split charge relay system are wired up you can move onto connecting all of the other parts of your electrical system and appliances. To find out how to safely wire up your electrical system check out our E-book here.
10. Walls and Ceiling
There are so many different finishes that a camper’s walls can have, each creating their own unique look and feel within your van. The walls could be built using cladding, giving it a wooden cabin feel or your could use large pieces of sheet wood (MDF, OSB, Ply) left bare, painted or carpeted to give the finish you desire. Just remember that you want to use something fairly light to keep the weight of the van down. Whatever you want your van to look like, the building method is similar and this is what we’re going to look at next in our how to build a camper guide.
Once all of the wiring is in place and you’re happy with its placement you can move onto building the walls. To be able to build the walls you first want to build a wooden rib cage onto the mental frame of the van. This will make attaching your wall much easier, as you will be screwing into wood, not metal. To make your rib cage you will need long lengths of wood measuring around 25x30mm- thin enough so that it will curve slightly, with the walls of your van but thick enough to hold the screws you will be using to attach your walls to it.
To build your rib cage, measure each vertical metal support in your van, as this is what you will attach the wooden rib cage to. Try to ensure your wooden beams extend all the way to the floor and the ceiling, even if it means making the beams longer than the metal. If your van is especially curved and you find the wooden beams are struggling to bend with it then horizontally score the beams in several places to make the bend easier.
You will need to cut one beam for both ends of the wall plus two or three in between, depending on the length of your van. You will also need to do the same on the roof of your van. Ensure that you have a frame around any windows that you have in your camper so that your walls can be secured around the windows. You do not need to attach a rib cage to any of the doors.
Once you have cut all of your pieces you’re good to go ahead and attach these to the metal rib cage, this will be easiest if you pre-drill a hole for the screw in the metal. Ensure you select a drill bit slightly smaller than the screws you will be using so the screw still has something to grip to, making your rib cage nice a secure.
Side Note:
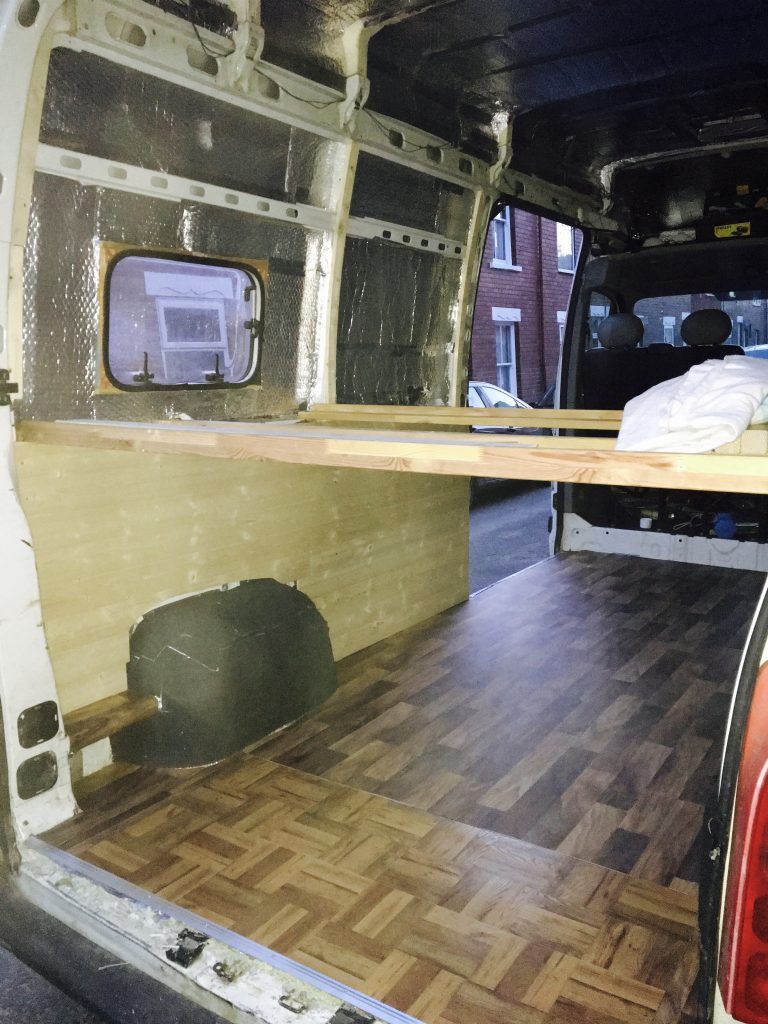
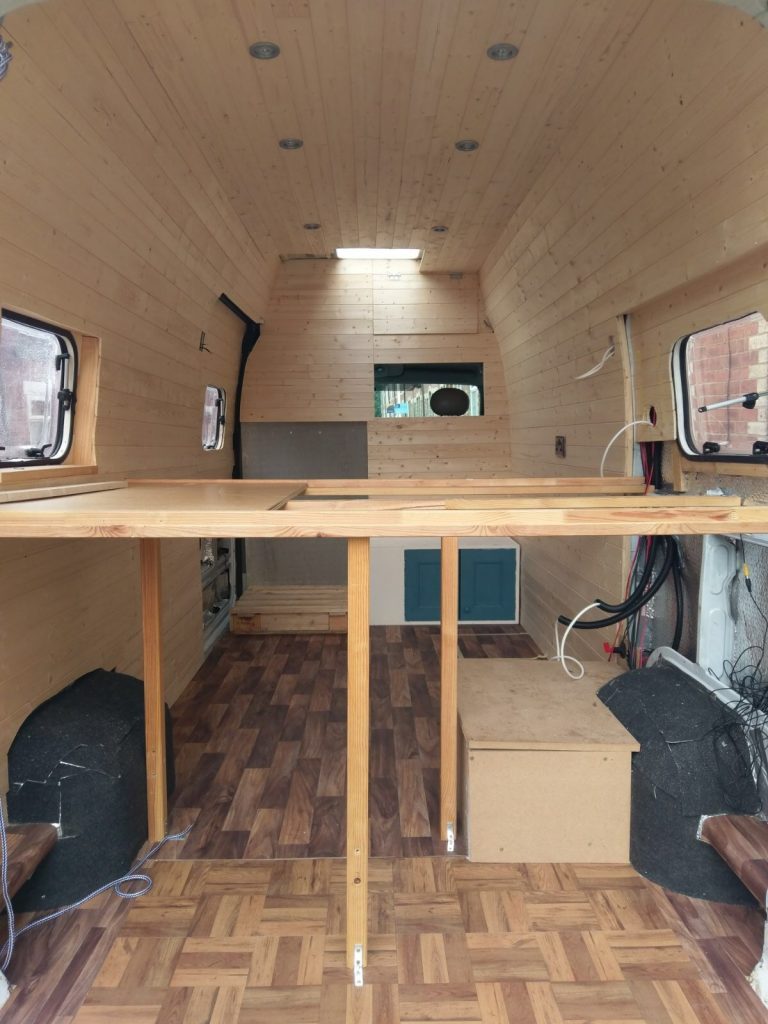
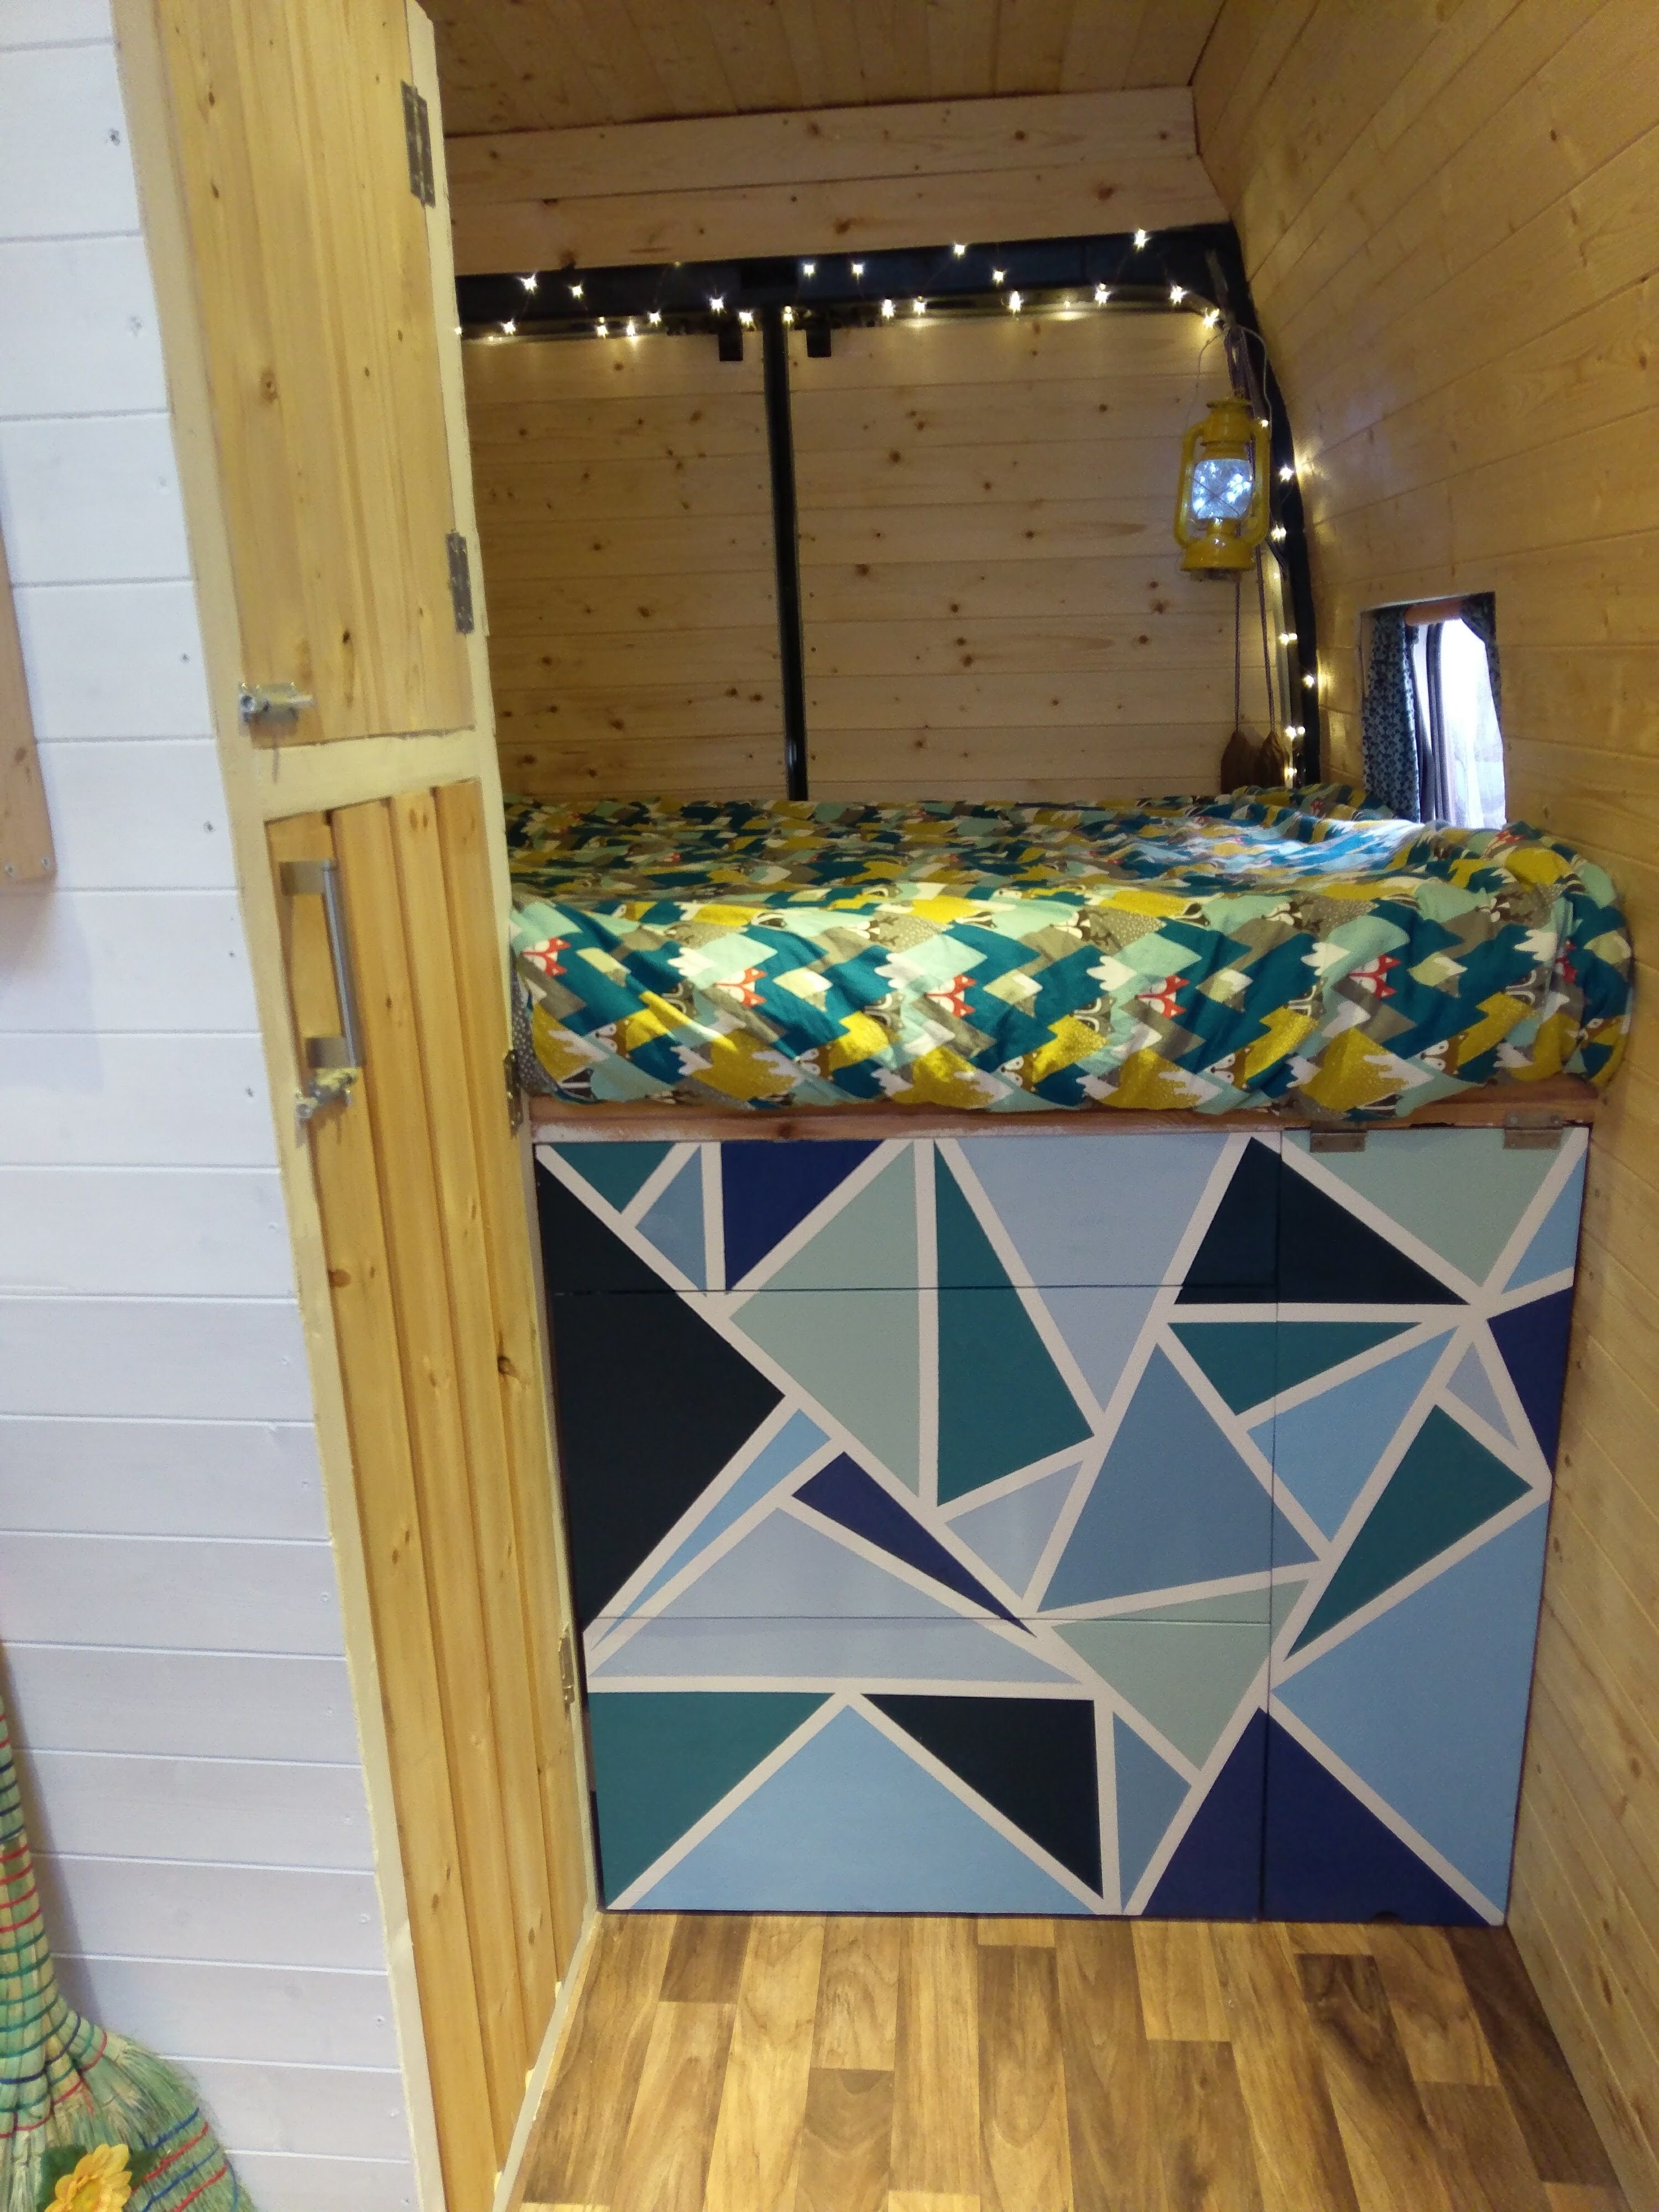
If you plan on building a fixed bed in your camper and your van has a metal beam running horizontally at the right height for the bed then you want to take advantage of it before all of the walls go up. By attaching a frame for the bed base to the metal structure of the van itself you are ensuring that it is a super strong bed structure. The bed base consists of three strong beams of wood running across the van from one side to the other, one for each side of the bed and one in the middle. Make sure that you have the measurements correct and matching that of your mattress.
Once the wooden rib cage is up you can move onto erecting the walls. This will vary slightly depending on the materials you are using. If you have decided to use wooden cladding for that cosy cabin feel then you will want to measure each piece as you put it up. If your van is longer than one piece of cladding then think about where you want the two pieces to join. Generally, a staggered formation is more forgiving as you cannot compare each join to the previous one, as the join is not going to be one straight line.
Attach the cladding, using screws, piece by piece and ensure it is tapped firmly onto the pice below. Make sure you remember to countersink your screw holes so that the screw heads lie flush with the wall. It is at this point that you add your insulation behind the cladding, if you are using soft insulation. Continue cladding until all of the walls and the ceiling are covered. Make sure to cut out holes where the lights and any plug sockets/light switches will be.
If you are using some form of panelling then you still just attach to the wooden rib cage. However, this will take more thought in terms of measuring and cutting, especially if you don’t plan on covering the panels. If you are going to be covering/carpeting the panels then your joins don’t have to be too precise as they will be hidden anyway.
Dealing With Curves
Whatever material you decide to create your walls with you’re going to encounter one main difficulty: dealing with the curves in your van. Each van is different but most are curved around the doors, and if you’ve installed any windows you will want a nice finish around them.
A good way to ensure you’re cutting a perfect curve to match your van is to make a template before you cut the wood. You can make this out of cardboard for larger areas, such as the wheel arch, or masking tape for smaller areas. Simply place the cardboard or tape around the area and adjust until it is a perfect fit, the trace this shape onto your wood and cut carefully with a jigsaw. This may be time consuming but it is worth it for the professional finish you can create.
Lights and Plug Sockets
Once you have completed the walls you can add the finishing touches such as the lights and the plug sockets/switches. If you have correctly set up your wiring this is just a case off attaching the correct wires (black to black, red to red) and fixing the unit you are using to the wall/ceiling. You can either attach the wires by twisting the bare wires together and covering the join in electrical tape or, for a more secure join, solder the wires together. Once all lights, switches, and sockets are in then the shell of your van is complete!
Now that the shell of the van is complete you can complete the next steps of our how to build a camper guide in any order you like- whatever makes the most sense to you and the layout of your camper. Below we are going to cover the essential points needed to create a camper, you may want to add something extra or ignore some of the steps, as every handmade camper van is unique.
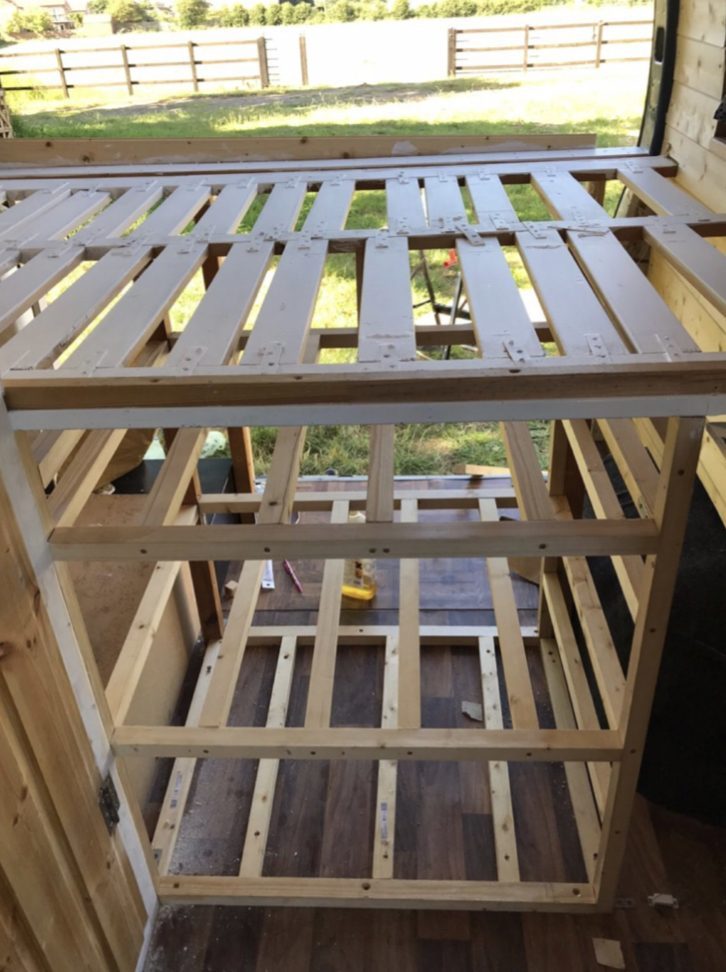
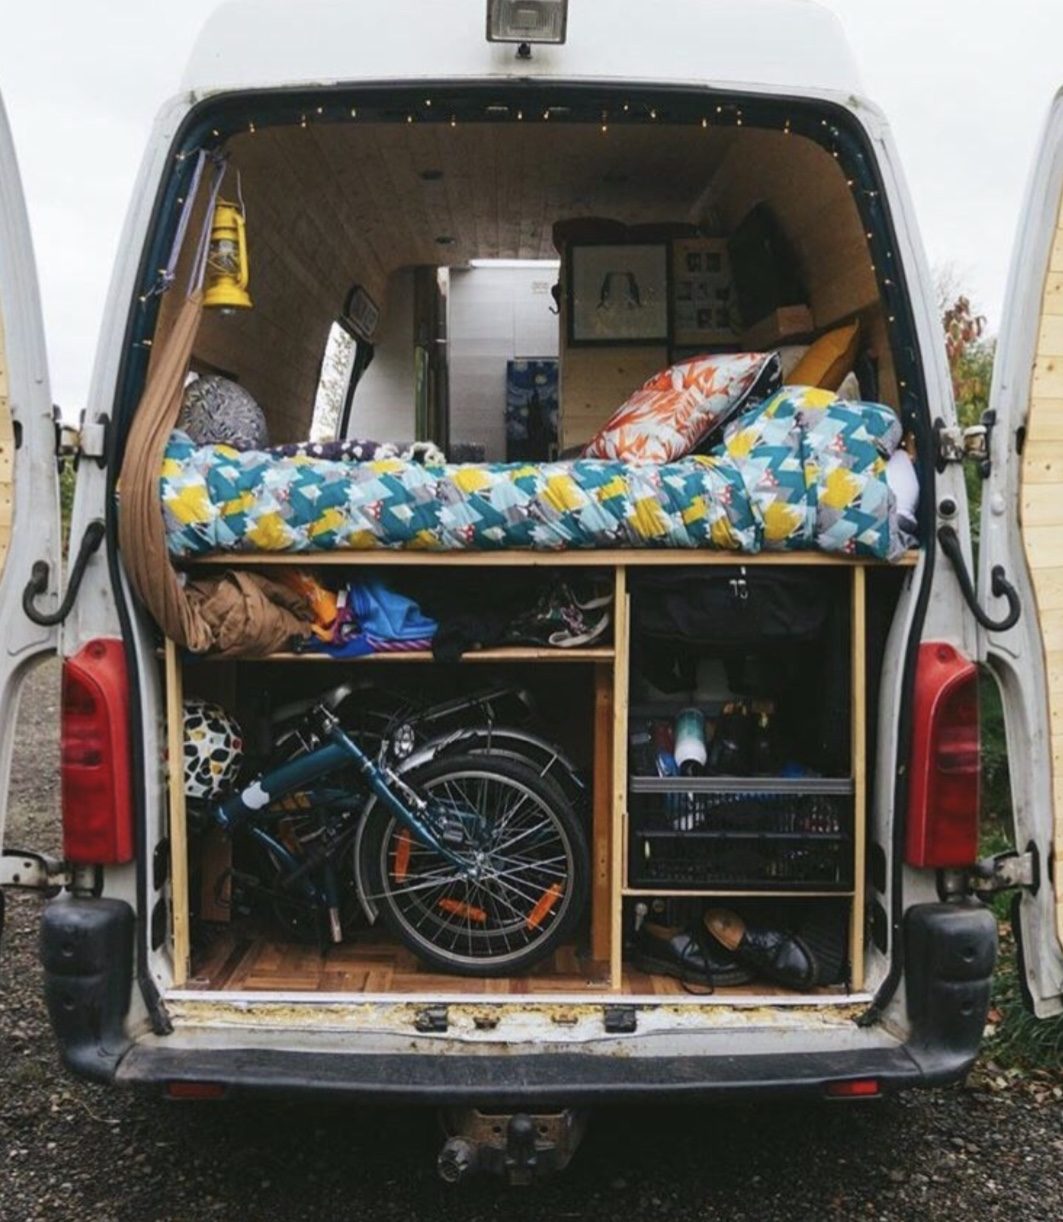
11. Fitting The Bed
Next up on our how to build a camper guide is fitting the bed, we’re going to talk about how to build a fixed double bed but there are many other styles you could go for. If your van had its metal ribcage at the right height for your bed then you should already have the main beams for the bed base fitted.
To strengthen the base you will want to add some legs for support. When doing this think about how the placement of the legs is going to work around any storage you may be building beneath the bed- can you place then so that they also make up the side of a cupboard or drawer? Once you have measured, cut and decided on the placement of the bed legs then you can attach them to the bed and floor. To attach to the bed, screw down into the legs from the top of the bed frame, two per leg do they don’t spin. To attach to the floor you can use L-brackets, screwed into the side of the leg and then into the floor. Lay bed slats and a mattress on top and your bed is complete!
12. Cupboards and Drawers
Next up in our how to build a camper van guide is cupboards and drawers. Once you have the bed in place most of the rest of your van build is going to be made up of cupboards and drawers in different shapes and sizes. This section will vary massively depending on the chosen layout of your van, but the same principles can be added to your design.
Drawers are a great solution in a van build as when driving the vehicle things are going to move around a little bit, falling to the back of your storage. In a cupboard this can get really annoying but if you are able to create drawers in your space you will always be able to see what is at the very back.
The easiest way to build a cupboard or drawer is to first create a frame for it, and then attach the siding. First, measure wooden beams suitable for making the frame of your cupboards to the length you need them, then cut and carefully attach together with screws, making a cuboid. Once this is done measure, cut and attach the side pieces- this can be done with wood glue so no screws are showing. If you are building a cupboard then the door will need to be attached using hinges and if you are making drawers then runners will need to be added.
Remember that a large cupboard or drawer space may want to be broken down into smaller spaces using dividers or compartments. This stops things from rolling around so much and can minimize spills and breakages. It’s also a great way to stay organized while on the road.
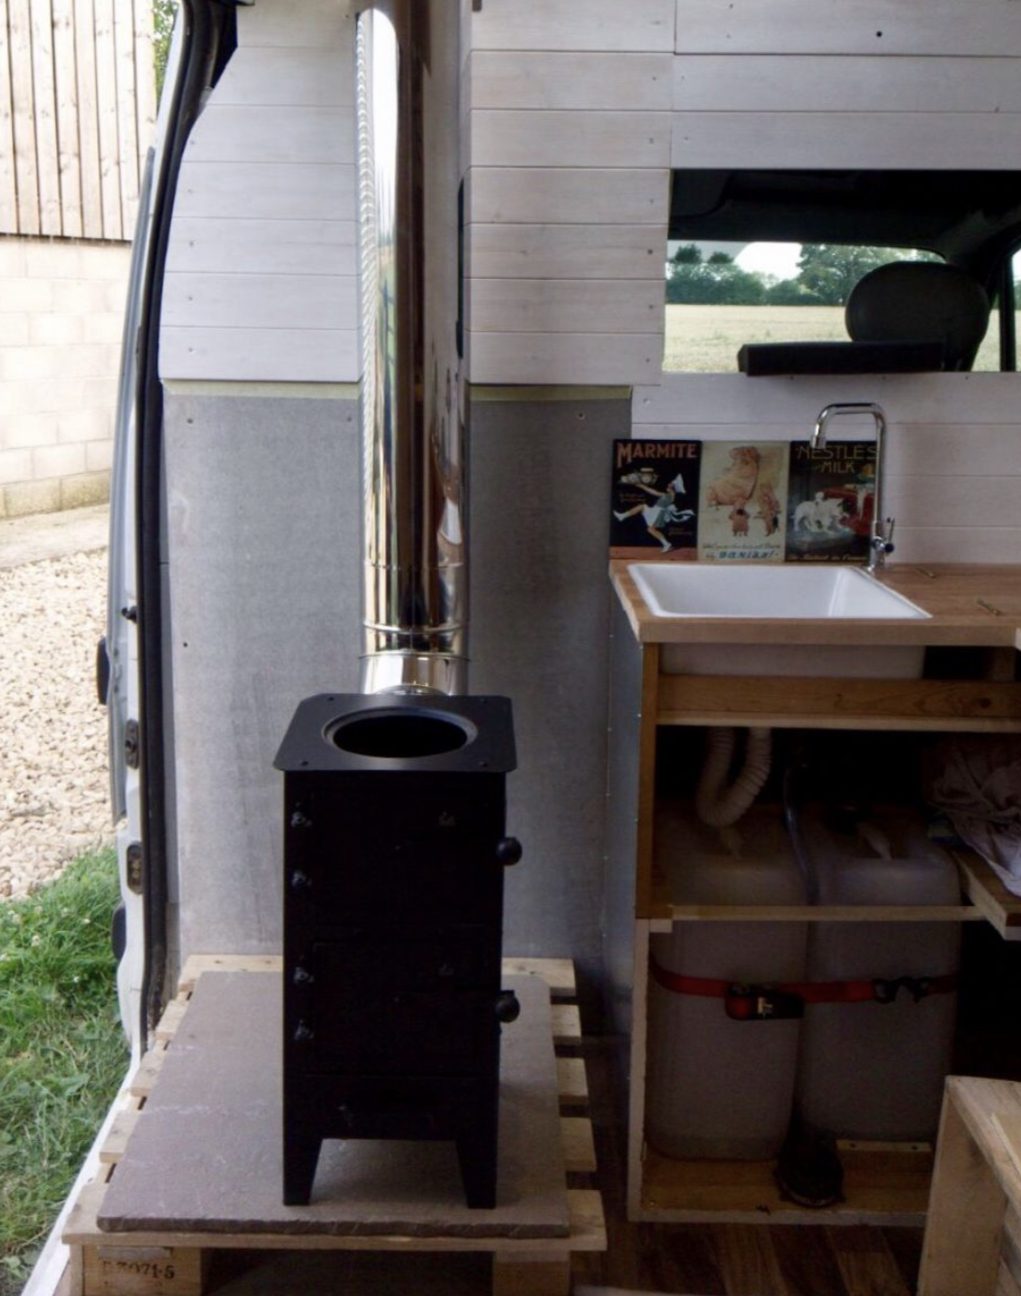
13. Heating System
Next up in our how to build a camper guide is fitting the heating. There are several different options for how to heat your camper including a gas heater, diesel heater or a wood burning stove. Gas and diesel heaters work in a very similar way, just use different fuel to work. Diesel heaters are usually more effective and produce a dryer heat compared to a gas heater, they are however, more expensive and more complex to install. A small log burner is a good option if you’re on a budget as they are generally much cheaper than a gas or diesel heater, but they are considered unsafe by some and this can cause problems finding insurance.
Log Burner

To fit a log burner the most important thing is to ensure you make it as safe as possible. This includes using a twin insulated flue, mounting hardy backer behind the burner, ensuring it is a safe distance away from any other furniture in the van and safely raising it off the floor on a fire retardant material such as stone or tiles.
Once you have considered and implemented all of these factors fitting a log burner is a fairly straight forward process, the most difficult part is creating a hole in the roof for the flue to come out of. To do this, carefully measure and cut a hole using a jigsaw from the top of the roof, place the flue down the hole until it is able to connect to the log burner then seal the hole on the roof by covering it with flashing as per its instructions. Ensure the burner itself is securely fixed to the surface it is sat upon.
Gas/Diesel Heater
Gas and diesel heaters are usually concealed within a cupboard or seat so it is good to install them once its casing is already build. Once fixed down the heaters need to be hooked up to either the diesel or gas, this can be done yourslf and, if using a gas heater this is a fairly starightforward process. It is however, always good to get it checked by a gas safety inspector.
If you have decided on a diesel heater this is a more complex process as the heater needs to be connects to the vans diesel tank. It can be done yourself if you know what you’re doing, however, this can often void the warranty of your product. You can have the whole unit fitted by professionals or, often, mechanics can connect it to the diesel tank and you can hook it up to the electrics, this method is also usually much cheaper.
Once the unit is in place and hooked up to its fuel supply you simply need to connect the electrical element which is a case of attaching the right wires to each other, as you previously did with the lights and plug sockets. If you planned your electrics correctly the wires should already be in place, ready for you to hook up.
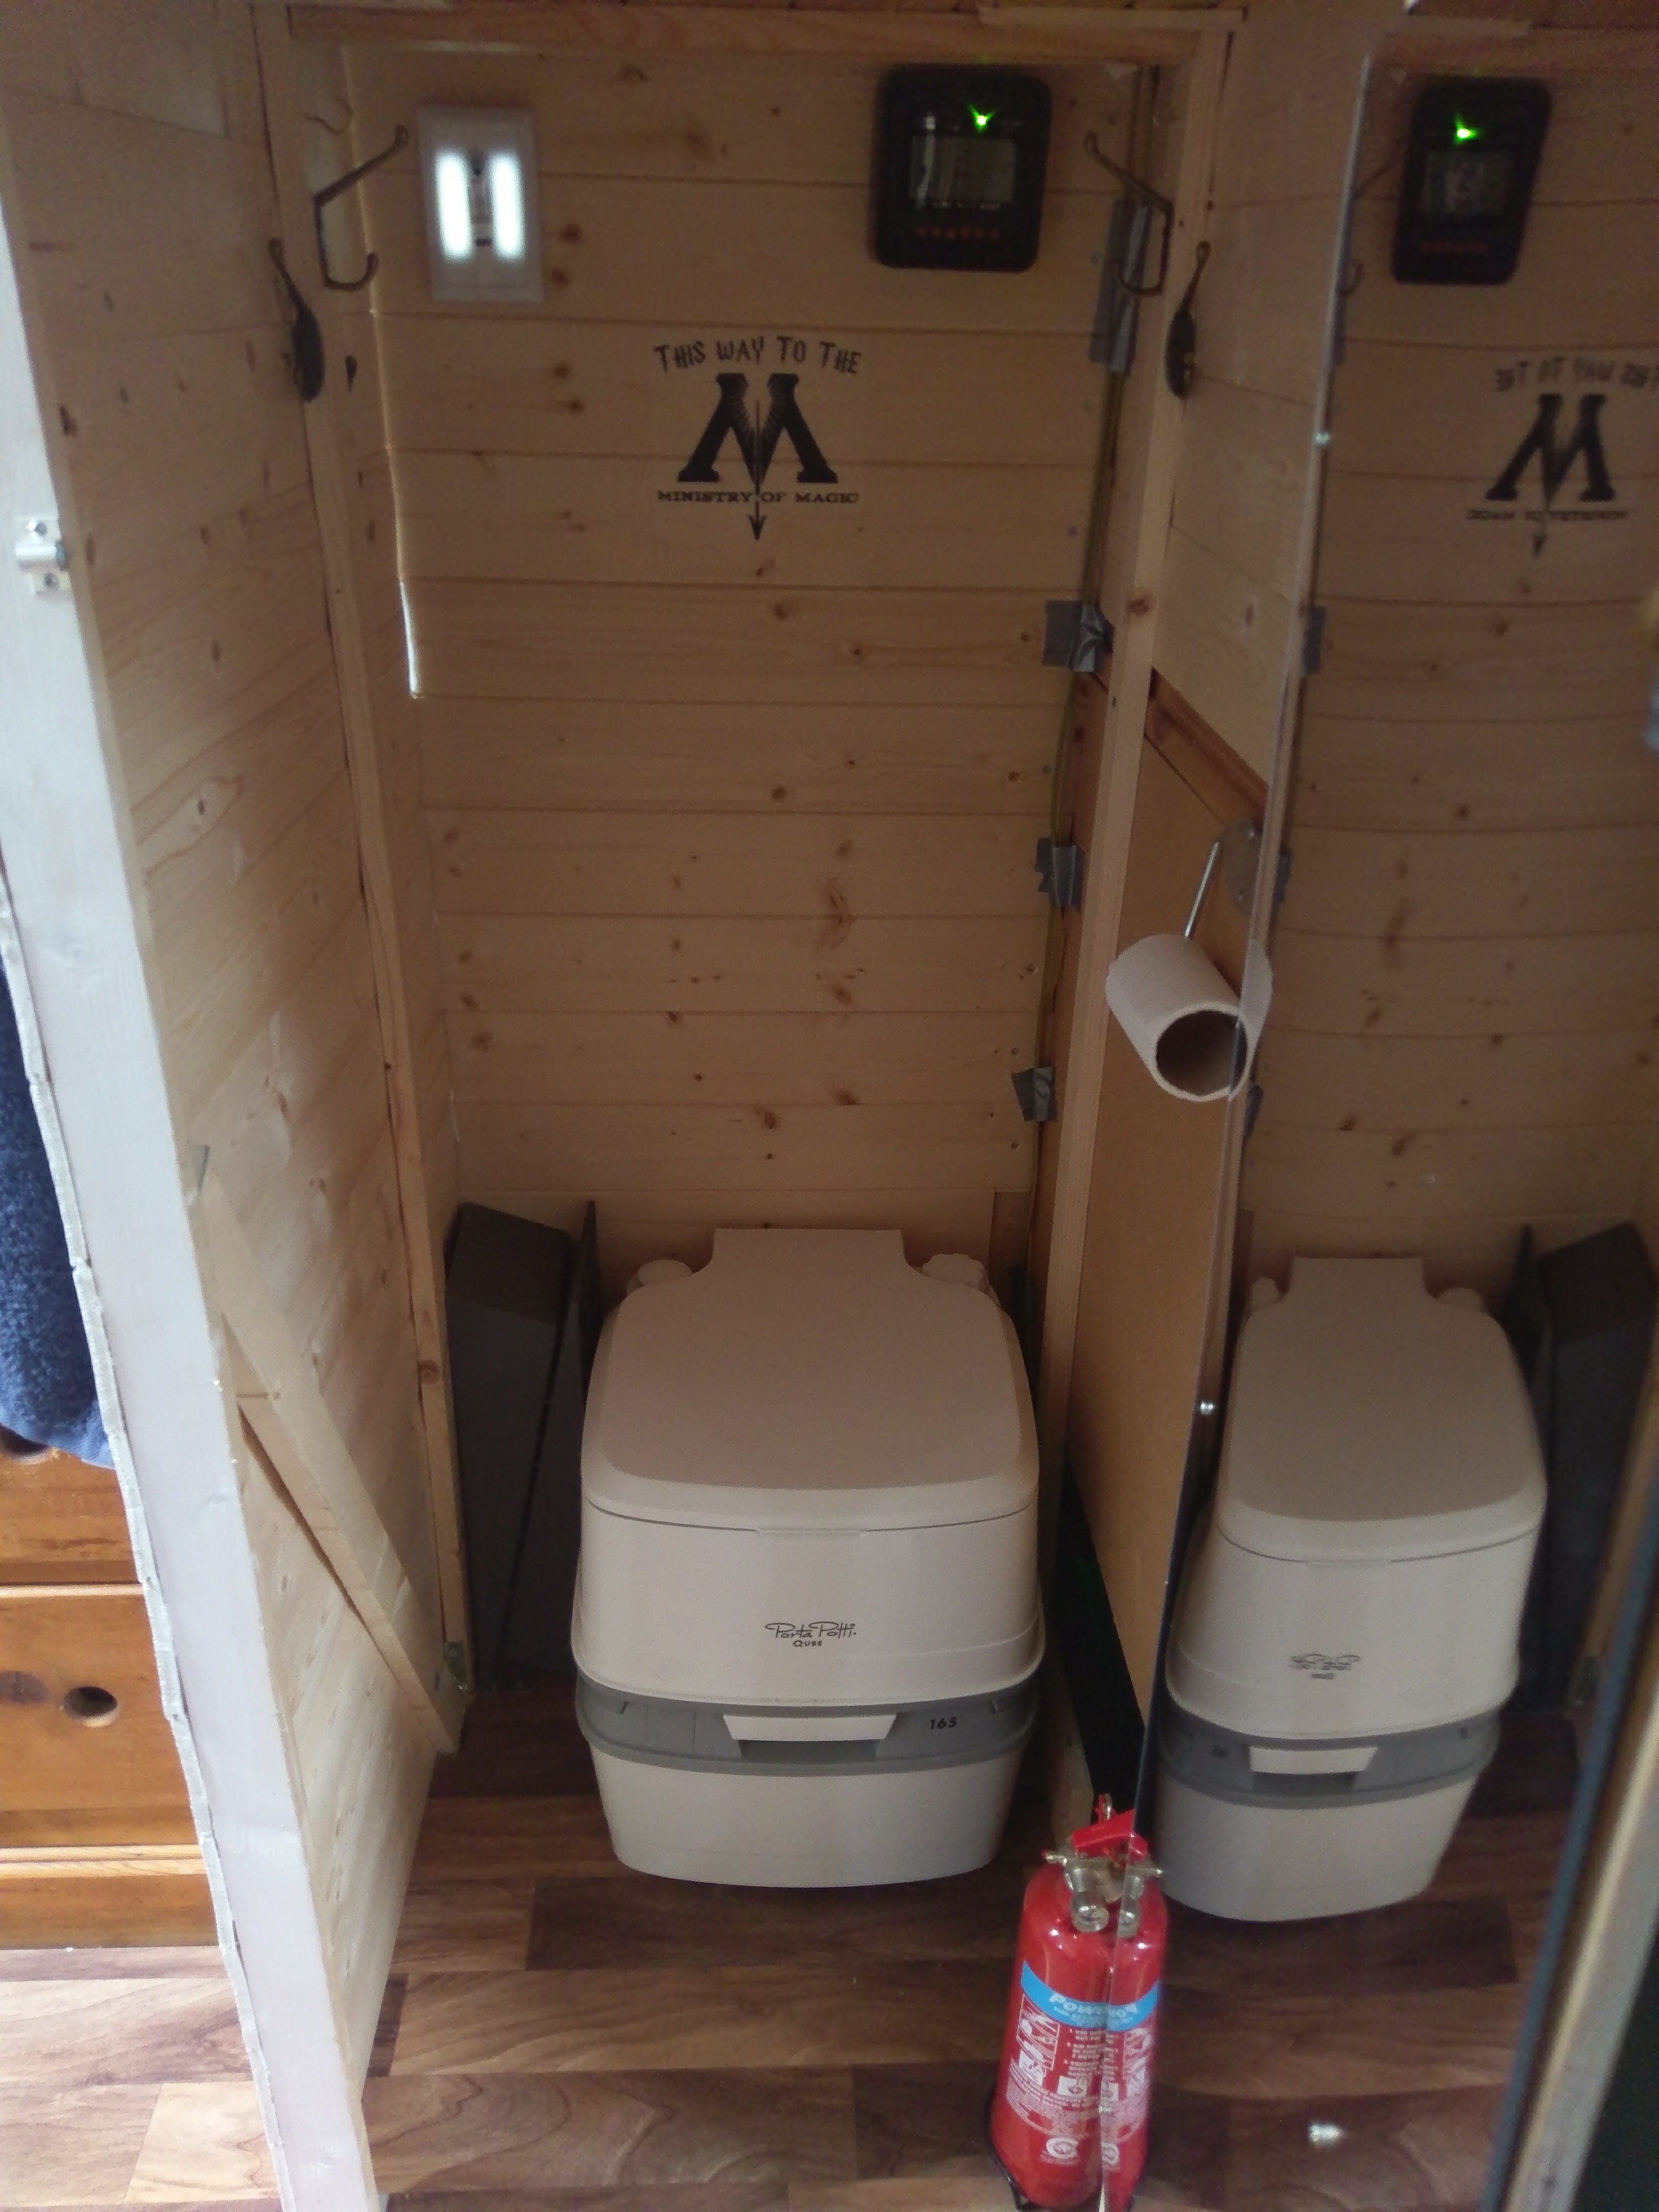
14. Toilet

Something that makes a house a home is being able to go to the bathroom! So next up in our guide on how to build a camper is a whole section on toilets. If you decide not to build a whole bathroom which also includes a shower you can save on space by hiding your toilet beneath a seat or on a sliding panel under the bed. Either of these options means that your toilet will not be on display all the time but will still be easily accessible for when you’ve got to go! If you do decide to place your toilet on a sliding panel just remember that the runners need to be strong enough to hold your weight and the weight of a full toilet.
There are a couple of different options that you can choose from when looking for a toilet for your camper van. The main decision is whether you want a chemical toilet or a composting one. Composting toilets are a brilliant option as they are much more environmentally friendly compared to a chemical toilet.
Composting toilets also don’t need to be emptied as regularly and are easier to empty when the time comes as its just compost, although pee does still need to be disposed of regularly. The main down side to a composting toilet is that they can be very expensive- hundreds of pounds, when a chemical toilet is around £50. If you want some more information on toilets check out our article on the best camper van toilets.
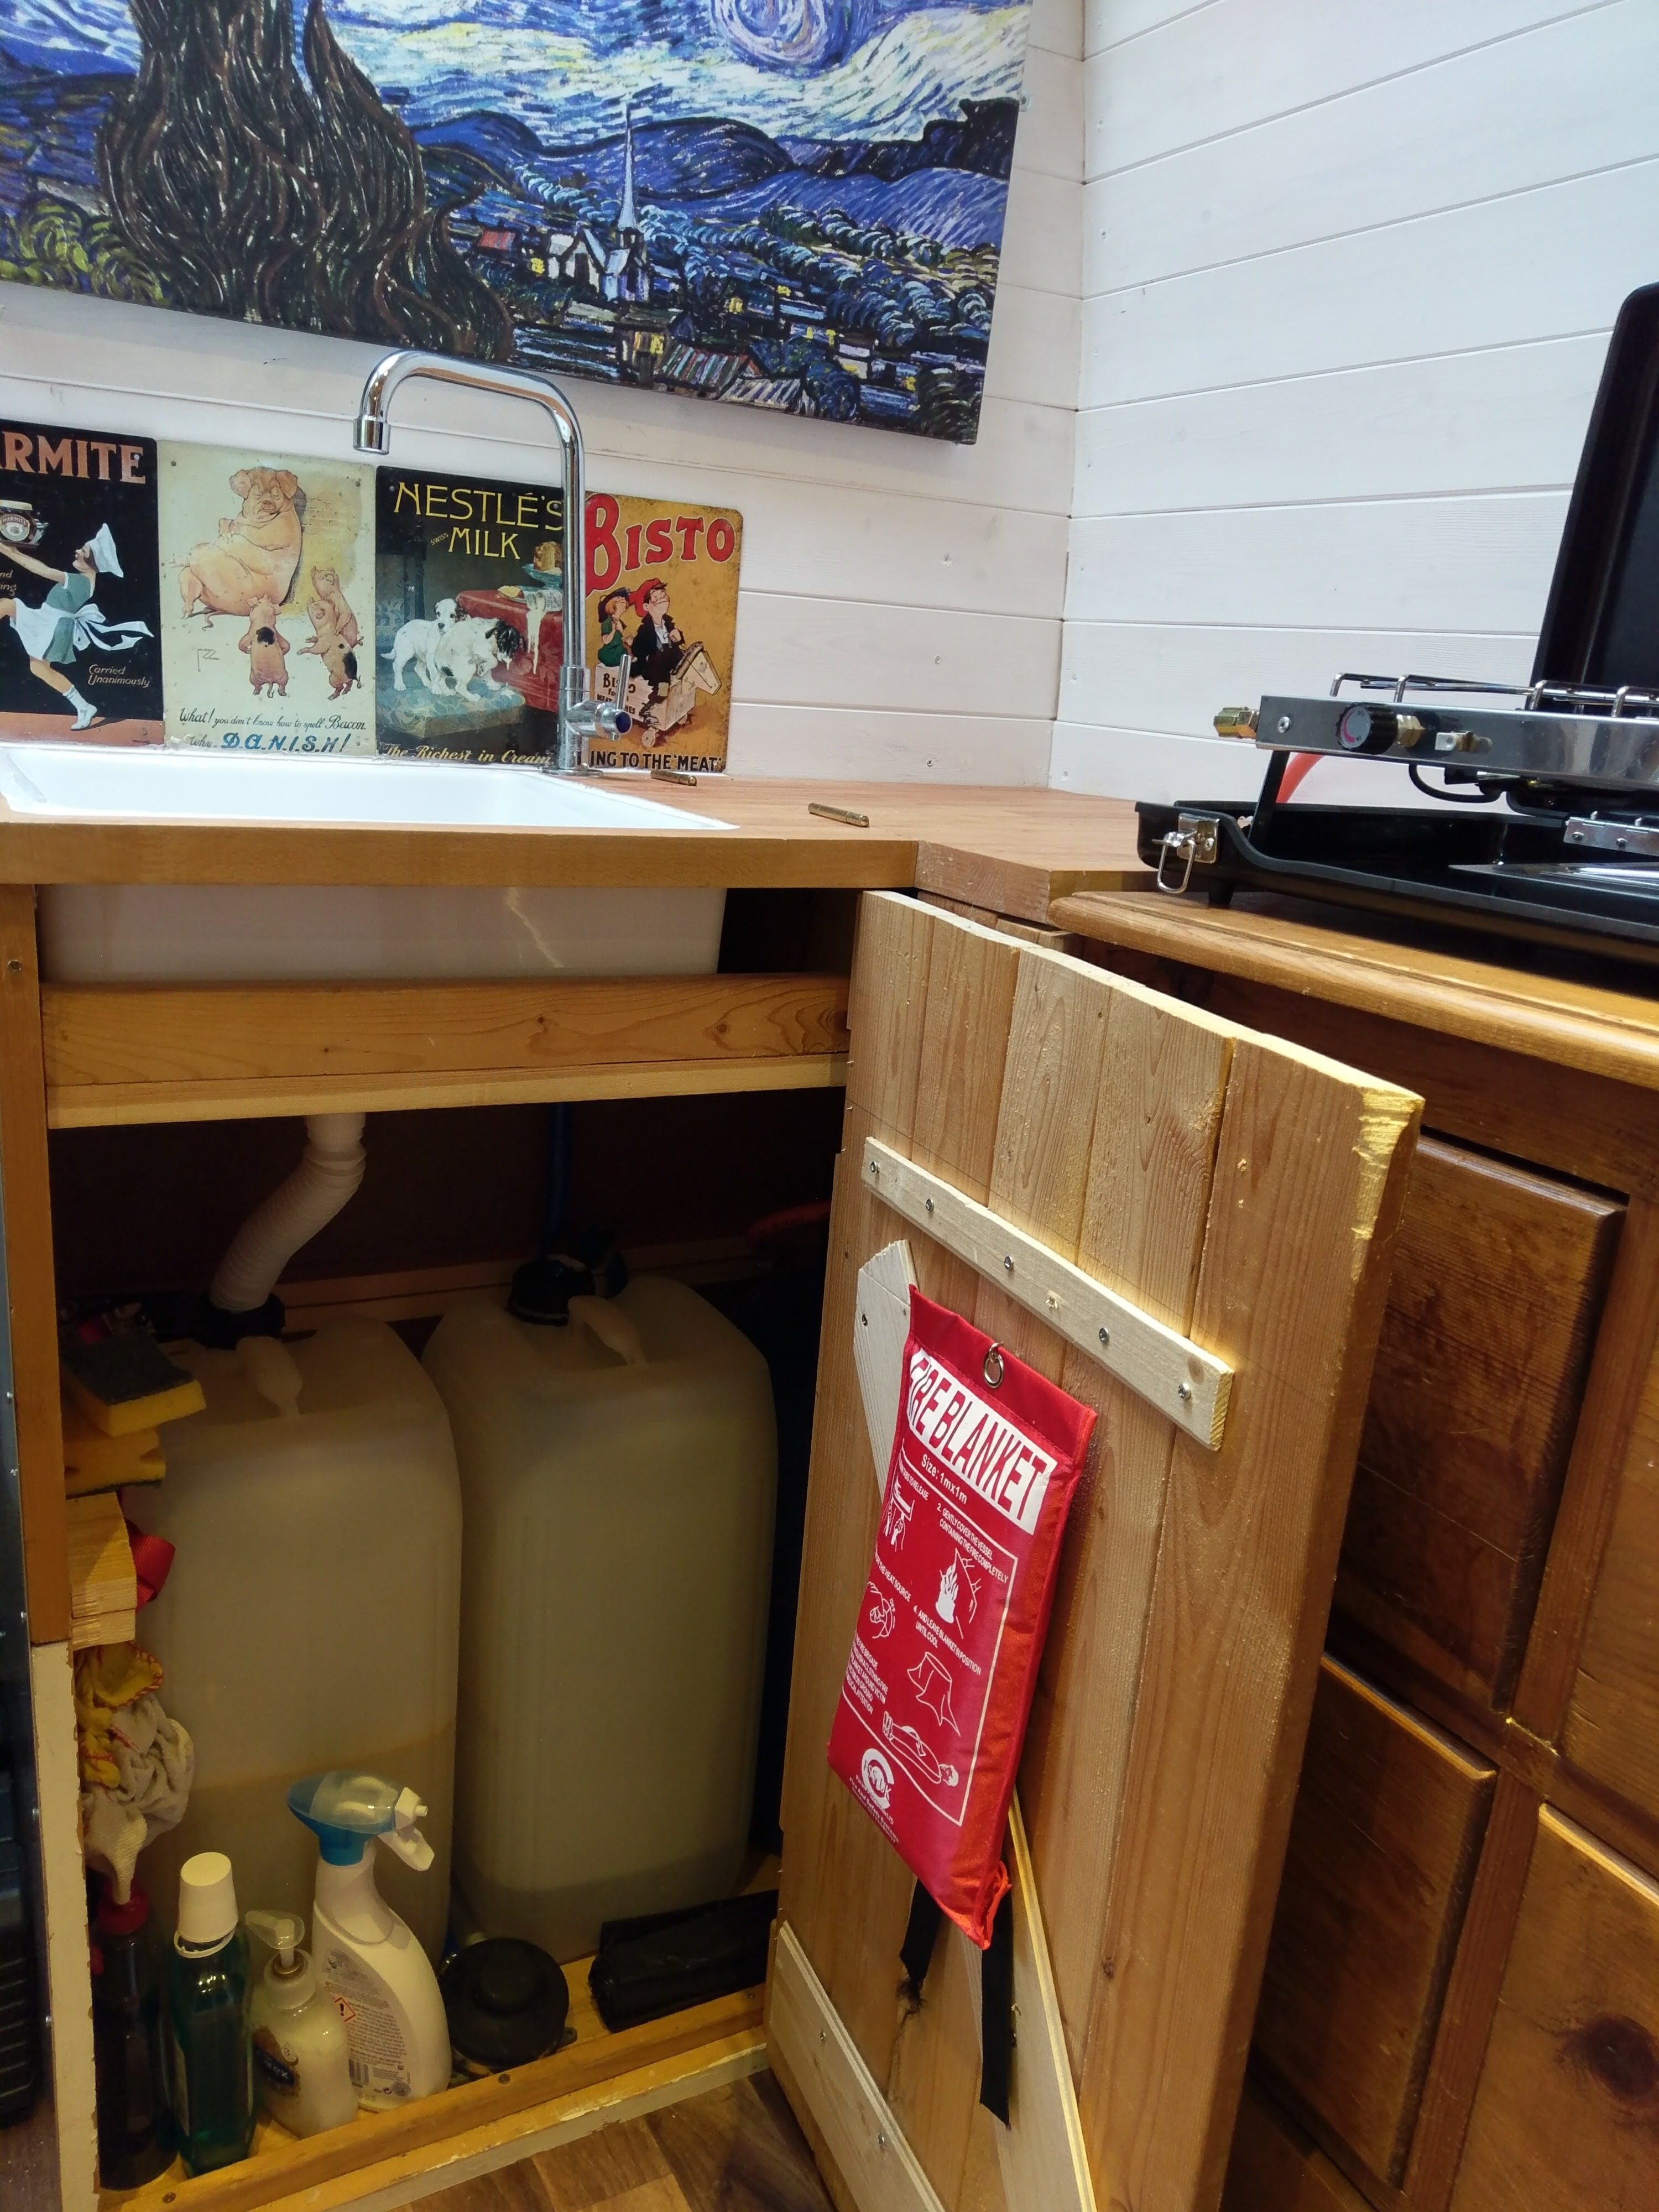
15. Gas and Water

Next in our how to build a camper van guide we’re going to be looking at the gas and water. We’ve taken a simple approach to installing gas and water. There are much more complex approaches that include storing gas and water on the outside of the van but we have gone for the easiest DIY option.
For the water you will need two large canisters- we went for 25 litres, a food pump, piping for fresh and waste water and a tap. Cut holes in the lid of each canister so that the tubing will run through and into the canister. For the fresh water the pipe wants to reach the bottom of the canister but for the wast one the pipe wants be very short inside, so it doesn’t sit in the dirty water. Attach the fresh water pipe to the foot pump and run the other end into the fresh water canister. Attach a second length of piping to the foot pump and then to the tap. Then connect your sinks drainage to the waste water canister. It really is that simple!
Remember that you will want both water canisters to be easily accessible as you will need to fill and empty these regularly when on the road. The also want to be nice and secure to ensure that they will not fall when driving.
If you are struggling for space below your sink to fit two large canister then you could always get a smaller one for the waste water. This works in just the same way, the only difference is that you will need to empty the waste water more often than you fill up the fresh.
If you plan on travelling long term in your camper van it is a good idea to get a refillable gas bottle, especially if you plan on travelling to multiple countries. This is due to the fact that regulators can have different attachments depending on what country you are in and that different countries have. Different law around buying a gas bottle. However if you fit a refillable bottle then you can refill at any gas station that stocks LPG.
Whether you decide to go for a refillable or a standard gas bottle the installation process is the same. Simply attach your regulator to your bottle and attach a gas pipe to the regulator, using clips to ensure no gas can escape. Then, attach the other end of your pip to your gas burner, again using clips. You may want to get this checked out by a gas safety specialist to ensure everything is connect correctly.
16. Garage Area

If you have built a static bed at the back of your van, the space below it is ideal for a ‘garage’ area- a space to keep any outdoor gear and equipment. So, the final point on our how to build a camper guide, is how to creat a garage area in your van.
The space under the bed is out of site when in the living space of the van, assuming you have utilised the front half of the under bed storage for drawers or cupboards. This means that the organisation of the garage area doesn’t have to be too fancy, if you don’t want it to be. It is nice just having a large open space to be able to rearrange if and when you get new gear.
If you have specific large items that you want to be able to store in your van such as bikes or a blow up paddle board then it is a good idea to build any storage areas that you might want around these bulkier items. This way you know that you will have enough space for these large items.
It is important to allow air to flow beneath the bed to stop the build up of condensation in this small space. This is something you will want to factor in when creating your garage area. Although it is good to make the most of your storage space you do still need to leave enough room for air to flow around.
17. Keeping It Legal
Different countries have different laws regarding DIY camper van conversions so it is a good idea to do your research before completing a van build to see if there are any guidelines that you need to adhere to. Once your build is complete you will need to register your van as a camper in order to keep it legal. This also tends to make your insurance much cheaper so it is worth doing!
Final Thoughts…
We hope you found this quick how to build a camper van guide helpful. If you you want more information to help you with your build then check out our in depth E-book for just £4.99. The E-book gives you step by step instructions on how to create a cosy home on wheels, as well as a 100 page guide on how to wire your electrical system. Share your conversion pictures with us by joining the Van Clan over on Facebook, Instagram and Twitter.


COMMENTS
Please note that all comments will be checked by our team before being approved.