Best Campervan Insulation – Which Products Are Best For You?
Put your hands up if you’re planning on converting a campervan? If you’re reading this article then we’re going to assume that you’re after information on how to build a campervan yourself, and we can confirm that you have come to the right place.
So, you’ve bought your van, cleaned it out, and now you need to turn it into a liveable space. But what important elements do you need to consider to make it feel like a cosy tiny home?
If you’re reading this in cold and rainy England, then one of the UK van life Hardest Bits is keeping warm in the winter. But if you’re also reading this while perched on a hot Texan veranda, then you’re going to want to know how to keep your van cool in the summer too.
It looks like you need to know what the best campervan insulation is for your build, and we have 6 different options for you to help turn your alternative living dreams into a reality.
Getting your insulation right is a crucial part of your build; once your electrics are in place and your walls are up, you don’t want to start thinking that you wish you had gone for another option. Insulating your van can be a time consuming process and possibly the second most expensive before your electrical system, so it’s important to know the facts before you crack on and click that buy button.
We have been lucky in the sense that we have tried and tested a few of these insulation methods in various builds, and we’re going to give our honest reviews on both. So, without further ado, let’s crack on with our best campervan insulation tutorial.
Best Campervan Insulation For Your Tiny Home Build
For everyone who is starting out on a maiden conversion voyage without any prior building knowledge, I thought I would just give you a little bit of an introduction into why we insulate our vans. You’re essentially aiming to turn a metal box into a liveable space, which is trickier than it sounds.
As you know from your experience of living on Earth since birth, metal can get both very cold and very hot, and it’s our job to try and balance that out without producing the dreaded by-product called condensation. You want to keep both your van walls and your insulation as dry as possible once it’s installed, otherwise you could end up damaging the outer walls of your camper and rotting through the metal.
Campervan insulation is as hotly contested as the subject of which are the best campervan toilets, and everyone that you speak to will have a different idea of which product to go for. All I can advise is that you take on board the information that we’ve gleaned from experience and add it to your own research to get a definitive answer.
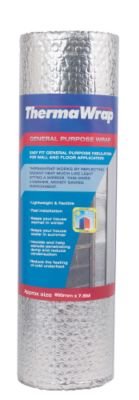
1. ThermaWrap – General Purpose Insulation

| Pros | Cons |
| Great base layer for your van walls |
Not suitable on its own |
| Reflects heat from the outside of the van |
Doesn’t provide any sound insulation |
| Easy to apply | |
| Great option for twinning with softer materials |
General purpose insulation — like the ThermaWrap — might seem like a strange option to start with on our campervan insulation list, but for many people it’s a great starting point and can be purchased very cheaply.
For anyone who is new to the world of campervan conversions, general purpose insulation is basically silver foil backed bubblewrap, and can be attached onto the interior panels of your camper with spray adhesive, standard Duct Tape, or aluminium tape if you really want to get fancy.
So what does general purpose insulation do? As well as providing a base layer so that other methods of insulation don’t go straight onto your walls, it helps to reflect heat particles that are trying to permeate through the outer wall of your van and helps to reduce the amount of heat that you create inside your van leaving through the walls into the colder temperatures outside.
Still with us? Good! Having a layer like this is perfect for stopping softer insulating materials from coming into contact with the walls themselves and becoming wet through condensation. While not technically a breathable barrier, it does act as a waterproof barrier.
The downside to general purpose insulation is that it cannot be used as your sole method of insulation. It has to be twinned with another material such as Rock wool or Sheep’s Wool. Don’t worry if you’re panicking as to which one of those would be the best for you, we’ll explain all in the next sections.
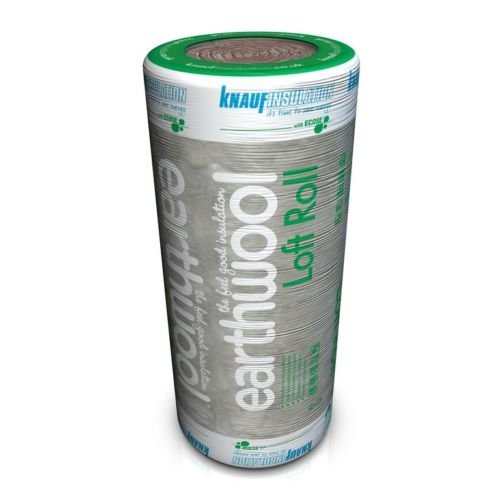
2. Earth Wool
| Pros | Cons |
| Easy to pack into tight spaces | Itchy when handled with bare hands |
| Great insulating material and easy to cut/tear |
Twin with a waterproof layer to avoid condensation |
| Provides sound insulation | |
| Buy in varying sizes | |
| Inexpensive and readily available |
You might be wondering why I have chosen these two insulating methods first? Well, it’s because this is the exact set up that I have in my own camper conversion, and it has served me well while living the van life for the past 21 months.
Earth Wool has many applications, including being used in sound deadening panels in recording studios. If you delve into your attic and have a poke around in your eaves, you’ll probably find it up there too! Earth Wool has been used as loft insulation for many years, and the stuff that I bought from Amazon is the exact same insulation that my mum has in her attic. Her house is always nice and toasty, so I figured it wouldn’t hurt to give it a try!
Earth Wool is super easy to tear up into little strips and stuff down into all of the smaller nooks and crannies inside your van build. Your don’t need to worry about the correlation between the size of your ribcage and your insulation, as you can always tear off more strips or cut more pieces to fit into any gaps. The rolls themselves come in various lengths and widths and can be cut into large sheets, which made insulating our roof incredibly easy.
The downside to Earth Wool is that it’s itchy when it comes in contact with your skin. If you wear gloves and a mask while installing then you won’t have a problem. Some people will also tell you that you might need a waterproof layer for colder and wetter climates, but I have had no issues whatsoever through using my silver foil and rock wool combo.
I regularly check the insulation behind small panels that I purposely made to be removable and it’s all as dry as the day it was put in. I might be writing this now from a small Italian village, but don’t forget that we lived in our van in wet and windy England for 13 months before moving to mainland Europe we’ve had our fair share of terrible weather!
3. Sheep’s Wool

| Pros | Cons |
| Environmentally friendly | Can be a bit smelly |
| Great insulating material and easy to cut/tear |
A more expensive option |
| Provides sound insulation | |
| Easy to pack down into tight spaces |
Have you ever seen a cold sheep? There’s a reason why we wear woollen jumpers to insulate our own bodies, and the same material that makes your grandpa’s long johns can also be used to keep the inside of your travelling tiny house nice and toasty too.
Sheep’s wool is by far the most environmentally friendly option on our Best Campervan Insulation list, and if you know a friendly farmer, then you could probably cut out the middle man and shear to order!
Sheep’s wool is thick and, when combined with general purpose insulation, provides a great means of keeping the interior of your camper warm while the silver foil prevents any heat particles that manage to escape through the fibres from disappearing out into the cold. It’s readily available anywhere where there are sheep, which luckily for you is most of the world.
The downside to our eco-friendly edition on the Best Campervan Insulation list, is that sheep’s wool can be a little bit oily and, as a result, can smell a little bit. This smell will fade with time, but it might be a little bit unpleasant when installing for the first time. It’s also a more expensive option than Earth Wool for a product that basically does the same thing.
It’s a great option if you’re one of our top
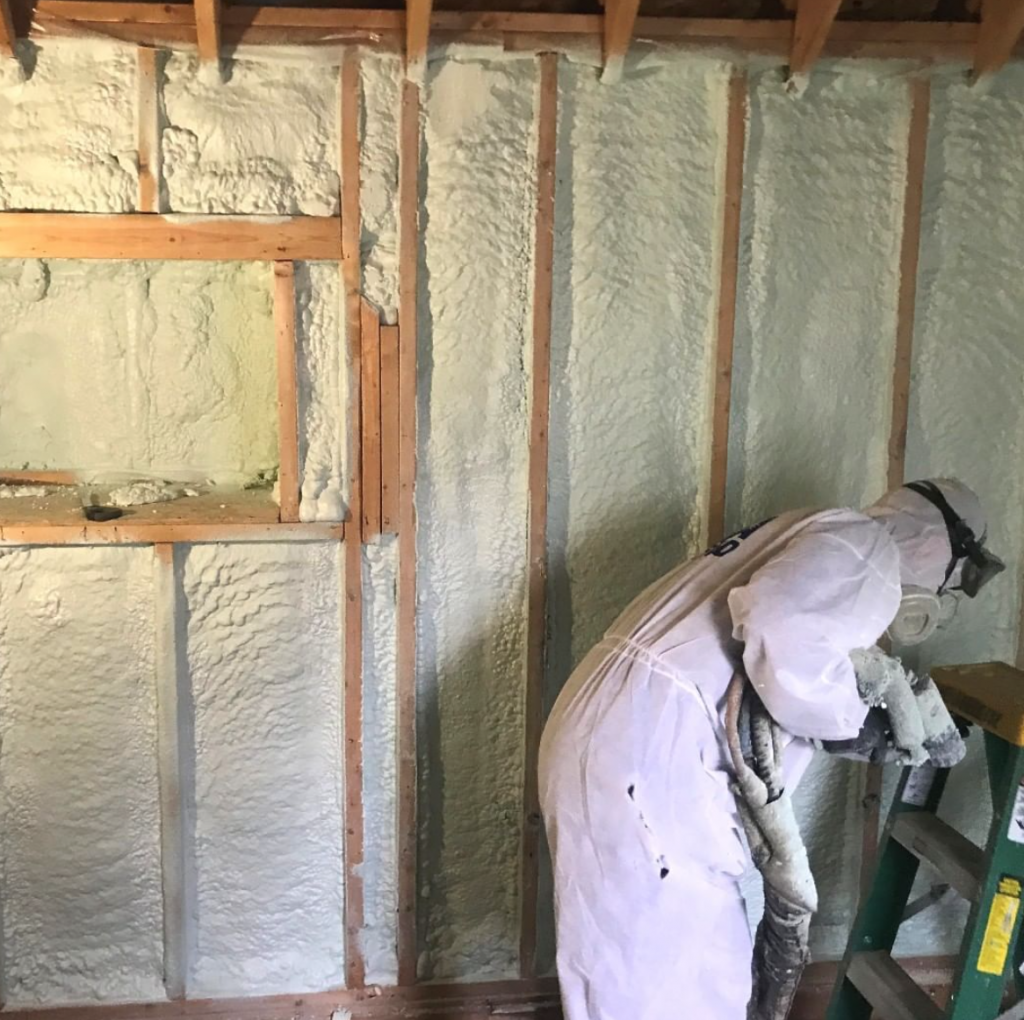
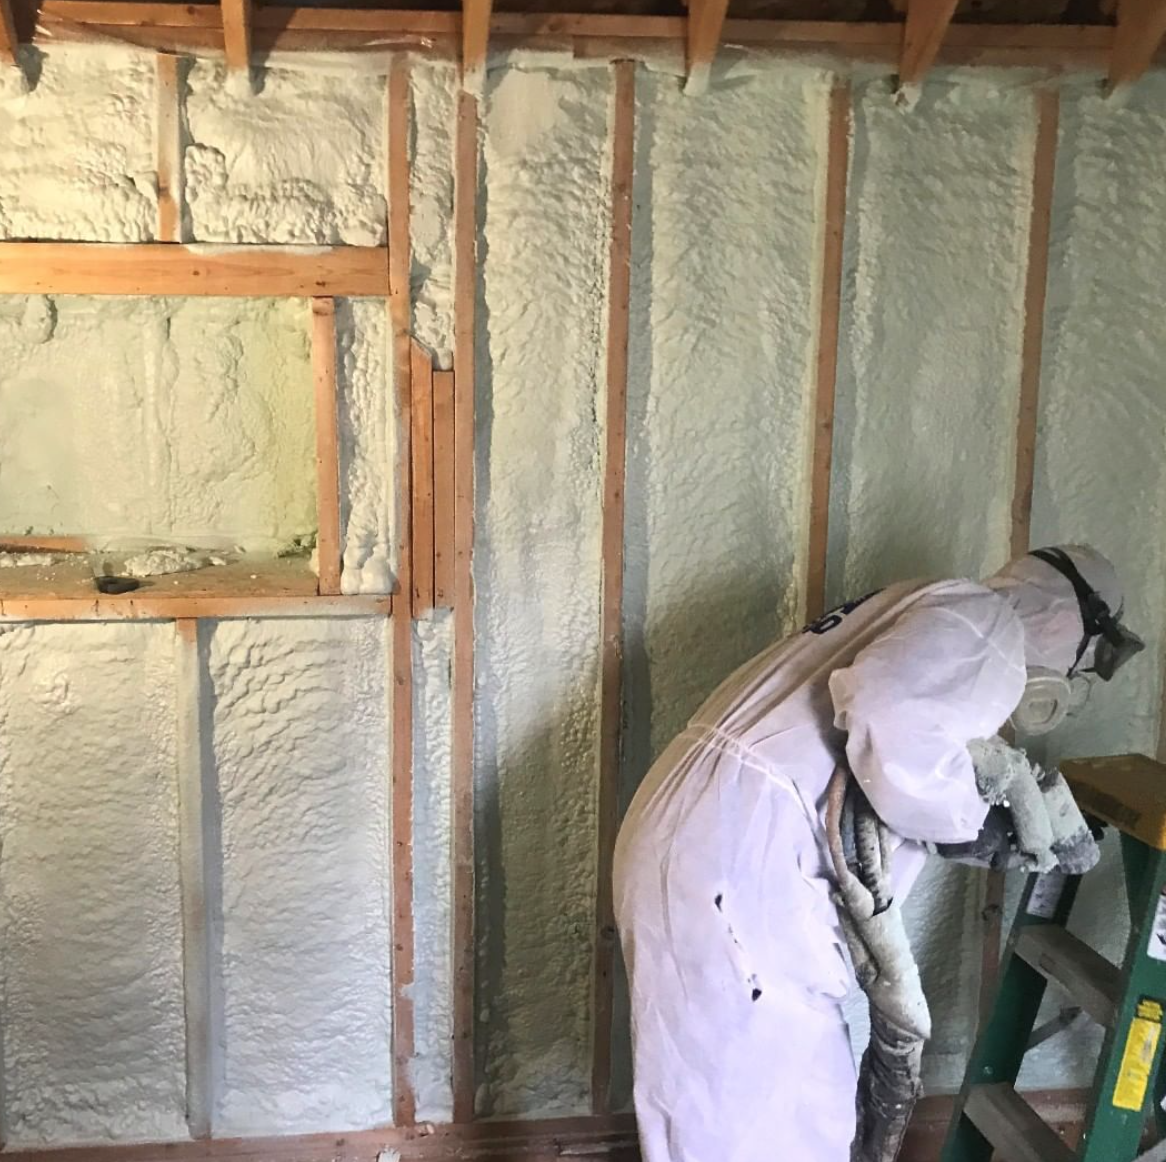
4. Spray Foam Insulation
| Pros | Cons |
| Cover all walls quickly and easily | Expensive insulation option |
| No need to cut or tear; sprays on and expands to fit into gaps |
Can be messy to both install and clean up |
| Provides sound insulation | Highly flammable |
| Great solution for bigger builds |
Spray foam insulation is by far the coolest option on our list and the one that provides the most fun while installing. This quick
It might seem like a crazy idea to bring a stranger into your ‘soon to be’ house and let them go crazy with a foam gun like it was a university rave, but this method of insulation leaves very little room for hot air particles to escape through. The end result provides you with a cosy camper that can be used all year round.
Because spray foam is quite dense, it also acts as a great sound insulator too. It won’t be anything like the expensive noise cancelling headphones that you use to listen to your favourite podcasts or Celine Dion’s greatest hits (we know all of your guilty pleasures), but it will certainly help to give you a better nights sleep when parking near busy roads.
The downside to this method of insulation is that it can get very messy very quickly, especially if you have a bash at doing it yourself. Expanding foam expands very quickly, and if you’re not careful you could be left with bulbous foam bubbles where you don’t want them to be (like on your face and in your hair!).
It’s best to get a professional in to do the job, but even then the cutting and clean up is left to you
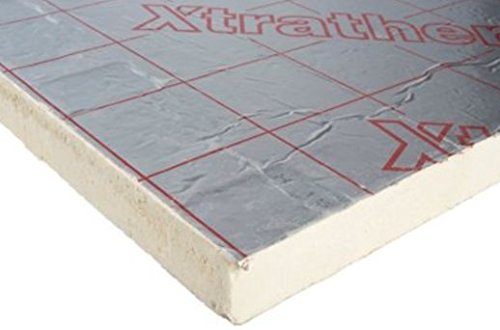
5. Celotex and Kingspan
| Pros | Cons |
| Blocks come in different sizes and can be cut to fit into the gaps between your metal ribcage |
Expensive insulation option |
| Easy and quick to install and tape together |
Highly flammable |
| Use expanding foam to fill in any gaps |
Not environmental friendly |
| Flat surface for putting under floorboards |
Celotex and Kingspan are perhaps the most used materials in our Best Campervan Insulation list, and are the go to choice for many vanlifers who are planning to convert a Sprinter Camper Van into an Off Grid Home.
These easy to cut blocks of insulation are simple to install and already come with a silver foil casing for to make things easier for you. The blocks come in different widths and have a flat surface, so you can easily put them under your floorboards or behind roof panels.
Celotex and Kingspan blocks can be attached to your van using aluminium tape or spray adhesive and the gaps can easily be filled by grabbing a small can of expanding foam from your nearest DIY outlet.
The bad news is that these blocks are definitely not environmentally friendly and would go up like a petrol soaked Guy Fawkes if they got anywhere near a naked flame. If you’re planning on adding wood cladding into the list, then we recommend that you use a fireproof wood spray. That sounds a little weird I know, but it actually modifies the molecules in the wood to make them less susceptible to catching fire.
Celotex and Kingspan are also expensive options to purchase, but for some people, the increased cost will outweigh the faff of having to mess around with cutting and tearing softer materials such as Earth Wool and sheep’s wool. There’s also the problem of finding out that you have the wrong sized blocks once you’ve assembled your wooden rib cage, and discovering a gap between the insulation and your wall caldding.
With Earth Wool, you can firmly tamp down your insulation to leave no gaps as you assemble your walls, whereas if you found this problem after using
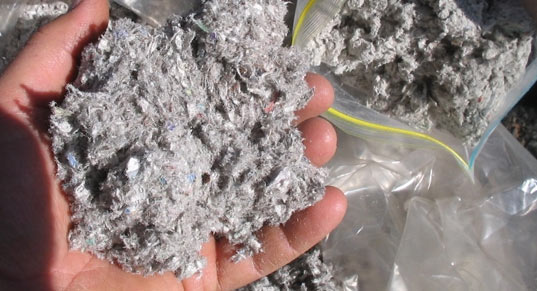
6. Recyclable Materials
| Pros | Cons |
| Completely environmentally friendly |
Harder to come by |
| Re-use materials rather than buying new |
Harder to install |
| A cheaper option |
The last option we propose is another firm favourite for anyone who is wanting to create eco campervans. ‘Recyclable materials’ doesn’t quite mean sticking old jumpers and used plastic bottles down behind your walls, but it is a great way to make use of old materials that would otherwise go to waste.
Items such as newspapers and old books are shredded and then sprayed behind your walls in a kind of mulch, which hardens to form a super environmentally friendly form of insulation. You could even offer up some of your favourite books to be used in your insulation, adding a bit of culture into your build! Denim and Nanogel can also be used too!
This option is by far the hardest to
If your carbon footprint keeps you awake at night (as it should!), then this would be one of the better options for you to go down. Is it worth the wait; only you can answer that question. Do a little bit of digging into companies that carry out this service near you and weigh up all of your options.
More Content From The Van Clan Team
- The EarthCruiser is one serious adventure mobile!
- Do Off Road Trucks make the best campers?
- Find out how to rent an RV with Outdoorsy.
- Keep in touch on Facebook, Twitter, and I
n stagram!


The other issue with some of the fibre types is that over time they will sag and leave voids at the top. Some also are less effect if compacted too tight but I can’t remember which ones they are.